Wooden housing is gaining momentum, which is not surprising, because living in an environmentally friendly facility in the age of the stone jungle is much healthier. Independent device of the house of your dreams is quite possible, provided that the owner of the suburban area has the skills of carpentry. Below are descriptions of important processes preceding such work, the answer to the question of how to make a log house with your own hands, as well as recommendations for its operation after installation.
")
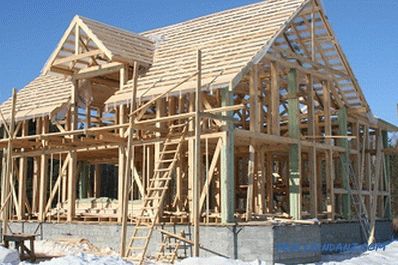
Scheme for assembling a house from a bar.
Site preparation
What is it? The site must be cleared of any type of vegetation. Moreover, after the uprooting of all the bushes, it is necessary to pour chemicals on the ground, so that the roots do not stretch again. If you do not, then you can wait for the appearance of trees in the log house. Perhaps, from the point of view of design, it will look stylish and unusual, but broken floor boards and constant dampness are unlikely to suit the owners.
")
Scheme of preparation of logs for building a log house.
The fenced site is enclosed, thereby preventing other vehicles from moving and marking the boundaries of the construction site. It is necessary to ensure the arrival of special equipment, if one is used, and conduct electricity to the site with water. Thus, the area can be considered ready for the next stage - the foundation.
It would be nice to equip a place for storing wood. This is usually a canopy that protects the material from natural activities. In addition, it will need to cover the film, if the construction is delayed.
Construction of the foundation
")
Scheme of the foundation for a house of timber.
When choosing a foundation for a log house, you should proceed from its dimensions and terrain conditions:
- Belt. Suitable for any type of building. Well behaves on problem soils. You can be sure that the log house over time will not "go." Minus - requires a large amount of concrete, which can not reduce the cost of construction, even if you make a log house yourself.
- Pile. Suitable for light one-story buildings. Perfectly behaves on heaving and rocky soils, reduces construction costs, but you can forget about floor warming: the walking wind, scattering snowdrifts under the frame, is a common thing. It is erected in warm areas.
- Columnar. First of all, designed for raw land. It is too capricious: after shrinkage, the level will necessarily move, therefore its construction should be left to the experts. Economical.
- Slab. The most reliable, but expensive. Represents the basis which is completely filled in with concrete. Perfectly shows itself on a problem ground: does not lead, does not allow dampness or heaving. Laborious.
Below is a description of the installation for strip foundations as the best in the price-performance ratio.
")
Tools for making a log house.
For work you will need:
- shovel;
- level;
- measuring devices;
- formwork - shields , boards;
- gravel, sand;
- reinforcement;
- insulation;
- concrete pouring.
The process begins with markup. Each log wall should be firmly placed on the foundation. With that condition, the outline is outlined. It is very convenient to use wooden stakes and austere threads.
Then ditches are dug along the outlined lines. The soil should be immediately stored separately, it may still be needed. The depth, depending on the frostiness, can not be less than 70 cm.
Next, the ditches should be allowed to dry and put gravel and sand on the bottom. Each layer is carefully compacted and watered. In total, the thickness of the pillow should be 30 cm.
")
The corner joints of the log box.
After that, the future foundation needs to be warmed. For this is used styrene. Plates are placed on the sides of the ditch and secured with pins, piercing and thus fixing them along the walls. If you neglect the insulation, then later it will affect the quality of operation.
The installation of reinforcement begins. She certainly need for rigidity. To do this, the steel rods shift the intersection and boil in the nodes and on the corners of the future log house.
Expose the formwork to the edge of the basement. Shields or boards strengthened in accordance with the level so that the future foundation is even.
Make a concrete fill. To save money, they put rubble into the ditch: construction waste: rubble, bricks, stones and so on. Fill are slowly, until complete shrinkage, each time pouring water until a milky-colored foam appears on the surface. This is done so that the surface of the foundation does not crack. Then he should be given time for complete solidification - 2-3 weeks.
")
Installation of the crown of the log box.
After the formwork has been removed, immediate construction cannot be started.Shrinkage of the base occurs during the year. During this time there is an opportunity to review all the nuances of the material.
Thus, the construction of the foundation can be considered complete. If the owners in the future want to have any attachments, then you need to think about this even when planning the site. Best of all, when a common log house will be made on one basis.
Direct selection of material
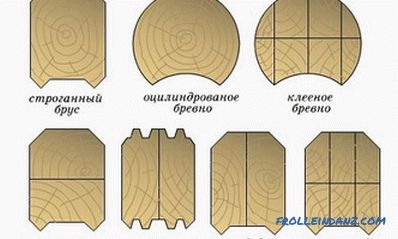
Probably, even before going to the offices, the owners had already decided on the choice of wood for their future offspring. Proceeding from financial possibilities, the material in the wooden house corresponds to them. An array is considered more expensive, but with it you can be sure that the house will be warm and durable. In addition, due to the beauty of a wild or rounded log, there is no need to decorate it. No less beautiful will be the profiled or glued laminated timber. In this case, construction with such materials will be easier because of the correct geometric shape of the material.
")
Types of logs that are used for log cabins.
The problem of how to make a log house correctly is the cutting of corners. Without the appropriate skill, you can get at least the material consumption. The greater evil is the wind-blown house. Types of logging are many. The most popular were "in the paw" and "in the bowl." In the first case, the material consumption decreases, but the corners become cold bridges. In the second, skill is required, but a house with such a cabin is reliable.
It also makes sense to choose coniferous or hardwood. Plus conifers is the presence of phytoncides, which serve as a tree protection from mold, fungus and bark beetles. The disadvantage of coniferous trees is that, due to the tariness, they are not recommended to build baths. Resin flows and is a threat to people with high blood pressure, as it clogs all ventilation. The choice should be optimal for the price, decent quality and durability.
Assembly of the log house: recommendations
The laying of the first crown begins - the main element in the whole log house. To make it of high quality, it is recommended to choose a larch for such a business. This tree has established itself as an excellent, non-interacting with moisture material. An example of this is the piles in Venice, which have been standing in the water for many hundreds of years. They were made of Russian larch, by the way.
")
Scheme for assembling a log frame from a carriage.
So, layers of roofing material are laid on the foundation, or it is mocked with bitumen mastic. Then put timber or log with grooves already cut. Naturally, strictly on the level. You also can not forget to stock up mezhventsovym insulation. It can be moss, jute or tow. Although the last builders refuse. Lags for the subfloor are immediately installed (for the convenience of the entire installation process).
The following rims do not differ from the first one. The only difference is that the initial log or timber must be somewhat wider than the others. Work is carried out according to the plan or project, accurately combining drawings with realities. That is, window openings or door should be in place immediately, and not later. Wooden pins are usually used as fasteners. The use of metal is undesirable, since the appearance of corrosion will lead to the destruction of wood. Work is carried out to the desired height, shifting the rims of insulation. The last two rows in the wooden house do not fix anything. After shrinking, they must be removed in order to properly mount and strengthen the truss system. Thus, you can build a log cabin yourself. This is not the most difficult, but responsible work.
Konopatka and some nuances of construction
Construction, of course, is not finished.
A log house needs at least a year for final shrinkage.
")
Caulking of the house from a bar.
At the end of the laying of the crowns, you can hold a preliminary caulker, but you should not get too carried away. Inexperience can be overdone, and then the house will turn out curves, with protruding elements. However, without preliminary caulking iron you can not see the construction flaws afterwards.
What is a caulker? This seal mezhventsovyh gaps suitable material. For this purpose, use moss, tow, jute, lnovatin and rope. The worst is considered tow. After the time, it will turn into dust. In addition, the birds love her very much and poke her before the owners start using the house. When buying a jute, you need to be careful and not buy jute felt instead. No matter how the seller assures that his properties are the same as in the above material, it is worth knowing that felt is a favorite treat of moths. For beautiful round logs, you can use a rope so that the aesthetic appearance of the log house is complete.
A blade is carried out with special tools: a shovel, a mallet and a dobor. The essence of the process is to plug all the gaps and gaps between the logs, even if they are not visible at first glance.
There are two methods: per set, and stretching. The first is good for thread seals. A thread is twisted from the material and pushed through the slits by a set of loops. The second one is faster and more qualitative: the material spreads along the entire length of the log, and one edge tightly tucks into the gap. The second is rolled up and sent there. It is worth knowing that the caulker is held from the bottom up and from two sides of the log house. After another 3-5 years, the process must be repeated.
After the caulking iron, you can erect a roof and proceed to the internal insulation and finishing.
The described process of how to independently make a quality log house is simple only on paper. Wood construction has a lot of nuances. Comply with them can be subject to a responsible approach to the matter and the study of supporting information. Only then will the operation of the house with its own hand fully delight the owners and make them proud of themselves.
Search
Related Articles
Rococo style in the interior - the rules of design and photo ideas embodiment

The Rococo style in the interior appeared in the middle of the 18th century as a natural continuation of the development of the Baroque style. In the Rococo style, interiors of the palace premises w...
construction, instruction (photo and video)
The frame house was designed more than 100 years ago in America and was first used as a quick and mass housing for workers. It is noteworthy that these villages are preserved today. This is a conve...
DIY cross-linked polyethylene pipe installation

Recently, communications made of cross-linked polyethylene have gained immense popularity, since this material is relatively inexpensive and has a number of significant advantages: an optimal combin...
Wooden chair do it yourself: a sequence of works
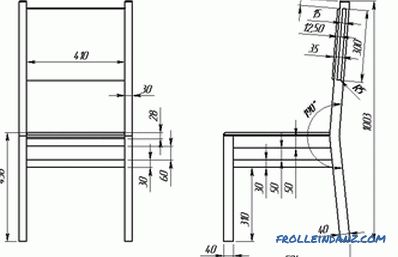
A chair is an essential attribute of the life of a modern person. These pieces of furniture have differences in size, configuration, materials and other features. A wooden chair with its own hands...
Technology build a house of timber: practical recommendations
For the construction of a residential house, the most commonly considered options are wooden construction. Widespread timber. Its use allows you to facilitate the process of construction of the log...