Plywood is often used to make floors in residential and office premises. Laying plywood on logs for the manufacture of subfloor is a fairly reliable method of installation. With this method of laying more clearly manifest the advantages of plywood.

Laying plywood on wooden logs.
Laying plywood on logs allows the subsequent manufacture of the top layer of the floor of almost any kind. This technology is applicable both in the construction of a new house, and in the repair of the room. The method is very simple and can be done by hand.
Basic materials

Plywood specifications.
The main materials are wooden logs and plywood. Usually, a well-dried wooden bar is used for logs. Recommended bar dimensions in cross section:
- width -70 mm;
- height - 40 or 50 mm.
It is advisable to use a timber with a length of at least 2 m. The timber should not have deformations along its entire length. The timber must be kept at room temperature for at least 10 days before use, after which it is necessary to check the absence of deformation due to drying.
Plywood is applied in the form of sheets. Standard sizes:
- 1525х1525 mm;
- 1220х2440 mm.
Sheet thickness must be at least 12 mm. When a two-layer coating can be used plywood sheet thickness of 9 mm. Sheets should be smooth, without damage. Residual deformation of sheets in any plane is not allowed.
Usually for the subfloor, cheap NS-grade plywood (unpolished) is used for the subfloor, and Sh1-grade (polished on one side) for the parquet floors. The use of these brands of plywood is limited to a moisture content of not more than 60%. Where the humidity is high or there is a high probability of flooding the floor, it is recommended to use moisture resistant plywood of the “FK” brand.
Step by step instructions: preparing the floor

The necessary clearances when laying plywood on logs.
Works begin with cleaning the floor from dirt, dust, household and construction debris, remnants of previous coatings. To exclude moisture from the wooden elements, a layer of roofing material (roofing paper) or polyethylene film is laid on the floor surface. The film is applied over the entire surface with an overlap of 15-20 cm. The places where the film is joined are held together with construction tape. If the thickness of the film is small, you can produce flooring in 2-3 layers. This flooring serves as a waterproofing.
Before installation, the lag level checks the horizontal position of the floor. The marking of installation sites of the timber is carried out and parallel lines of the middle of future lags are drawn. Usually cant be installed on the lining. For them are used plates from pieces of the board or plywood. The recommended size of each such lining: width - 100 mm, length - 200-250 mm, thickness - not less than 25 mm. Wooden lining with anchors attached to the floor on top of waterproofing on the marked installation line lag. The level is controlled so that the height of the floor on the lining is the same over the entire surface. If necessary, adjust the height of the added pieces of ruberoid or linoleum.
To eliminate the formation of mold in the future, all wooden parts and logs are treated with an antiseptic. For the convenience of mounting the floor sometimes used beacons. As beacons, you can use screws (screws), which are the height of the cap correspond to the height of the installation lag. Such beacons, which are screwed evenly over the floor surface, during installation of the beam will help to control their height and their pressing force or the need for additional installation.
Mounting lag on the surface

Lag mounting scheme.
The laying of the beam is made according to the markings on the fixed pads. The lags are mounted parallel to the wall with windows, i.e., across the direction of sunlight entering the room. The first lag is set at a distance of 30-40 mm from the wall, and all subsequent ones - 40-50 cm apart.
When specifying the distance between the lags, it must be remembered that the gap between the last bar and the back wall should also be no more than 40 mm. The distance between the lags should be the same. Lags should be fixed parallel to each other strictly at the same height (along the surface). All logs are selected in the same section size, except for the lag located at the entrance door. This bar is advisable to install from a wider bar (at least 50 mm).
Lag screws are attached to wooden linings, pre-exposed and secured with anchors on the markup. The caps of the screws should not protrude outwards (it is advisable to deepen them into the lag by 2-3 mm). The height of the lag must be strictly the same, so the installation is a constant control of the height of the beacons (if installed) or using a level. To increase the height under the lag of enclosed ruberoid laying the desired thickness.
The beacon allows you to determine the force with which the screw is screwed in, so the lag height is adjusted.
For hardening the lag is usually carried out the installation of transverse bars (beams). Such bars are fastened across the beam in the places of installation of wooden linings and fastened to them with screws.
For reliability after mounting the log, all wooden elements are coated with parquet or other similar glue. It is advisable to fill the volume between the lags with insulation and sound insulator. For this purpose, mineral wool, expanded clay or polystyrene foam (polystyrene) are commonly used. All communications are carried out before backfilling (if necessary). It is also recommended to put a layer of parchment or bituminous paper on top of the lag.
Sometimes installation of a bar is made without use of wooden linings. In this case, the alignment of the lag is carried out by placing pieces of roofing material. Fastening lag to the floor is carried out by anchors. The length of the anchor is chosen 5-6 cm more than the thickness of the bar.
The process of laying plywood

Methods for laying plywood on the floor.
For the convenience of laying plywood over logs, it is desirable to cut a large sheet into squares or rectangles with a size convenient for high-quality work. The main requirement is that the size should be chosen taking into account that the edge of the sheet during fastening should be located in the middle of the beam. It is recommended after cutting the plywood to hold its full display on the floor. Sheets should be fastened in a razbezbeku, i.e. at one point it is undesirable to dock more than two corners of sheets.
On the sheets of plywood the points of their attachment to the lags are determined and marking is carried out. In marked places, it is advisable to drill a hole under the screw and drill out (countersink) the hole with a diameter equal to the diameter of the screw head. When attaching plywood, this will allow you to drown the cap. The distance between the holes for the screw is selected in the range of 20-30 cm, but taking into account that the number of fasteners on one sheet should be at least 8. and bolts (if provided). Screws are selected in length, three times the thickness of plywood. Sheet joints should be placed in the middle of the lag. The gap between the sheets is left within 2-3 mm. After laying the entire layer, the gap is sealed with mastic with a spatula.
Plywood is usually laid in two layers.
When overlaying the second layer, the matching of the seams in the layers should be avoided.
The total thickness of the plywood in both layers is selected in the range of 24-25 mm. In each layer, the thickness of the plywood sheets must be the same, but it may differ in different layers. In the second layer, thinner sheets can be laid.
Tools and materials

Plywood grades.
When laying plywood, the following tools are needed:
- electric drill;
- Bulgarian;
- electric screwdriver;
- electric jigsaw ;
- a hacksaw or saw on a tree;
- a hammer;
- a tape measure;
- a meter ruler.
Consumables:
- nails - 50, 70 mm;
- screws (self-tapping screws) - 35, 50, 75 mm;
- anchor bolts with a diameter of 10 mm;
- roofing material or polyethylene film;
- construction adhesive tape;
- elastic mastic;
- parquet glue;
- antiseptic;
- parchment or bituminous paper.
Plywood over logs is a fairly long and laborious process, but it allows you to make a reliable floor that will last for many years. Happy repair!
Didn't find the answer in the article? More information on the topic:
-

Decorating the walls of the house with a tree outside
Decorating the house with a tree outside with your own hands. The main advantages and disadvantages of using wood for building cladding. Decorating the house with wood panels and block house.
Search
Related Articles
Ecowool Insulation - technical characteristics and parameters + Video
Insulating materials today release so much that my eyes run. Some of them serve for a long time, others - not very. They differ from each other both in technical parameters and in structure. Common...
What is better chainsaw or electric saw

Among woodworking tools, chainsaws are among the most common. This is determined by their performance, compactness, relatively low cost of consumable parts. Practically, only an endless toothed chai...
Do-it-yourself board table - preparatory work, drawings (photo and video)
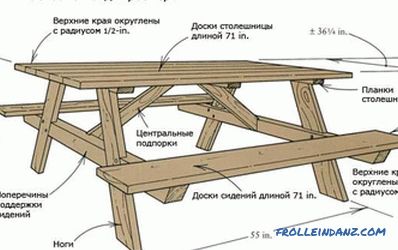
The board table can be made with your own hands. To do this, prepare a drawing and determine the size of the furniture. If a simple table is made, then its length (cm) should be equal to 120, heigh...
How to lay a vapor barrier on the floor, walls, ceiling + photos, schemes
The circulation of air flows in each room. In order that in the room there was no excessive humidity and stuffiness, vapor barrier is necessary. In this article we will describe how to lay the vapor...
Bar stool do-it-yourself manufacturing features (+ photos, + drawings)
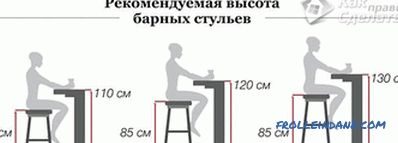
Modern apartment owners increasingly prefer free movement in the kitchen, the possibility of which is achieved through redevelopment. So, many seek to improve the interior and at the same time make...