The circulation of air flows in each room. In order that in the room there was no excessive humidity and stuffiness, vapor barrier is necessary. In this article we will describe how to lay the vapor barrier on the floor, walls, ceiling, consider which side to lay the vapor barrier to the heater, and also give photos and video instructions.
For which rooms
 Rooms requiring a vapor barrier
During the cold season the indoor temperature is much higher than outside, respectively, and the humidity there is much more accumulated vapors trying to escape from the house. Even in the presence of high-quality thermal insulation requires protection from moisture in the form of vapor barrier material. Its function is to prevent the penetration of moisture into the structure through existing slots, gaps and holes. The waterproofing material protects the insulation from the interaction with moisture from the outside of the house, and the steam insulator - from the inside.
Vaporous insulation materials are subdivided, depending on vapor permeability, into limited and complete.
 Where a vapor barrier is necessary
Steam insulation is required:
- in multilayer structures for fencing;
- in the presence of a pitched or flat roof, for insulation of which bulk or fibrous materials were used;
- in rooms with high humidity;
- in structures warmed from the inside;
- in seasonal buildings.
 Foil vapor barrier
Steam insulation is used not only in the construction of residential buildings and other structures , but also in addition to materials that absorb moisture, as well as to isolate communication lines.
In order for the procedure to have the expected result, the vapor permeability of the multilayer structure must increase from a warm surface to a cold one. For this reason, the steam insulator is mounted from inside the roof, walls and floors.
 Wall scheme in a section
The sequence of layers for wall insulation:
- roofing layer;
- diffusion membrane;
- material for insulation;
- steam insulator with overlap taped;
- tight glued paroizolyator to the surface of the walls.
Nuances
 Foil cloth
Construction stores offer a huge selection materials for vapor barrier, and depending on the manufacturer they all have their own characteristics. In the manufacture takes into account ease of installation, humidity and climatic conditions of operation, the functional purpose of the room. Today, many manufacturers produce material that prevents fire, steam penetration, contributes to the withdrawal of excess moisture.
In our country, for a long time, polyethylene film was produced as an insulator from steam, however, a high level of competition and the requirements for the material prompted Russian manufacturers to develop special building insulators. Today we can safely list several manufacturing companies that produce vapor barrier material based on foiled polyethylene, metal-coated films and vapor-insulators with laminated film, which not only successfully cope with the assigned functions, but also are resistant to ignition.
 Steam insulation with plastic wrap
In order to choose the best material you need to consult with a knowledgeable professional in all the subtleties of installation, knowing which side to lay the vapor barrier, what material to choose exactly for your room, and the like. As a rule, newcomers to the construction business rely on cost, manufacturer and field of use when choosing, but this is not enough to perform high-quality insulation.
The list of distinctive features is much more extensive and requires a more responsible and professional approach. As an example, the insulation of the roof, in the implementation of which an important role is played by the planned structure, layers, slope, climatic conditions and temperature inside the room. Already building on this, preference is given to an insulator with high, medium or low vapor permeability.
Video
How to ensure a good vapor barrier of the roof, taking into account the features of all the structural elements:
Features of the installation

Often the installation is done by trained specialists. Based on the opinion of professionals, you can deduce a few rules:
- For effective vapor barrier, you must have supply and exhaust ventilation inside the building.
- Fencing of insulating material from interaction with moisture, both inside and outside.
- Styling of the vapor insulator exclusively from the warm side of the insulation.
- Mandatory fixation of the material at the joints and in places of contact with the surfaces with a special tape and glue.
In any case, the installation must be completely sealed. In case of violation of technology, you will have to redo everything anew, which would entail major financial losses.
For the implementation of high-quality insulation it is necessary to have on hand many special tools, many of which are determined by the characteristics of the material.
On the floor

The vapor barrier is usually placed in a cake that consists of the following layers:
- Draft floor.
- Waterproofing.
- Insulation.
- Vapor barrier.
- Finishing material.
But in some cases, the vapor barrier is placed on both sides of the insulation. Much easier to do the work in the new building. If you are doing repairs, then first of all you will need to completely eliminate the old coating until the subfloor.
Even if you plan to install a floor heating system, it is recommended to lay a vapor barrier and insulation between the pipes of the water floor heating.
 Vapor barrier with an air gap
Consider an example of laying roll material:
- The film must be completely stretched over the floor surface.
- It is recommended to leave between 7 and 15 cm of ventilation gap between the insulation and vapor barrier. If a diffuse membrane is used, such gaps are not needed.
- So in which direction you will lay the material does not really matter.
- But the installation side of the vapor barrier plays an important role. As a rule, company lettering should be on top. If the film does not have an inscription, then the metallized side is laid up, and the rough side on the insulation. If you use a simple plastic film, then there is no difference.
- Regardless of the selected material, the canvas is laid with an overlap of up to 20 cm. Between themselves, they are fastened with tape.
- If the base is wooden, then on top you can additionally fill the slats in 50 cm steps or fix the vapor insulator with a stapler.
Another type of vapor barrier is to use liquid rubber. For its use to prepare the surface of the floor in a special way is not worth it. Rubber is spread over the surface with a roller or spatula manually. The only thing you need is to remove all rubbish from the surface before starting work. In this case, it is best to vacuum the floor.
 Thermal insulation of the floor on the balcony
As a result, the rubber will completely prevent the penetration of moisture under the floor covering. The air in the room will be light; you can forget about the smell of damp and mold forever.
The technology for applying liquid rubber is particularly relevant when working with wooden floors.
On walls

Different materials can be used to vapor barrier walls. So, if rolled material is used, the installation is carried out in a horizontal position. Laying starts from floor to ceiling. In addition, each subsequent strip is mounted overlap. The joint is glued with tape or other special compound. It is important that the connection is completely sealed.
 Vapor barrier of balcony walls
If there are places where the material is adjacent to a stone or concrete surface the film should be glued. It is important to achieve tightness. If you build a wooden frame on the wall, then the film is attached by a stapler to wooden bars.
On the ceiling

As for the ceiling vapor barrier, it is performed with an overlap on the vapor barrier of walls up to 20 cm. The presence of vapor barrier on the ceiling will allow to keep the finishing material long time. As a rule, the vapor barrier can be placed both from the bottom of the ceiling and from above from the attic. In this case, you get the following cake:
- Vapor barrier.
- Thermal insulation.
- Vapor barrier.
To do this work is necessary even with concrete ceilings. When the temperature drops, the accumulated condensate can after some time provoke the appearance of mold and fungus, which is not so easy to deal with.
 Vapor barrier of the ceiling
The installation process begins with the preparatory work:
- The surface is cleared of debris and old finishing material.
- All existing gaps and defects of the base are smeared over.
- The ceiling is primed and dried.
The vapor barrier process looks like this:
- As mentioned above, the steam insulator is overlapped with the wall. It is attached to the ceiling with a stapler.
- It is good if there is a possibility to treat the vapor barrier with reiki.
- The pre-joint is covered with a waterproof tape.
- On the ceiling, it is enough to do an overlap of up to 10 cm.
- There is no need to tension the material too much.But it should not be allowed to sag. Otherwise, condensate will accumulate on the film and polyethylene may break through.
Remember that vapor barrier on the ceiling can not pierce. Therefore, the ideal option is to lay the film on a wooden frame.
Video
In the video you provided, you can clearly see the subtleties of work on vapor barrier:
Photos
In photos You can take a closer look at the individual details of the vapor barrier process:
 Fixing the vapor barrier with a stapler
 Vapor barrier of the bath
 Laying in the attic
 Laying insulation material

 Vapor barrier in the attic floor
 Installation of vapor barrier
 Overlapping
 Fixed vapor barrier
Schemes
The provided diagrams will help you to understand how work is done:
 Styling Technique
 Insulation circuit
 How is the ventilation going
 Roof installation
 Vapor barrier of walls
 Roof vapor barrier
 Layout
Search
Related Articles
What kind of vacuum cleaner to choose for home and apartment + Video
What kind of vacuum cleaner to choose for your home so that it meets all the requirements for cleanliness, is easy to use and has the least impact on households. Vacuum cleaner has long been an inte...
Garden furniture with their own hands from wood, pallets + photos, drawings, diagrams
Even the most modern exterior can become much more comfortable if it has garden furniture. Undoubtedly, the country furniture has differences with the pieces of furniture intended for arranging resi...
Installing doors of the wardrobe closet
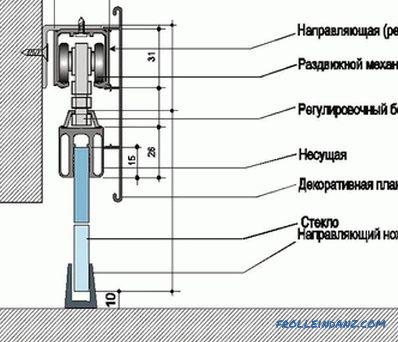
Only having appeared in the market, sliding wardrobes found popularity among the majority of inhabitants of the big and small cities. In the list of furniture sales for the past many years, they con...
Quality toilet bowl rating (2019) and their best manufacturers
A huge number of manufacturers producing toilet bowls of various price and quality segments are on the market. Even more represented by the models themselves from the most simple and compact to comp...
ways, materials (photos and videos)
Sad as it may be, but our favorite things eventually age and lose their former luster and beauty. This also applies to furniture. Over time, the kitchen table loses its attractive appearance....