In some areas where the soil absorbs water poorly for one reason or another, there is a danger of flooding of houses. Excess moisture accumulating in the ground, can significantly harm both buildings and structures, and comfortable stay on the site. To get rid of excess water, a drainage system is created. Thanks to it, moisture from precipitation or melting of snow is taken out of the territory of the site or into a drainage well. About how to create such a system in the country and will be discussed in this article.
When it is necessary to create a drainage
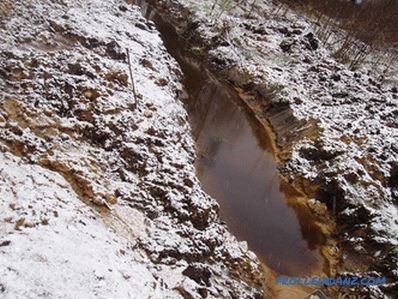 Water in the area
Drainage system at the dacha plot is not always needed. Everything will depend on some factors. First, on the quality (more precisely on some of its physical properties) of the soil. If the soil on the site is sufficiently permeable, then the moisture will disappear and not accumulate at the surface. Secondly, from the proximity of the occurrence of groundwater. This indicator should be at least three meters.
The relief of the terrain, the presence of ditches and barriers to the flow of water can contribute to flooding the site. Smooth areas with small slopes in one direction, flooded extremely rarely. Much depends on the amount of precipitation too. If in your area there are many snowy winters or frequent heavy rains, the drainage system is best done.
In general, experts recommend creating systems for draining water if the plot of land has at least one of the following characteristics:
- clayey or loamy soil;
- groundwater is located on a depth of less than three meters;
- the site is located in a lowland;
- the site is located near a slope or directly on it;
- heavy rains are frequent in your area, or every year there is a lot of snow.
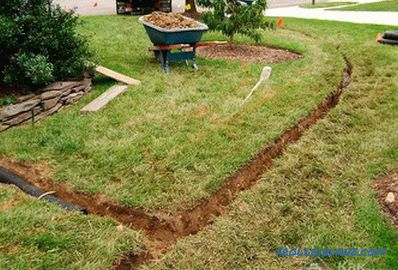 Consider the relief of the area
In these cases, it is better to spend your strength and money to create drainage. Otherwise, you will have to spend a lot of effort to overcome the effects of constant drowning.
Types of drainage systems
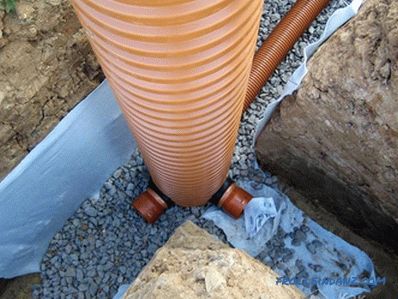 Deep drainage
Before setting up the system , you need to get acquainted with its species. In total there are two types of drainage:
- deep;
- surface.
Depth drainage of a private house is a pipe hidden under the ground. Such a system is more difficult to organize, but it does not take up much space. On dacha plots, each owner tries to efficiently use the entire area. Hidden underground pipes provide such an opportunity.
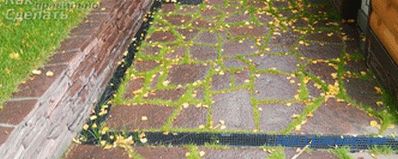 Surface drainage
Surface drainage is less expensive, but for the bliss you will have to allocate free areas. In this case, gutters and storm water inlets are mounted on the site, which are connected to a single network and drain water beyond the site or into the drainage well.
Whatever system you choose, its construction must comply with SNiP 2. 06. 15-85 "Engineering protection of territories from flooding and flooding." This document lists all sanitary, hygienic and construction requirements for the creation of such structures.
Preparatory work
 Drainage scheme of the area
Depth creation is the most difficult task. drainage system, that's about it we'll talk. What needs to be done before starting all the work?
First, a scheme is created. It shows all the places of laying pipes, catchment points, the location of other elements. Do not forget to place the inspection wells, they are necessary to carry out the cleaning of pipes.
When drawing up a chart, it is necessary to study the terrain relief. For this purpose it is convenient to use special tools: a level and a laser range finder. If you do not have such devices or lack the skills and knowledge in geodetic studies, then it is worth to be observant. When it rains, look where the channels are located along which the water flows, so you can understand where the slope is and in which direction it is.
Secondly - stock up with the necessary tools and materials. For earthworks, you will need shovels, a wheelbarrow, perhaps a crowbar or pickaxe. For the system itself, prepare drainage pipes, couplings and fittings for their connection, plastic wells for collecting water and other elements.
 Geotextiles roll
In addition, stock up:
- gravel or rubble;
- sand;
- geotextile.
Work steps
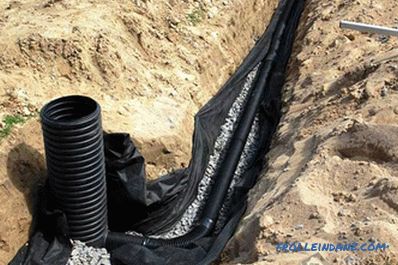 Laying drainage pipes
Creating a drainage system the plot starts with a markup. Transfer the created scheme to the site with the help of pegs and ropes stretched between them. Only after that you can start earthworks.
When digging trench for pipes, do not forget about the slope. It is necessary so that the water does not stagnate, but flows evenly to a certain point. The slope should be in the range of 1.5-2 cm per linear meter of pipe.
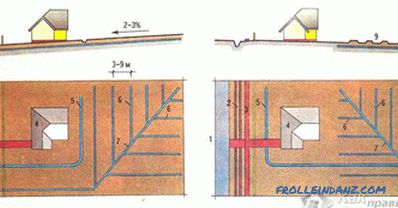 Drainage pattern on a section with a slope
After digging trenches, you can check how correctly bias To do this, pour a bucket of water in the highest part of the trench. The liquid must flow to the lowest point and it should not linger in any place.
Now we "equip" the bottom of the trench. To do this, lay out a kind of cake. The first layer is sand. They fall asleep to a thickness of 7-10 cm and carefully tamped. Then comes a layer of geotextiles. The material unfolds over the entire bottom of the trench, calling on its walls. Now it is the turn of rubble (you can use gravel with fractions of 20-40 mm), its layer should be 20 cm. Here you should listen to one recommendation. You should not use crushed limestone, as this may lead to the appearance of saline.
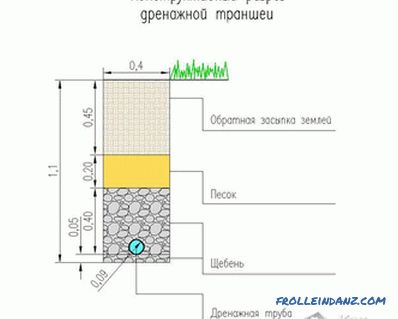 Drainage in the context of the layers
watching the video:
Such a kind of protection will not allow the ground to fall into the pipes, and therefore, will prevent the silting of the holes. The last stage will be to fill the trench, and it is better to fill it not with soil, but with drainage, in the role of gravel, coarse sand and crushed stone, they need to be filled in the indicated order in layers. On top of this "cake" is covered with geotextile and powdered with a small layer of soil. This approach will provide more efficient drainage area.
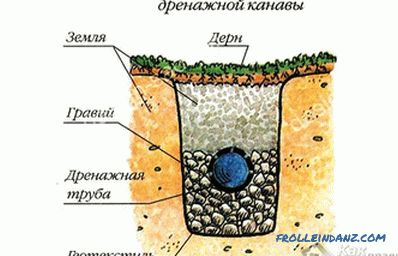 Drainage device
When building a drainage system, it is necessary to ensure that all the pipes converge in one the lowest point on the site. Here a drainage well is created. From it drains can merge into a natural pond or ravine, central sewage system or into a drainage well.
If you decide to make a surface drainage system, you will not have to carry out large earthworks. Such drainage is created in areas with little or rare precipitation.
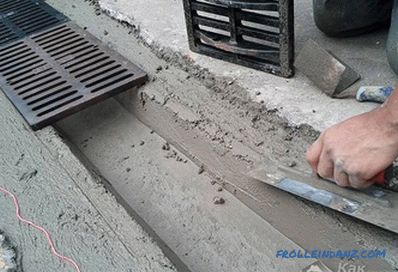 Installation of surface drainage
At the first stage, a system diagram is created. Also determined by the natural slopes and places of accumulation of water. Then dig a shallow trench. Its depth will depend on the trays used. They can be purchased (they can be made of both concrete and plastic) or make them yourself (lay out the formwork and pour concrete). When carrying out earthworks do not forget about the slope.
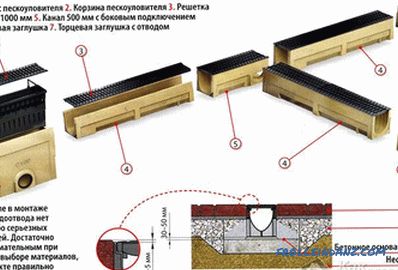 Layout mounting scheme
A layer of sand is poured at the bottom of the trench and compacted. Then the tray and the sand trap are put in (if such is provided), the grate (it will protect from leaves and other large debris). All trays are displayed at the lowest point of the area where the collector well is created.
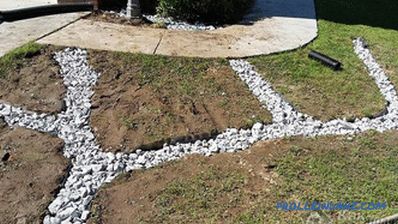 Filling drainage
The surface system can be filled up. In this case, gravel or rubble is poured into the tray (or directly into the trench). In this case, the installation of the lattice and the sand trap is not required. Filling surface drainage has a less aesthetic appearance, but its creation will be cheaper.
Video
Of course, you need to know some information about drainage pipes, how to choose them correctly:

