At the final stage of finishing work, special importance is attached to such a procedure as alignment of the walls under the decorative plaster. This is explained by the fact that the well-known advantages of this unique coating are able to manifest themselves only when the surfaces of the walls are perfectly prepared for decoration.
At once we will make a reservation that the known methods of preparatory work do not differ significantly from similar activities carried out before painting or pasting walls with wallpaper. In addition, when implementing them, it is not at all necessary to achieve a completely flat wall surface, because, due to its plasticity, the applied material perfectly hides all the irregularities on it.
Preparatory work steps
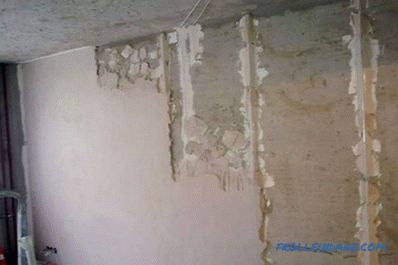
 Sanding the walls after puttying
It should be understood that putting plaster is made only at the final stage of finishing works, when all window and door openings are already installed in their places, and the floor covering chosen by you is completely laid. Surface preparation in this case is performed according to the following scheme:
- first of all, it is necessary to remove the remains of paint, wallpaper and old putty from the surface to be finished;
- then the walls should be treated with a special primer ensuring achievement of a reducing (firming) effect;
- in rooms with high humidity, in addition to priming, the walls must be treated with antifungal action;
- the cracks on the walls will need to be embroidered and filled with a special repair compound. In the event that the cracks are very deep and wide - filling them with a special composition is done in several steps;
- after the walls are fully primed, you can proceed to applying a base layer of putty to them, ensuring the final leveling of the surface and which is the basis for the subsequent finishing of its decorative plaster.
 Sealing of cracks and leveling
In a situation where you are planning to apply a thick layer of plaster with a pronounced structure, putty the surface of the wall is not necessary. But with a relatively thin layer of coating, preparation of a perfectly flat surface should be mandatory. Otherwise, all the irregularities of the base can not be hidden under a layer of decor, and the consumption of the material used will increase markedly.
After completing all the filler operations, you can proceed to sanding the surface of the walls using fine-grained emery paper.
Specialists' advice
 Surface treatment for plaster
Surface treatment is subject to a number of factors:
- each of the applied layers of putty requires thorough drying (at least 2 days);
- in order to avoid the appearance of cracks, experts recommend using "serpyanka" (so called special self-adhesive mesh);
- after the final drying of the filler, it is desirable to treat the surface of the walls with an acrylic primer of deep penetration capable of ensuring good adhesion to decks proliferative coating
- hardening of the primer layer in order to protect it from peeling can be made through the use of special impregnation. In this case, your chosen filler composition used in the preparation of the walls should have good absorbent properties (for example, the use of materials on an oil-adhesive or alabaster basis is not allowed).
The primer should be applied according to the following recommendations:
- the thickness of the primer should be about 2 centimeters; with a smaller thickness, it will be difficult for you to get a high-quality and uniform decorative coating; for this procedure a piece of wet sponge is used).
A surface treated in this way will be completely ready for applying a layer of decorative plaster on it.
Test plastering

Special attention should be paid to the smooth transitions between the smooth and texture strips of the coating.
Video
Search
Related Articles
DIY installation of metal pipes

Metal-plastic pipes, hitting the construction market, gradually crowd out all others. A number of advantages of these products allows using them equally for both cold and hot water supply. The insta...
Greenhouse of glass with their own hands: how to do
Want to have on your table natural fresh and fragrant vegetables, the amount of pesticides and herbicides that would not exceed the norm, and even all year round? Then you just need to build a green...
How to install a toilet with their own hands

Installing the toilet yourself is not very difficult, if you look into some of the details of how the system functions. Before you put the new unit, the master will have to do the work of dismantlin...
Electric screwdriver: how to choose the right one?

A screwdriver is an indispensable tool for any experienced craftsman. Therefore, his choice must be approached very carefully. In today's market there are many different types of electric screwdriv...
What to do first wallpaper or suspended ceiling
When repairing it is necessary to observe the sequence of finishing, in order not to dirty and not spoil the ceiling during wall decoration, for example. That is why questions arise, similar to what...