The material from which the flooring is made plays an important role in creating the overall interior of the room. When finishing their own homes, most people prefer natural, environmentally friendly materials. That is why the wooden floor in a private house is unlikely to ever lose its relevance. Regardless of which type you choose - the most prestigious or economy class, wood covering will help to make your room cozy, and its design - unique.
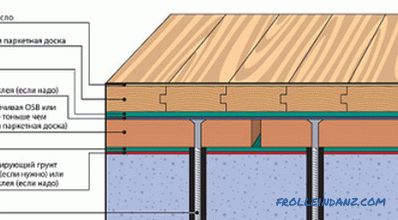
Wooden floor plan.
Types of flooring, auxiliary materials and tools
Depending on the material possibilities, wooden flooring can be made of such materials: solid plank, parquet board, glue parquet board, parquet. The coating of parquet strips was once considered the richest and most refined. It could be found in landowner houses and palaces, in public buildings, theaters and museums. Using planks of different wood species, craftsmen created unique paintings on the floor.
Parquet boards are made of solid wood, their length is from 0.5 to 2 m, and thickness - up to 25 mm. High-quality docking is ensured by the presence of several special grooves in each of them. From the glue floorboard of the same size in a private house you can make a luxurious coating. Under high pressure, it is glued together in at least three parts. The top layer of valuable wood is very strong and durable. Its thickness is about 5 mm.

Tools for laying wooden floor: planer, saw, chisel, hammer, pliers, screwdrivers.
A massive board is solid, resistant to wear, however, it will be quite expensive. But if the wooden house is made of solid logs, it is desirable that the floors correspond to it. They provide good heat and sound insulation, besides the board does not need additional processing. After laying it is enough to paint or cover with several layers of varnish. Products from moisture-resistant wood species - oak, larch, teak, walnut - some prefer to use without dyeing. The material has the following dimensions: from 600 to 3000 mm in length, from 60 to 200 mm in width, the thickness of products is 20-22 mm.
Installation of the coating in a private house is not particularly difficult, it can be done with your own hands. To do this, you need to stock up the following materials:
- one of the types of flooring;
- waterproofing material (roofing material);
- wooden logs (length from 2 m, width 80 -100 mm, thickness 20-30 mm;
- insulation (mineral wool, glass wool or expanded clay);
- moisture resistant plywood;
- boards for 50 mm thick floor;
- antiseptic;
- self-tapping screws, construction brackets;
- construction level;
- hammers - rubber and ordinary;
- plane;
- saw (best of all - circular);
- sanding machine, sandpaper.
Preparation for work and final finishing
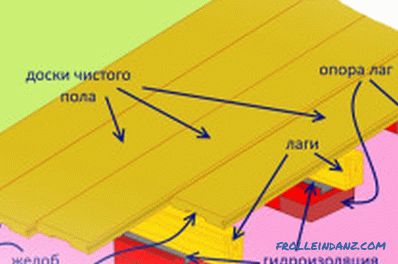
Wood floor plan on logs.
In order to ensure good sound insulation, it is advisable to make the floor double-layered. For this purpose, a waterproofing layer is laid on the base, over which lags are laid. They can be laid both on the concrete base of the building and on the floor between floors. Concrete screed under waterproofing film should be covered with a layer of bitumen mastic. The distance between the lags is 40-45 cm. Fixing is done with screws in increments of at least 50 cm. The heads of the screws must be slightly recessed into the wood. To finish the house was smooth, logs should be set to the level, adjusting their horizontal position with lining of wood.
In the space between the lags, waterproof plywood is placed on which the insulation is laid. Above spread another layer of waterproofing, and better - vapor barrier film. Before you make a floor of expensive material, it is desirable to lay a rough floor of boards across the log, the fastening of which is done with self-tapping screws. Both these boards and logs must first be soaked in an antiseptic and dried. The moisture content of the material should not be higher than 12%.
The finish can also be laid on old wooden floor if it is still in good condition. To do this, the base is ground and cleaned of dust. Then it is covered with a moisture-proof material, after which it is covered with plywood sheets not less than 12 mm thick. Before laying new boards or parquet, the surface is carefully leveled by coarse sanding.
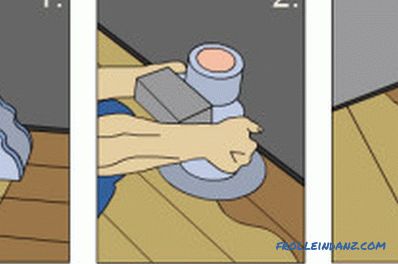
Wood floor sanding pattern.
After the floor has been installed, it should be scraped or ground. Grinding is used more often, because it is less time consuming and does not require special skills. It is made using a grinding machine or manually, in stages.
Each time, the sandpaper grit is reduced, bringing it to the number P150-P200 at the final stage. Then it remains only to rub the wood with a special composition or varnish in 3 layers.
How to assemble a floor from boards
To avoid deformation, the floor of wood should not be heated. Since rooms can differ significantly from each other in size, boards from an array for each of them must be selected separately. Naturally, the smaller the room, the smaller the board should be. Material should be brought into the house in advance. Before installation, it should be there for at least 3 days.
Installation always starts from the wall, making an indent of 1.5-2 cm. This gap will subsequently be hidden under the baseboard. Boards should be perpendicular to the lag. If the room is large, it will have to make a wooden floor of several boards in length. The joints between them must be on the logs. Cut the board from the butt, if it is not neat enough, should be leveled using a circular saw. The first row is laid out along the wall of the house with a spike in its direction, carefully leveled and screwed with self-tapping screws. Their caps will then also hide the baseboard.
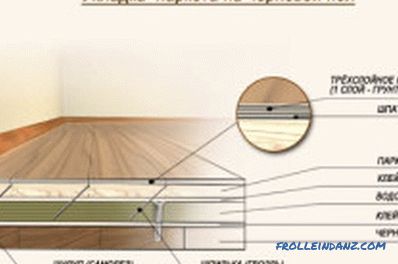
Laying of parquet on the wooden floor.
The side of the groove of the board is screwed to the logs at an angle of 45 °. To the heads of the screws do not interfere with the spikes of the next row, they must be recessed into the tree by 1-2 mm. In addition, wide boards can be screwed to the base, drowning the screw to 9-10 mm. In this case, the hole is closed with a stopper made of wood of the same species as the floor. If the spike enters the groove badly, the board should be lined with a rubber hammer. When installing the last row, it is sometimes necessary to level the upper part of the material with a plane. Sealing rows carried out using wooden pads.
To make a wooden floor of unwrapped boards, for a better fit, it is necessary to process their edges with high quality. The cut is made at right angles or slightly inwards. The slope should not be large, so that the edge does not break off under load. Laying the first row is at a distance of 1-1.5 cm from the wall. To lags boards nailed or screwed with screws. They will need from 2 to 4 pieces on one board. The second row should closely adjoin the first. For this, the boards are laid without nailing, and then, at a distance of 10 cm from them, construction brackets are driven into the lags. Wooden wedges are driven in between the bracket and the second row board, which help to make a tight fit. After that, the material can be attached to the logs.
Laying parquet and parquet
The presence of grooves on several sides ensures a tight connection of elements. The assembly can be carried out in different ways: glue the boards to the base, nail them to the subfloor, fasten them to the logs with screws. Since in a private house the area of individual rooms rarely exceeds 60 m², you can use the floating method. It does not require the installation of a log, it is enough just to achieve a perfectly horizontal surface of the base on which the installation will be carried out.
First, a concrete screed is produced, which should eliminate the height difference. After it dries and gathers the necessary strength, a slab of moisture resistant plywood is assembled on top of the screed. From the bottom, threaded legs are screwed into the slab. All together forms the so-called adjustable floor. Making a level check and twisting the legs to the required height, achieve a strictly horizontal position of the plate. Then you can already do the floor.
The parquet board is mounted on a synthetic or cork substrate. The boards are arranged perpendicular to the window. In this position, they are a continuation of the sunlight falling from the window and look the most advantageous. The rows are staggered, that is, the transverse joints between the boards of the first row must be opposite the center of the boards of the second strip. If this arrangement is not possible, the transverse joints of adjacent rows should be placed at a distance of at least 50 cm from each other.
Parquet can be laid out in the form of various patterns: Christmas trees, squares, decks, as well as more complex patterns that require a certain skill from the master. Unlike boards, dies of a parquet are not only interconnected by a groove-thorn type, but also glued to the subfloor. Depending on the chosen pattern, the laying starts either from the wall of the house (with parallel arrangement of the dies), or from the center of the room (with a diagonal arrangement). In any case, the pattern is parallel to the walls, the distance from which should be 5-8 mm.
In order not to damage the wood, tamping is done only with a rubber hammer or through a special plastic block.
Before starting the finishing work, you need to wait until the glue is finally grabbed. Its freezing time is indicated in the instructions.
Didn't find the answer in the article? More information on the topic:
-
High-quality furniture from shields with your own hands
Furniture from the boards with their own hands. Preparatory work. Full production of a bed from the first to the last step. The time after which you can begin operation.
-

Installing the ceiling from wooden slats
The ceiling of wooden slats, its features and types. Dimensions and classes of wooden slats. The procedure for installing the ceiling. Tools required to install the ceiling.
