You always want to organize your stay fishing or picnic as comfortable as possible. And here not to do without such necessary attribute, as a small folding stool. The design of the chair can be different: wooden, metal, have a back, lean on three or four legs. The seat can be made of wood or fabric, have a rectangular, square or round shape. The main condition is that this piece of outdoor furniture was convenient to use.
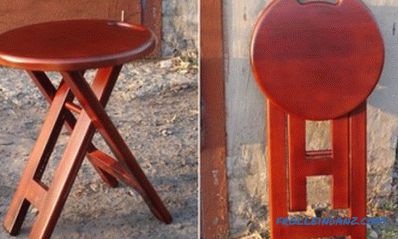
Figure 1. The folding stool is a compact and convenient type of furniture and also indispensable at home.
Preparation for work
A small chair can be made independently of ordinary materials. The simplest option would be a tripod-shaped chair and fabric as a seat. However, it may not be very comfortable to sit on such a structure for a long time, it is better to use a more convenient construction. For its production it is worth choosing hard wood: oak, beech, birch or pine.
A folding stool with a round seat (fig. 1) will look very interesting.
In order to make such a high chair with your own hands, you will need the following materials and tools:
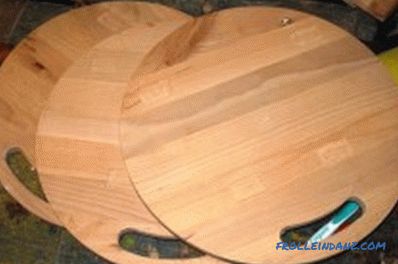
Figure 2. To make a handle, you need to seat drill 2 holes that are connected by cutting.
- Manual milling cutter.
- Jigsaw.
- Sandpaper Kit or Sander.
- Screwdriver.
- Clamps.
- Construction Square.
- First drill.
- Pencil and tape measure.
- Furniture shield.
- Fasteners.
- PVA glue.
- Varnish for wood.
In order not to buy material for each element separately, all the necessary details can be cut from the furniture panel. Fasteners will be needed in a minimum number: "butterfly" hinges, double-cut studs and end nuts, dowels.
For the convenience of work, it is necessary to draw up a drawing of a future structure, on which you should indicate not only the dimensions of all the parts, but also the places of their fixings. It will be quite convenient to use the stool, the seat diameter of which is 350 mm. The height of the legs is 500 and the width is 48 mm. The distance between the outer legs is at least 170 mm, between the inner legs - 70 mm.
Assembly of wooden elements
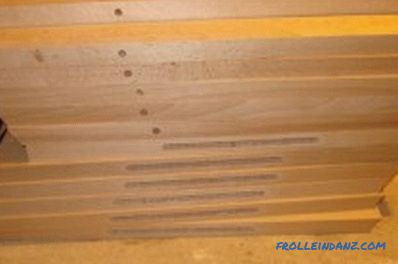
Figure 3. To make a slot on the inside frame of the legs, it is necessary to drill holes along the entire length of the future groove.
For the seat, it is necessary to cut an ideally even circle from the furniture panel. Make it easy. Some difficulties will be associated with the manufacture of pens. To do this, you need the first drill. In the future seat, it is necessary to drill 2 holes at a distance of 120 mm from each other. In both cases, the same distance should be retreated from the edge of the circle. Holes are connected by cutting. The result is a comfortable handle (Fig. 2).
All parts of the high chair must be machined on both sides with an end semicircular cutter. The inner side and jumpers can not handle. On the inner frame of the legs, at a distance of 335 mm from the edge, a groove 180 mm long must be made. To make this slot, you need to drill holes along the entire length of the future groove. The bridges between the holes are removed using a conventional chisel (Fig. 3). You can perform the necessary cut in another way. Drill 2 holes at the ends of the future cut and, armed with a jigsaw, connect them together.
The top of the legs should be cut at an angle of 30 degrees. This parameter should be observed as accurately as possible so that all other work is not corrupted. The bottom of the legs may just be rounded.
To install jumpers between legs, dowels and glue will be needed. Planes that are adjacent to each other should be well glue-free. Holes, which will include shkanty, must also be smeared with glue. Clamp together parts to remove glue and remove excess glue. Leave the blanks alone until the glue dries completely.
When the glue is completely dry, you can begin to assemble the high chair. All elements must be fastened in strict accordance with the drawing. The hinges on which the legs will hold are fastened with self-tapping screws. Hairpin that connects the legs, you can close the wooden tube.
The assembled structure must be sanded with sandpaper or a sander to make all surfaces smooth. Then you can cover the chair with tinted varnish, at least in two layers.
Didn't find the answer in the article? More information on the topic:
-
How to make a corner cupboard with your own hands
Instructions on how to make a corner cabinet with your own hands. What materials can be used? The complete process from cutting to closing edging. Features of the workflow.
