Balcony cladding with clapboard is by far the most popular and optimal finish for this part of the apartment. This is due to the fact that the material is environmentally friendly, has sound and thermal insulation characteristics. Painted walls are not so relevant, in addition, such a coating fade and peel off.
")
The scheme of finishing the balcony with clapboard.
Cladding can be carried out only with the appropriate materials and tools:
- guides;
- dowels;
- lining;
- square;
- punch;
- level;
- screwdriver;
- self-tapping screws;
- ax;
- hacksaw;
- jigsaw;
- tape measure;
- pencil;
- hammer;
- nails.
")
Tools for finishing the balcony clapboard.
Guides are needed for mounting the frame on which the cladding elements will be mounted. These parts of the system are represented by slats that have a rectangular cross section. In the example, slats with a cross section of 25x50 mm will be used. Guides should be distributed so that the distance between 40-60 cm is ensured between them. The elements should be fixed to the wall surface using dowel-nails, which should be installed in 80 cm steps, but not more. If you intend to sheathe a clapboard balcony and in the area of the ceiling, the guides should be attached to the surface with dowels according to the same pattern.
Before purchasing lining, it is necessary to calculate the surface area to be sheathed by multiplying the height of the wall by its length; after the area of all the walls, fold and subtract the area of the windows and the door. The next step is to calculate the area of one panel lining. Now the final area of the finished surface needs to be divided into the area of one panel, which will allow to get the number of canvases that will be needed for the work. It is recommended to add to the result obtained 10% of the volume of the material that can be spent on manufacturing defects or waste obtained during cutting.
We sheathe the balcony with clapboard using a perforator, which can be replaced with a drill equipped with a percussion mechanism. It is recommended to use a jigsaw that works on the reverse.
Preparation before starting work
")
The framework for clapboard paneling.
Sheathing a balcony using clapboard can only be pre-installed frame. However, its installation must be made on the surface of smooth walls. To analyze this indicator, you need to use a level that will allow you to determine which part of the wall is more deflected from the vertical.
Before you sheathe the balcony, you need to install guides, the first of which should be initially sawed to the desired length.
On its surface, holes should be marked in increments of 60-80 cm, intended for dowels. They must be made with a d6 mm wood drill. On the wall, the element must be attached at a distance of 10 cm from the ceiling, and then through the holes should be placed marks on the wall. Then in the body of the wall you need to equip the holes using a d6 mm drill, while their depth should be equal to 5-6 cm.
The balcony paneling at the next stage assumes that the guides should engraft with plastic choppers, but the screws should not be inserted until stop. Now you can check how well the rake is installed, it should be done with the help of a rule or a cord. If the rail cannot be installed correctly, it can be removed in the right places by means of wooden wedges, if necessary, preload the element with dowels, substituting the wedges of the required thickness. The dowel should be pounded with a hammer, while it is desirable to leave it undone - then it will hold more firmly. The gap should be equal to 7-10 mm, only after it can be screwed up to the stop using a screwdriver.
")
Clapboard mounting scheme.
Fastening the bottom of the located rails should be done at a distance of 1 cm from the floor surface. The distance between the top and bottom of the rails should be equal to 60 cm and no more. In those places where the extreme slats were fixed to the wall, you need to stretch the cords, which will allow you to correctly install the remaining frame elements. If you want to sheathe a balcony clapboard according to all the rules, the frame system must be installed in the area of window and door openings. In these parts of the loggia, the slats need to be fixed along the perimeter, exposing them on the same level with the others.
Covering balcony walls with clapboard
Before clapping a balcony with clapboard, you need to decide which corner will be accompanied by the greatest difficulties of the process, it is recommended to start installing slats from this angle. This is due to the fact that the completion of the work must be accompanied by the least laboriousness.
Lining has a tongue-and-groove lock.The start panel must be attached to the wall frame, which will check the correctness of the level. If necessary, you need to make alignment.
Starting to sheathe the balcony with clapboard with your own hands, you need to nail the starting bar into the groove and the crest. In the ridge part, you need to install the fasteners not so close to the edge, which will make it possible to eliminate the chipping of the wood, but you should not remove the fasteners too much from the edge. Thus, a vertically installed plinth should overlap all the nails. In the groove area, nails should be hammered into the part that will become overlapped by the next panel. It is not necessary to drive in a nail all the way, it should be, using a doboynik, attach a tool to the fastener head. Ultimately, the nail must be deepened so that it does not interfere with the installation of the next panel.
Before you sheathe a balcony, you need to familiarize yourself with the rule for installing the finishing bar when the wall meets the first corner. In order to make work more aesthetically pleasing in this area of the balcony, it is necessary to determine the distance from the groove of the penultimate panel to the guide wall not covered by the clapboard in 4 places. These marks can be transferred to the prepared lining. Measure should be directly from the beginning of the ridge, despite the fact that this area after attaching the rail will be inside. At the next stage, you can install the wall paneling, which will be quite easy to do, and as a result, the narrow gap formed will be closed by the plinth. The described technology will allow to sheathe clapboard not only walls, but also the ceiling.
After you have managed to sheathe the walls of the balcony with clapboard with your own hands, you can begin to work on finishing the slopes. We sheathe the balcony, strengthening the starting plate in the upper part of the slope, only after that you can proceed to the trim of the side parts. The first rail must be secured to the door or window so that the finishing rail extends beyond the skin. Sheathing the balcony properly in this area can be done by stripping the first ridge of the ridge, this will allow you to refuse to install the plinth in the corner afterwards.
Before you sheathe a balcony, you need to know that the side slats in this area must be adjusted as tightly as possible to the top, since mounting the baseboard or the panel will be unaesthetic.
Final work
Once you have finished clapping the balcony with clapboard with your own hands, having done the work on the slopes, you can proceed to the installation of cashing paper and baseboards. Before starting work it is important to know not only how to sheathe the balcony, but also how to protect the material after the completion of the work. This should be done with bioprotective impregnation.
Didn't find the answer in the article? More information on the topic:
-
")
Technology of laying inside the house
Laying lining: preparatory work, the manufacture of frame construction, fixing the insulator and vapor barrier. Installation of lining in different ways to the surface of the frame, painting the lining.
Search
Related Articles
How to insulate the iron front door with your hands
The iron door serves not only as a reliable protection against unauthorized persons entering the apartment, but also prevents the penetration of cold air and noise. The ideal option is an iron door,...
Finishing a wooden house inside and outside with their own hands (photos and video)
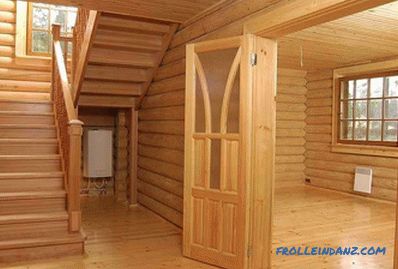
After you have made the foundation, erected the walls and installed the roof, you still need to solve a problem such as finishing a wooden house inside and outside. If you built your own wooden ho...
How to choose the installation for the toilet
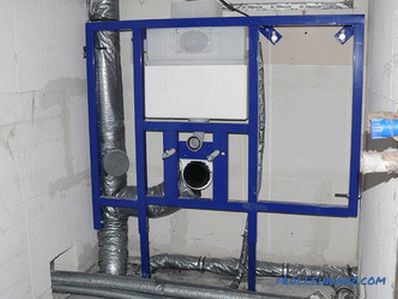
In modern solutions for interior decoration minimalism is increasingly prevailing. This applies not only to living rooms, but also bathrooms and toilets. In the article we will talk about how to cho...
How to make self-leveling self-leveling floor

The emergence of self-leveling mixtures facilitated the work of professional builders and allowed home craftsmen to perform high-quality screed without any extra effort and skill. Now making a flat...
Do-it-yourself installation of ceramoplast - installation instructions
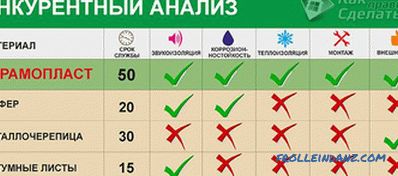
In connection with the development of technical progress in the field of construction, the range of materials for the roof expands every year on the market. They are characterized by durability, str...