In connection with the development of technical progress in the field of construction, the range of materials for the roof expands every year on the market. They are characterized by durability, strength, and most importantly - ease of installation and environmental friendliness. Among the large selection of materials is to highlight keramoplast, which has not only good performance properties, but also looks beautiful. Installation of ceramoplast with your own hands can be done even by a non-specialist.
What is the material
 Competitive analysis
Keramoplast did not appear on the market so long ago, but already very popular due to its characteristics.
Environmental friendliness
Specialists use natural components of natural origin and synthetic substances in the process of material production. The correct combination of components allows you to produce environmentally friendly material, which compares favorably to other types of roofing. During operation, it does not adversely affect people's health and retains its qualities for a long time.
Wide choice
 You can choose roofing materials by color
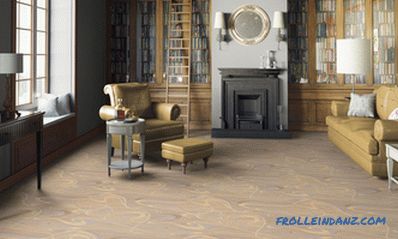
If you wish, you can choose the color of the material, which corresponds to individual preferences and is combined with the general mood of the house. If there is a desire to stand out, to make the roof unique and original, you can decorate it with a pattern or ornament, which will be beneficial to emphasize the taste of the owners.
Strength
 Keramoplast durable
If you prefer ceramoplast, you need not worry about wind and snow load on the roof, as its natural minerals ensure the strength of the structure, regardless of the cataclysms. Due to the low weight of the material, the pressure on the structure and foundation is reduced.
The material has excellent resistance to ultraviolet rays.
Easy installation
Following the step by step instructions, it is easy to install the ceramoplast. You can do this work without much effort.
Step by Step Installation Instructions for the roof
 Installation of the roof
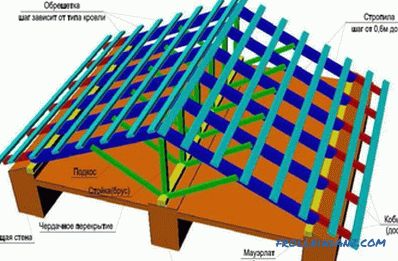
- V first of all, before you start laying keramoplast, you should run the crate along the rafters. They are presented in the form of boards, with a section of 150 * 150 mm, and a step - 600 mm. To make the sheathing, you should give preference to beams, the cross section of which reaches 150 * 25 mm. Laying perform adhering to a step of 380 cm, regardless of the angle of the slope of the roof.
- The next item is the treatment of all wooden structures with antiseptic preparations and fire-resistant solutions.
 Vapor barrier and roof sheathing
- To prevent condensate from building up on the rafter system lay waterproofing layer.
- The laying of the ceramoplast starts from the side opposite to the main facade of the house. This is necessary in order to hide the joints of the vertical seams. As a result, the roof will look like a seamless fabric.
- The work will be performed horizontally, taking into account the main wind direction in the region.
 Large roof area
- In order to understand how to cover the roof At home, characterized by a large area, keramoplast , it is important to be guided by expert advice. First, the first row is laid, and then proceed to the extreme side, moving vertically. Then you can work with the remaining rows, focusing on the lower and side rows.
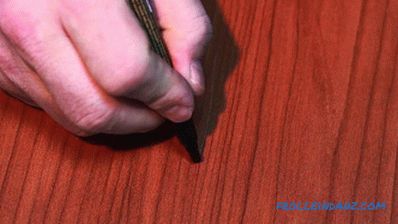
- Laying can be done with a standard or zigzag principle. The first option involves the installation of sheets in a staggered manner, when the sheets do not shift. As a result, at the junction there are four sheets that overlap. Some experts advise to subject the corners to cutting, so that the layer does not come out thick, and the design remains unchanged. Laying the roof without offset angle, the sheets will need to be cut. It is worth remembering about the trim angle, which is 45ºС.
The zigzag method involves laying sheets in the second row with an offset of 1/2 sheet. Because the joint on one row is located in the middle of the sheet next row. If you prefer this method, you do not have to cut the sheets.
Fasteners
 Fastening of keramoplast
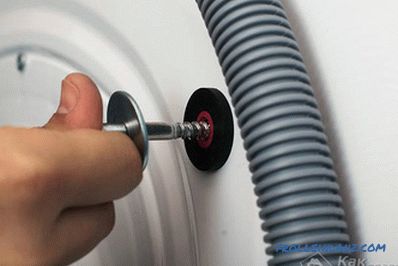
During the installation of ceramoplast initial fasteners perform with the help of two mounting screws. Fastening is carried out in the center of the batten board. The guideline is a thread stretched across the crate, along which it will be much easier to fasten parts. The work is performed with notched nails. It is necessary to fasten the first sheet using fastening details in the amount of 30 pieces. For fixing the following sheets 20 fasteners are required.
To prevent sheet deformation during temperature fluctuations, on the crest of the wave, in place of the fastener, you can make a hole whose diameter is slightly larger than the diameter of the fastener.
 Fixing the ridge
Having finished laying the material, you can proceed to the installation of the ridge, which is attached to the joint area two slopes of the roof. The peculiarity of the fastening is that the first row of ceramoplast fasteners must be closed with a skate wing. Fastening carry twelve nails.
If you need to change the angle of the ridge area of the roof, you can warm it with the help of a building dryer from the inside of the structure. An alternative to a hair dryer can be a blowtorch. Warming up is carried out to a temperature of 50ºC, which will allow the sheet to bend to the desired angle.
To completely seal the roof (to prevent precipitation and dirt from falling under the roof), wind strips are fastened from the end.
Video
Watch the video instructions for installing keramoplast:
Search
Related Articles
Do-it-yourself kitchen furniture repair
If something in the old furniture is broken or it has lost its appearance, this does not mean that it is necessary to change it. Furniture can be restored, and any furniture, including kitchen. To b...
Do-it-yourself washing machine installation
Today it is difficult to find housing in which there would be no washing machine. If you are faced with the problem of connecting the washing machine, then this article is for you. Preparing for i...
Semi-commercial linoleum technical characteristics and properties
In European countries, it is customary to divide linoleum into only two types: household and commercial. Well, in Russia they decided to single out another kind. This is semi-commercial linoleum, wh...
The distance between the rafters - the method of calculation
In order for the roof to be not only attractive, but also as reliable as possible, attention must be paid to its construction. All calculations must be carried out accurately and correctly. It take...
How to make a slope window
One of the most important operations performed when replacing window blocks is the manufacture of slopes, the quality of the arrangement of which ultimately determines the appearance of the entire w...