The emergence of self-leveling mixtures facilitated the work of professional builders and allowed home craftsmen to perform high-quality screed without any extra effort and skill. Now making a flat floor with your own hands has become much easier. A great base for tile, laminate or linoleum is a self-leveling self-leveling floor. How to make self-leveling self-leveling floor independently, and will be discussed in this article.
How to choose a mixture for the self-leveling floor
 Mixtures for the self-leveling floor
Dry mixtures that are intended to create a self-leveling floor, are made of two types: polymeric and mineral. Turning after adding water to the liquid solution, the composition spreads over the base and after hardening a smooth surface forms. The formulation of the polymer mixture includes:
- hardener;
- epoxy or polyurethane;
- fillers for strength;
- dye pigments;
- additives that control the fluidity and other properties of the mixture.
The mineral base for screed has simpler, natural components:
- cement;
- gypsum;
- sand;
- polymer additive (polyurethane or epoxy).
The choice of mixture is determined by the purpose of the room. Manufacturers indicate on which loads the foundation of the self-leveling floor is calculated.
The advantages of the leveling mixture
 Thanks to the self-leveling mixture, the floor is very even
Self-leveling mixtures are a modern type of screed, characterized by several significant advantages:
- Ecological purity of the material. Such basis is suitable for a heat-insulated floor, when heating toxic substances are not emitted.
- Low shrinkage of the mixture.
- Easy to fill the floor.
- The surface dries several times faster than traditional concrete screed.
- High frost resistance.
- Long service life.
How to prepare the base
 Primer floor
Before pour self-leveling floor, you need to prepare the base. The subsequent operation of the floor, its adhesion, absence of voids and detachment depend on the quality of the work done. All construction debris is removed from the surface, dust is carefully swept away. If there are stains of paint, bitumen or oil on the base, they must be mechanically removed, such contamination will not allow the solution to adhere to the surface.
The concrete subfloor must be sufficiently dry; it is recommended to ventilate the room at high humidity. Small crevices cover with mortar. The entire surface is covered with a layer of primer, and the place of the repaired cracks is better primed twice. To start the self-leveling floor only after the final drying of the primer.
Preparing the solution
 Diluting the dry mixture
To work on the preparation of the solution and The following tools are required for potting:
- Powerful drill with stir nozzle.
- Bucket for solution.
- A needle roller mounted on a long holder.
- Spatula, which allows to level the mixture in the corners.
The packaging of the self-leveling mixture contains the manufacturer’s complete information on the preparation of the solution. To work, take a bucket of water, the amount of which is indicated in the instructions, the dry mixture is poured into it and thoroughly stirred by a drill with a nozzle or a mixer.
Kneading is a crucial stage, the mistakes of which will lead to the deterioration of the composition. Do not use more liquid than recommended, otherwise the floor will crack.
Compliance with the temperature requirements is an important component of a good solution, since the mixture, poured during cold, will not be able to gain strength and will crumble after drying. The composition is no less sensitive to high temperature, it quickly sets and becomes unsuitable for leveling.
 Mixing with a mixer
Mixing with a mixer lasts for 3-4 minutes during this time all lumps are broken and the solution has time to ripen. When working, move the drill in a circle and from top to bottom, but do not touch the walls of the bucket. The mixture freezes quickly enough, if you do not have time to fill the entire composition for half an hour, it can not be diluted with water and put into action. The size of the screed bulk floor is from 5 to 20 mm, a large thickness is impractical, it will require significant financial expenses. It is more economical to level the base with a cement-sand mortar.
Filling of a self-leveling floor

Preparation of a solution from mixtures from different manufacturers takes place according to one algorithm, only drying time and fluidity can differ. Before you make a self-leveling self-leveling floor, put the mark level, which is planned to fill the solution. This mark is performed by screws or profile.Work must occur without a hitch in order to have time to level the mixture before it hardens. It is good to bring a partner to the repair work, especially if the area of the foundation to be poured is large enough.
 Leveling the mixture
Kneading from the bucket is poured closer to the corner and leveled with a rule or spatula to the desired level , necessarily reaching out to hard-to-reach places. The next solution is poured next. Fill is displayed from the low end of the room to the highest. The thinnest point of the screed should be at least 5 mm. The liquid consistency of the mixture eliminates the appearance of seams and joints after several additions of the solution. At the threshold of the room you need to make a barrier so that the liquid composition does not flow out of the room.
 Roller and special shoes
Next, using a needle roller, air bubbles are expelled from the self-leveling mixture. It is necessary to carefully go through the tool with the entire area of the floor, otherwise it will lose its declared strength. It will take about three days for the solution to dry, but if there are areas of considerable thickness, then the ready floor of the self-leveling floor will increase to two weeks. During the first days of the mixture can not walk, so as not to have dents. A period of two to three weeks is necessarily maintained before laying the laminate.
The factors of humidity and temperature have a significant effect on the readiness of the self-leveling floor.
Work on a self-leveling mortar mix does not require professional skills and takes little time. The main condition for the successful completion of the process is compliance with the technology of casting and kneading the composition according to the manufacturer’s instructions.
Interesting materials:
installation of a warm water floor with your own hands;
how to level the floors in the apartment under the laminate.
Video
This video shows the process of applying a self-leveling mixture to the floor:
Search
Related Articles
Painting the facade of the house with their own hands

Putting paint on the facade is the easiest, fastest and most affordable method of refining it. This is important because the facade is the face of the house and, in fact, indicates the welfare of th...
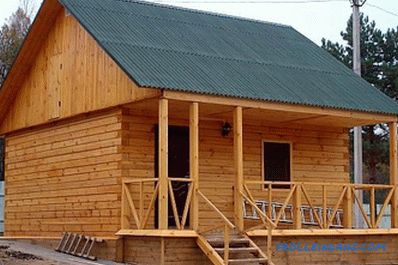
How much does it cost to build a garden house?
Most of those who want to get a small country house for reasons of economy are trying to find out how much it costs to build a garden house. Naturally, the answer to this question depends on such fa...
Noise insulation of the walls in the apartment - modern materials detailed review
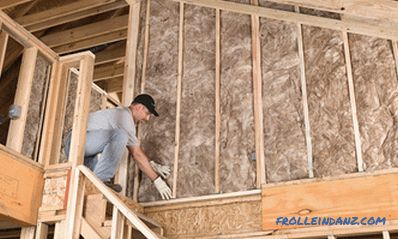
The problem of excessive noise in the house is not as harmless as it may seem. With the modern rhythm of life in the city, the extra noise, exceeding the permissible level by even a few decibels, tu...
the choice of wood and the sequence of works, instructions (video)
Traditionally, baths are constructed of wood, since it is this material that best of all keeps heat, warms quickly, has a pleasant structure, aroma, and many healing properties. A log house made of...
How to connect a sink - features of installation and connection of a sink
When connecting the sink, there is no need to contact specialists. The main thing, before you connect the sink, carefully examine the wiring diagram and sequence of works. Preparatory stage Firs...