In order for the roof to not leak, keep warm and long to please the owners with its beautiful view, it is necessary to equip it according to all the rules. Moreover, for each of the roofing materials there are their own subtleties and installation technology. In this material we will analyze in detail - the device of the roof of the metal.

There are two fundamentally different approaches to warming the roof of a house, the so-called warm roof and cold roof. Depending on the type of roof chosen, its structure will also differ slightly. Therefore, in the beginning we will consider the features of each of these types of roofs, after which we proceed to those elements that are the same for these types of roofs.
Warm roof - how it is arranged and why it is called so
This is a roof where roof slopes are insulated, therefore it is quite comfortable in the attic and it is possible to arrange a living space, that is, the so-called attic. And for this you need to conduct a series of operations, creating a whole roofing system. Consider the device of the roof.
Provide protection against water
Condensate may form on the inside of the metal tile. So that he does not drip on the insulation and not wet it, you need to lay a waterproofing. Membranes are well suited for this. They are better films that are permeable to steam. Therefore, moisture does not accumulate anywhere, but calmly goes outside. Such superdiffusion abilities of membranes perform their functions well and save space (they are put on insulation without any gap).
First isolate the valley. The membrane from the roll is laid along its entire length, starting from the top. The joints on the valley and the landmarks are glued with a building tape of the same brand as the membrane. On the rafters waterproofing lay from the eaves to the ridge, rolling the rolls horizontally. The joints of individual rolls are made on the rafters, the overlap between them is 15 cm. Sagging of the membranes is not allowed - they must be well stretched.
We insulate the roof, and then we put the vapor barrier on
. We continue to cook the "pie of the roof of metal". Immediately behind the waterproofing membrane, on the inside, the insulation goes down. Most often for such purposes mats are used basalt wool, but you can use other types of insulation.
- For details, see the article: Heater for a roof - make the right choice.
Mats of basalt fiber are placed between the rafters of the roof. If you need to put not one layer, but several, then the joints between the mats of the first layer are covered with slabs of the second. Otherwise, the cold bridges can make themselves felt. On top of the insulation stack vapor barrier membrane. It is necessary that the evaporation from the interior could not accumulate in the insulation.
- In more detail about vapor barrier: Vapor barrier - which side to the heater should be properly laid

Insulation protection against penetration moisture from both the inside and the outside.

General arrangement of a warm roof made of metal tile.
Features of a cold roof
The main feature of this roof is that the slopes themselves are not insulated, the insulation fits only on the lower part of the attic. It turns out the house is warm, and the slopes are ventilated.
Protecting insulation from moisture
In addition to the above-mentioned membranes, cold roofing from metal tile also allows the use of waterproof film. Unlike membranes, the films should sag between the rafters by about 20 mm to drain the condensate. As for a warm roof, waterproofing should be laid horizontally, from the eaves to the ridge, with an overlap of 15 centimeters.

General arrangement of a cold roof made of metal tile.
An important element of the roof is the sheathing
To create the batten, use bars of 50/50 mm cross section and a 32/100 and 50/100 mm edging board. At the bottom of the roof of the roof, along the eaves overhang two 50/100 boards are nailed. Then on top of the waterproofing the concrete grille is made of 50/50 mm bars. Bars are nailed along the rafters, from the ridge to the bottom. On top of this kontrbreshetki with a certain pitch, horizontally fix the sheathing boards. The step of fastening these boards will depend on the type of profile of the metal tile which is planned to cover the roof.

Lathing under the ridge
The uppermost part of the roof needs hardening. For this you need to nail a pair of boards on each side of the ridge board.

Roof ends
From the end of the roof, you need to nail the boards larger than the main crate to the height of the metal tile profile.

The lathing for the valley
Endova is the internal joint of two roof slopes. In the places of passage, the valley ends are made solid.

- See the material: What is a Endova and what is its structure
Roofing
It simply must be reliable, so it is made above the eaves overhang. For reference, you can take the height of the bearing wall. Crate in these places need solid.Therefore, additional boards are added between the row crate and a solid base is made.

Elements of the roofing system
The roofing of metal roofing involves attaching all the elements of the roofing system to the assembled crate, then consider all these elements.
The eaves strip, the holder for the gutter and the gutter itself
First fix the special gutter holders. Then attach the gutter to drain water. And only after that I fix the cornice bar. It is fastened to the crate screws, so that the edge of the gutter is not stuck out from under it.

The end roofs of metal
Depending on the shape of the roof, there may be several such elements. Endova bottom is fixed to the crate under the roof, end upper (decorative strip) - above the roof. When docking the lower end slats do an overlap of at least 10 - 15 cm. See photos above.
Junction
These nodes are necessary for a tight junction of the roof with pipes and walls. Like endy, they consist of upper and lower slats. Having made an apron from the lower slats, they put a tie under it, designed to divert water to the valley or to the outer ledge. Then the roof covering is fastened and only on top of it are the junction upper joints mounted.

Installation of metal tile
If a sheet of metal tile covers the entire roof slope, the installation is carried out starting from the ridge. At the first sheet, we check the location relative to the butt and the eaves (above which it should protrude 5 centimeters). Next, we install metal roofing - even from right to left (with an overlap of the next sheets of the previous ones), even from left to right (with an overlap of the previous sheets). Every 3 connected sheets must be checked against parallelism of the eaves. Screws screwed into the side overlap (top point). You can not allow grabbing with crates.

Now let's look at the metal roofing scheme, when the length of the roof slope is more than the sheets of material. First, join the sheets along their length. And then align the first 4 sheets on the end. Fasten every square meter of tile with self-tapping screws (with EPDM gasket) in the amount of 6 or 8 pieces. The sheet (bottom) is attached to the bend of the wave where the material is adjacent to the crate. Mounting goes through the wave, the next rows of screws are shifted in a checkerboard pattern.
The final elements of the roofing system
The end strips
C the end faces of the roof are installed. Fix them with screws through 50 - 60 cm. At the same time, the overlap between adjacent planks should be about 50 mm.
Ridge bars
These elements come in flat or rounded shapes. The latter additionally require attachment to their end caps. It is simple and tapered, fastened with rivets or screws. Before installing the slats, we put a compactor (universal or figured) under the ridge. The slats are mounted using ridge screws.

Device of ventilation and walk-through elements
The following additional roof nodes of metal tiles are needed for ease of installation of air ducts, antennas and other elements.
Ventilation outlet
Ventilation outlets are needed in each span of the rafter, otherwise there will be no good air exchange. But if there is an unheated "cold triangle" right under the roof, there will be one exit for every 60 square meters of the roof. A hole is made in the metal tile, and then the element is fastened with screws to the edges of this hole. If there is no silicone sealant in the exit kit, then it is applied additionally.
Sewer outlet
The sewer outlet is connected to the riser. Corrugated pipe is used for this. On the roof for the installation of the passage element cut a piece of metal. After installation of waterproofing, sealant and sealant, the sewage outlet is inserted into the passage element (which is attached to the metal tile with self-tapping screws).
Output for antennas and electrical cables
Special so-called antenna outputs are used to seal the junctions of antennas, cables and chimneys of the "sandwich" type with a roof covering. The rubber tip of the antenna output is cut off and made 20% smaller than the diameter of the passing pipe and pulled over the pipe. The base of the antenna output is shaped into a metal tile profile, and having missed it with silicone sealant, it is screwed to the metal tile with self-tapping screws.

In the photo (from left to right): 1. Ventilation exit; 2. Exit sewer and exhaust; 3. Antenna output.
Device safety features and their purpose
Ladder
To climb to the roof, you need a steady staircase. It consists of wall and roof ladders with brackets. The brackets require 4 pieces per section, they are placed in the place of the lower wave bend, where the crate is solid. And the brackets, and the top of the roof ladder fasten bolt-screws.The wall ladder is installed so that the uppermost step is opposite the edge of the eaves. In this case, the wall ladder itself should be in alignment with the roof.

Roof railing
These metal elements are a necessary condition when working on the roof. Fasten them with special supports to the solid crate through the lower part of the wave, sealing gasket of rubber. See photo above.
Transition bridge
Transition bridges are needed for safe walking on the roof from the attic window, sunroof or staircase. Attach them in the same way as the fence, only a continuous crate is not required.

Snow retainers
Snow retainers are tubular, made of metal, painted black, brown, red or green. They are installed around the perimeter of the roof, above the eaves overhang. In addition, they must be placed above the entrance to the house, the windows of the attic, as well as above each level of a multi-tiered roof.

Scheme of the roofing system Metal Profile
Below is the diagram of the roofing system of the company Metal Profile. On it all the above nodes are connected in a whole roof.

The drainage system
Proper installation of the roof under the metal tile necessarily implies a reliable drainage system. It consists of various elements.
Gutter
For one drainpipe, according to the rules, 10 meters of gutter are laid, no more. A V-shaped hole with a width of 10 centimeters is being cut out on this trough - an outlet funnel will be inserted there. It must be fastened 15 centimeters from the edge of the gutter.
Holders for gutter
They must be installed before the eaves of the roof and metal tile are mounted. Install holders every 0.4 - 0.5 meters. They need to mark up to get a slope of up to 5 millimeters per meter, and then bend the bend. Or you can bend the already fixed holders, marking them with a tensioned cord.
Plugs for the gutter
Put these elements at both ends of the gutter, tightly hammering them inside with a mallet.
Exhaust funnel
Its leading edge is brought under the outer bent edge of the gutter. Fix the funnel with a carved flange, bending it to the rear edge of the gutter.
Connectors
When you need to fasten between the gutters or their corners, overlap from 2.5 to 3 centimeters is required. To do this, use special parts - connectors. They have rubber gaskets and a lock consisting of a back flange and a tongue in front. With this lock, the gutters are easy to connect - even in a row, even at an angle.
Spider
This detail is placed in the funnel of the drainpipe, without letting in there trash and autumn leaves. At least once a year the spider must be cleaned, otherwise it will cease to perform its functions.
Pipe for connection and its knee
For transition from the funnel to the drain pipe, use two elbows and a connecting pipe. They are sawed in place, determining the required size.
Drainpipe and its holders
Holders are available in two types. These elements are universal - suitable for all surfaces and all materials. These elements are attached to the wall through the meter. In addition, mounts on pipe joints are required. During installation, pieces of the required length are cut off from the billet of the pipe, which are inserted into the holders by firmly snapping locks. At the bottom of the drainpipe, departing from the pavement 30 centimeters, fix the knee to drain water.
Drain pipe tee
It is needed when there is one drain for two funnels. Bottom tee compressed. The side of the socket of this element is quite wide, which is very convenient. This allows you to change the entrance angle of the side pipe
A funnel for collecting water
If the roof is folded or belongs to one of the most complex types, then the trough is changed to a funnel. This funnel is simply inserted into the pipe attached to the cornice with a yoke. It is made from a metal strip, and connected with a self-tapping screw.
A limiter to prevent overflow
It is needed where water flows constantly, and sometimes in large quantities (under the valley, for example). Put it on the corner of the gutter or gutter.
Here, perhaps, are listed all the main elements that the technology of roofing of metal tiles provides. And if everything is set correctly, a strong, beautiful and waterproof roof will come out.

Video installation instructions for the roof of metal tiles "Metal Profile"
Search
Related Articles
What bimetallic radiators are better
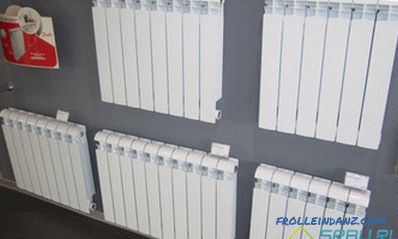
Bimetallic radiators - they are installed without problems, they give plenty of heat, and they can boast of a beautiful design. The stores sell bimetallic radiators of different design and technical...
Installation of flooring: tools, materials, process
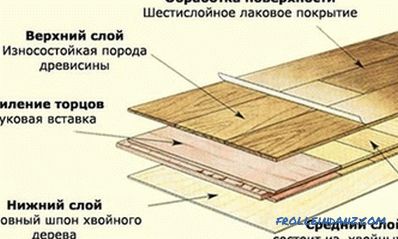
The use of an array of natural wood makes it possible to obtain a coating that surpasses all other materials in its decorative properties. Speaking in lofty words, the wooden floor awakens the gene...
Arbolite DIY Blocks
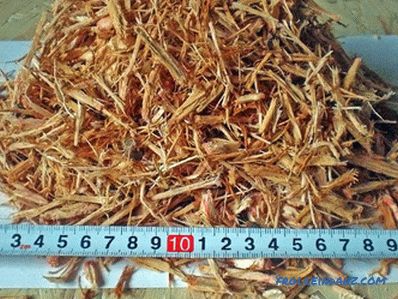
Arbolit is a unique building material, ideal for the construction of walls, lintels, supporting structures. In the manufacture of blocks and slabs using sawdust, chips with wood chips, cement and wa...
Which polycarbonate is better to use for the greenhouse

Currently monolithic and honeycomb polycarbonates of various thickness are colored and transparent. The nomenclature of polymeric materials of this type is diverse. The consumer appreciated the high...
features of the arrangement of the floor, ceiling and walls (photos and video)
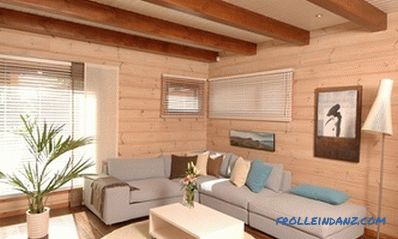
Immediately after completing the construction of a wooden house, it is worth while to forget about the implementation of interior decoration, since the building will sit down for a while, this may...