The use of an array of natural wood makes it possible to obtain a coating that surpasses all other materials in its decorative properties. Speaking in lofty words, the wooden floor awakens the genetic memory we inherited from our ancestors. However, for this to happen, the preparatory work, the installation of the floorboard and the coating material itself must be of adequate quality.

Floorboard layout.
The main requirements for sawn timber before laying the floorboard are:
- no biological or mechanical damage;
- humidity not higher than 10-12% ;
- before laying the floorboard must undergo the so-called acclimatization in the room where it will be used; the duration of this process is at least 3-5 days.
The grade of the sawn timber used by and large has little effect on the quality of the final coating. It will mainly affect the nature of the pattern. From class C, you can get a floor of very good quality, but it will take much more effort to do this than when working with material of class A or Extra. When working with low-grade class C, one should also take into account an increased reject rate (twisting with a screw, knots, uneven edges, pitch pockets).
Required tools
To install the floorboard, you will need:

Tools for mounting the floorboard.
- hand-held circular saw or a wide body with a hand saw;
- a power drill;
- a screwdriver with a set of bits for tightening screws;
- nozzle for cutting holes (roller cutter);
- set of wooden wedges;
- hammer;
- grinder;
- sandpaper of several grain sizes;
- self-tapping screws;
- elastic sealant for wood.
The flooring can be carried out on:
- lags;
- plywood base, arranged on the existing screed;
- to the existing floor.
Before the start of the installation of the floor covering, wooden bars are fixed to the surface of the existing tie, to which the floorboards will be subsequently fixed. Fastening is carried out using powerful dowel-nails or metal anchors. A mandatory requirement is the complete absence of signs of a lesion by a fungus or mold. The step of installation of the bars is adopted so that, together with the thickness of the stacked tongue-and-groove sheet, a solid non-spring surface is obtained. The direction of the lag should be perpendicular to the direction of the flooring.
Another popular method of installation is to build a plank floor over a pre-laid layer of waterproof plywood. The advantage of this method is the ability to install with appropriate modifications on almost any basis. Plywood is fastened with dowel-nails and adhesives. The fastener must be completely recessed and not protrude above the surface.

The plan of attaching the floorboard to the lags.
The combination of these methods of fastening ensures reliable fixation of plywood sheets both in the direction of tearing and in the direction of shear. The laying of such a base in most cases is carried out diagonally to the direction in which the floor will be laid. Between the sheets and the wall must be left a compensating seam, which is subsequently sealed with an elastic sealant. The width of the seam is about 10 mm.
There is another very common type of installation - flooring on an existing wooden floor. This option is possible if the old floor is strong enough and does not have serious flaws. If necessary, problem areas can be replaced.
Preparation for installation work
Before the start of installation work, it is necessary to make hydro- and thermal insulation of the base on which lags or plywood are installed.
Then it is necessary to decide on the direction of installation of the boards. In the general case, the installation is carried out in such a way that the light from the window falls along the length of the installed elements. In passable rooms, the direction of the flooring usually coincides with the direction of movement of people in them. Also sometimes used diagonal method of laying. By mating, you can distinguish between the installation of the tongue in the run and without offset.
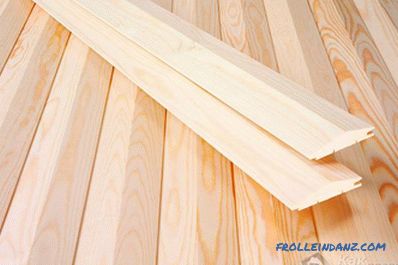
By design, the floorboard is a cut, planed from all sides. A spike is formed on one of the faces and a groove on the other. With the help of these elements is carried out tight rallying. On the back side there are several cuts or shallow wide grooves.
The purpose of these elements is:
- to ensure air circulation inside the coating;
- to prevent deformations when the humidity of the ambient air and material changes.
Installation: practical recommendations

Fixing the floorboard on glue and nails.
The installation process of the floorboard starts from one of the walls. The first floorboard is laid groove to the wall with a clearance (about 10 mm). Through the front side, along the entire groove, drilling of self-tapping screws is made. The distance from the edge to the head of the screw must be such that, taking into account the compensation gap, the installed baseboard will mask it.
On the other hand, the screws are fixed at an angle across the ridge. To prevent damage and spalling, it is recommended to pre-drill the holes with a slightly smaller drill bit. In order to ensure good assembly of adjacent boards and prevent crest cracking when tightening fasteners, the holes should be drilled in such a way that the heads of the self-tapping screws are fully recessed.
At the beginning, the next board is manually put on by a groove on the crest already fixed. With the help of a hammer and a set of gaskets and wedges a more dense unification is carried out. In order to prevent edge jamming, it is recommended to lay the grooved planks as safety linings for wedges. The load when tightening in this case is distributed more evenly.
Cohesive floor boards are fixed with self-tapping screws.
The fastener must be chosen in such a way that, when twisted, the fixed base contains at least two-thirds of the length of the fastener. The mounting step should coincide with the installation step of the lag or be 20-30 cm.
The last board, if necessary, is cut with a circular saw in width and installed in its place, just like all the others floor elements. Its fixation is carried out through the front side by analogy with the first board.
When mounting in a run-in, inevitably there is a need to trim the elements. This operation must be carried out with the utmost care in order to avoid or minimize the formation of end gaps.
Elimination of installation defects
After the completion of the basic installation process, it is necessary to eliminate small defects that inevitably arise when working with large volumes of such a material as wood. These can be:
- gaps and leaks on the rallying or end-pairing line;
- minor dents or dents on the front surfaces (this type of defect is highly undesirable and should be avoided if possible) ;
- fastener caps when fastening through the front surface (their number should also be kept to a minimum);
- front surface irregularities caused by material warping (when laying the floor, you should try not to use traces of spatial deformations).
The gaps, asperities and holes from the caps are sealed with wood sealant of a suitable shade. After hardening of the sealant, the place where it is applied is finely polished, flush with the surface.
The unevenness of the mating and deformation of the boards can be eliminated by sticking with a plane and subsequent grinding. After eliminating all these minor issues, it is considered that the installation of the floorboards is complete and you can proceed to the finishing of the coating. Good luck in the upcoming repair!
Didn't find the answer in the article? More information on the topic:
-

Wooden windows: DIY-making
Do-it-yourself wooden windows: the advantages of installing wooden structures. Varieties of windows from natural breeds. The stages of the manufacture of wooden windows, installation design.
Search
Related Articles
Cork underlay for laminate - selection and installation + Video
So that the laminate lay down smoothly, and its locks do not break and the boards do not creak, a substrate made of special material is placed under it. A good substrate and a warmer floor will do,...
How to seal the seams on the ceiling
Very often in homes there is such an unpleasant phenomenon, like cracks in the ceiling. This happens for various reasons: house shrinkage, improper repairs, large temperature drops, dry climate, poo...
DIY cross-linked polyethylene pipe installation

Recently, communications made of cross-linked polyethylene have gained immense popularity, since this material is relatively inexpensive and has a number of significant advantages: an optimal combin...
Connection of timber: basic principles and provisions
Nowadays, more and more often wooden lumber is used in the construction of the walls of houses, cottages, baths. This is due to the fact that the quality of the proposed material of large sections...
Interior decoration bath with their own hands (+ photos)
Building a bath is only half the work. After the construction is completed, you must proceed to the finish. Interior decoration performs not only an aesthetic function. It includes a whole range of...