Building your home is a responsible and important activity. However, all the joy will come to naught if the house shrinks.
Because of an incorrectly made foundation, huge cracks can appear, double-glazed windows burst in windows and even the roof deteriorates, because of the deformation of the walls the roof structure is broken, as a result of which the tiles start to fall, or with which it is covered.
Foundation for walls

Two main types of foundations are worth mentioning, which are used when building a house. These are:
- monolithic, a pit is used for its construction;
- is a tape that is pulled out under separate load-bearing walls.
The last type is done in the form of trenches. Accordingly, less time, resources and time are spent on it, therefore it is more popular, and it would be correct to consider it.
Planning
 House Project
It is necessary to have a typical house project. You can order it at any design institute, from an architect, or you can do it yourself (when you have construction skills). If you don’t have enough energy for such a project, at least you can figure out in your mind what size the building will have, how many floors, and only then draw a plan of the foundation on the sheet indicating its size and thickness of the trenches.
Axial markings
 Layouts for the foundation
First you need to mark on the building plot the exact location of the building, and also install lighthouses between which the transverse and longitudinal lines (or strong non-stretching nylon threads) will be stretched, indicating the axes of the building.
Such beacons are usually made at some distance from the future foundation, using two wooden slats, arranged vertically, across which is attached another board. Its top must coincide with the level mark, which is specified in the draft.
Next, with the help of a laser level, it is noted where this rail will intersect with the axis of the building, a screw is twisted there, a fishing line is tied and we are engaged by analogy with the other side. So, by analogy all axes are made. The correctness of their installation is checked by the laser level, and the distance on the parallel sides must be equal between the axes.
The dimensions of the foundation, its reinforcement and the device
 Foundation scheme
Depth and the width of the trenches depends on the thickness of the walls, the material from which they will be, the soil and the number of floors of the future building. The smaller the density of the soil, the thicker the walls, the denser the material, and the taller the house, the wider and deeper the trenches need to be dug. It should be remembered that an extra margin of safety does not hurt, but it can hit the pocket painfully and take time and effort. When the trenches are ready, you must wait a month until the ground is crouched.
A pillow under the foundation is made inside the trench. If he, for example, has a width of 40-50 cm, then the cushion will be 20 cm more on each side, that is, the total width will be 80-90 cm. For this, when the foundation trenches are ready, a soil layer is cut off at the base deep into 20 cm and somewhere at the same height. Then there is poured a layer of sand, about 50 mm, which will become a waterproofing. The reinforcing mesh is placed in the pillow (if necessary, 2 can be connected by connecting them together as a frame).
The foundation can be made of different materials:
- foundation blocks;
- concrete mix;
- granite;
- brick;
- any strong aggregate mixed with mortar (for small buildings).
 Foundation blocks
It is best to use foundation blocks, since they are large in size . However, there is one major drawback - a crane is required for installation, and its work should be combined with the delivery of this building material to the site. If this is not done, the crane will have to be hired twice: for unloading, and then for laying in trench blocks.
The blocks are stacked on a layer of cement-sand mortar, about a centimeter or more thick, and the seams are sealed with it. Blocks should be laid with a series of ligation, as when laying walls, otherwise the necessary strength will not be provided. Blocks need to be smeared with bitumen - this is most conveniently done while one row of blocks is laid, and not two or three. When the finished foundation structure is strengthened, you can cover it on the sides with earth, tamping it evenly (manually or with a "paw").
The foundation must be above ground level so that the horizontal insulation, which will be between it and the wall, can hold back moisture (usually these are several layers of roofing material, and for seismic zones - a cement-sand screed 1: 3).
Also, to protect the strip footing from dampness, a blind area is made, at least 1 meter wide. Pre-prepared site of clay with a thickness of 10 cm, which must be tamped. It should have a slope from the house, which will ensure the removal of precipitation.
Video: behavior of the strip foundation in different conditions
Photo
 Layout of the Foundation
 Trench for the foundation
 After finishing the trenching, construction of the formwork
 The permanent formwork of the EPSI for strip foundations
 Decking under the pile-foundation foundation
 Preparation for pouring of the pile foundation
 Reinforcement of the strip foundation
 Tape foundations in formwork with struts
 Tape foundations for the porch
 Finished strip foundation
Search
Related Articles
Laying parquet boards diagonally (photos and videos)
A parquet board is a multilayered material, the way of laying of which depends on the appearance of the room. Can be made laying floorboard diagonally, along or across. Diagonal styling is much mor...
How to choose a gas meter - the right choice of gas meter

The gas meter is a special meter. The cost of gas is constantly growing, so the need arises for organizing an accurate accounting of the consumption of gas resources. A gas meter is capable of measu...
production and assembly of the design, cheap and beautiful (photos and video)

Practical use of space on the balcony can be achieved by installing a comfortable and spacious closet there. Virtually every apartment has a huge amount of things, which is not so easy to find a pl...
production, drawings (photo and video)
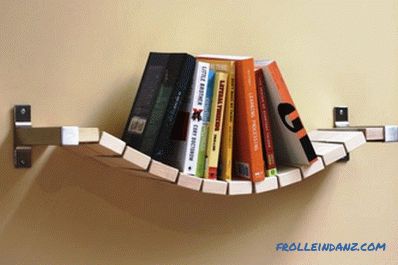
Self-made furniture will create an atmosphere of individuality, originality and convenience in your apartment. By completing your own wooden shelves, you will be able to embody your preferences, se...
Gable roof system - how to make a truss system
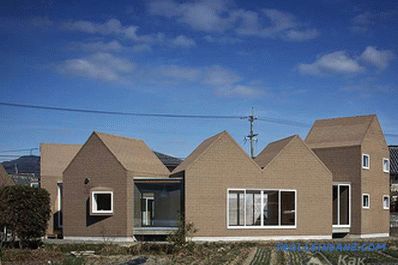
The gable roof due to its simple, reliable and presentable construction has been popular for many years. Depending on the slope of the slopes, it is used in regions with different amounts of precipi...