Practical use of space on the balcony can be achieved by installing a comfortable and spacious closet there. Virtually every apartment has a huge amount of things, which is not so easy to find a place to store. In order not to overload the space of the apartment, it is advisable to place these things on the balcony. For organized storage of various household items is best to use the wardrobe on the balcony with your own hands.
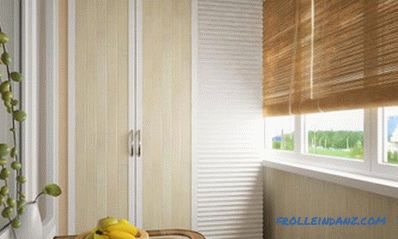
With the help of the cabinet, you can significantly save free balcony space.
Preparing the balcony for installing the cabinet
Before you make the wardrobe on the balcony, it is recommended to examine the room itself. If the loggia is not sealed, wind, humidity and other effects of atmospheric phenomena penetrate through the many cracks, then the cabinet is unlikely to serve in such conditions for a long time. Its various elements will crack and be deformed, the doors will no longer close. This should be taken into account and ensure satisfactory operating conditions for the future product.
In addition, attention must be paid to the quality of the floor. It is best to lay tile, you can use waterproof laminate or linoleum as a floor covering.
It is not recommended to make an oversized cabinet. Firstly, it will block access to the light in the room, and secondly, it will create an excessive load on the balcony slab.
Manufacturing blanks
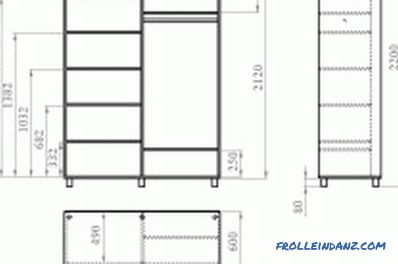
Drawing of a balcony cabinet.
Before work, you need to think about what things will be stored in the cabinet and to what extent. This will allow to determine the basic parameters: height, number of shelves. The recommended cabinet depth is no more than 60 cm, and the optimal width should be the corresponding width of the balcony. It is best to make the highest cabinet - from floor to ceiling. This will allow you to use a small space as efficiently as possible.
The design features of the cabinet in each individual case, the owner can choose independently. Convenient option can be considered divided into 2 parts cabinet. On the one side of the partition - shelves for storing small items, and on the other - free space for large items with 1 shelf in the upper part.
You can use the universal parameters by adjusting them to the size of your balcony:
- depth - 60 cm;
- width - 120 cm;
- height - 240 cm;
- width of the right and left sections - 57.6 cm;
- height of shelves in the section for small items - 36.8 cm;
- height of the shelf in second section - 34 cm.
As an option, you can make shelves of different sizes, depending on what is stored on them. For the manufacture of doors, it is best to turn to experts who will make rolling shutters or blinds that are comfortable in this case.
From materials you will need to stock up on the following:

Tools for making the cabinet to the balcony.
- Laminated chipboard waterproof 16 mm thick;
- wooden bar section 4x4 cm for the frame;
- louver or roller blinds;
- Fiberboard for back wall;
- metal corners for making connections;
- dowels, screws, nails.
Chipboard can be cut at home with a jigsaw. But in this case it is necessary to be prepared for the fact that there may be irregularities and significant chips in the edges. It is better to contact the company that will perform cutting on specialized equipment. In addition to the basic material, you also need to stock up on tools:
- a wood saw;
- a drill with wood and concrete drills;
- a hammer;
- screwdriver or screwdriver;
- tape measure, ruler, level, pencil for marking.
For novice craftsmen who have never encountered furniture assembling, it is recommended to prepare all the details of full size cardboard and practice on them.
This will prevent material damage.
Assembly of the structure
It is necessary to assemble the wardrobe on the balcony with your own hands in stages. The sequence of work will be as follows:
- The markings for the frame are applied to the upper and lower plates of the balcony.
- The timber for the frame is attached to the marked places. As a result, it is necessary to obtain 2 rectangles from a bar on the ceiling and on the floor of the same size opposite each other.
- The side walls of the future cabinet must be screwed to the upper and lower transverse bars. For this, screws are used.
- The cabinet floor is bolted to the bars.
- A ceiling plate is screwed to the frame. If there is a backlight in the cabinet, then in the ceiling plate before fixing it is necessary to drill a hole for the lamp. In the gap between the ceiling of the balcony and the cabinet can be placed wiring.
- With the help of the corners, the internal partition between the side sections to the ceiling and the floor is fixed.
- A side bar is screwed to the side looms of each section, which will serve as a stiffener.For fastening angles are used, which are fastened with screws.
- Metal shelves with self-tapping screws are screwed on the shelves in both sections.
- Roller shutters are fastened to the top bar or blinds are installed. If you decide to make hinged doors, it is better to use plywood, as it is easier than chipboard. Each hinge will require 3 loops.
The wall behind the cabinet can not be decorated. But to create a more aesthetic appearance of the cabinet, you can make its back wall of fiberboard. It must be installed before the main installation.
All wooden construction elements must be varnished or painted. You can use the cabinet after drying the decorative coating.
Thus, a cabinet for a loggia can be made with your own hands even without the experience of assembling furniture. Such designs allow you to store various necessary household items for which there is not enough space in the apartment. Work does not require any specialized tools or inaccessible materials.
Didn't find the answer in the article? More information on the topic:
