When thinking about a major overhaul, you will certainly encounter the need to change the floor. Now become self-leveling floors and 3d floors. In this article we will tell you how to make a self-leveling floor with your own hands, give step-by-step instructions for pouring, and also show you the video and photo.
Laying technology
") 3D floors - dandelions
3D floors - dandelions
Polyurethane floor decorative coating is different from a usual bulk floor the image applied on it.
The drawing is applied on a base, on top of which a polymer layer is poured. In this way, a three-dimensional image effect is achieved, and the depth changes due to the thickness of the final coating. What will be depicted on the floor, you choose yourself, based on personal preferences and imagination.
It will be optimal to entrust the process of making such a floor to professionals, but with exact adherence to technology you can cope on your own.
The technology for laying a three-dimensional floor is almost the same as making a standard self-leveling coating with small nuances and corrections and consists of the following processes:
- Base preparation.
- Primer.
- Alignment.
- Base coat.
- Drawing drawing.
- Fill the finish layer.
- Varnishing.
Preparing the base
") Preparing the floor for 3D
Preparing the floor for 3D
For installation three-dimensional self-leveling floor required pre-prepared concrete screed.
Step-by-step instruction:
- The concrete base is processed with a grinding machine, large bumps are cleaned using chisels.
- All irregularities and potholes are filled with cement or epoxy;
- At the end of the repair work, the surface is cleaned of debris and dedusted by vacuum cleaner.
There should be no greasy stains on the surface, otherwise it will lead to flaking of the bulk coating.
Primer
") Primer floor brush
Primer floor brush
") Priming the floor with a roller The surface is primed after it has been cleaned. For this purpose, special compositions are used, which are able to fill all gaps and gaps in the concrete base. Thus, better adhesion of the polymer floor to the base is provided.
Priming the floor with a roller The surface is primed after it has been cleaned. For this purpose, special compositions are used, which are able to fill all gaps and gaps in the concrete base. Thus, better adhesion of the polymer floor to the base is provided.
The primer is applied using a flat brush, spatula or roller with a short bristle. The primer is applied in two layers, before applying the next layer, the first one should dry well.
After the end of the process, the surface should be left for about 6 hours, and only then proceed to the application of the base polyurethane layer.
Coating with base coat
")
") Leveling process for flooring When making a three-dimensional coating as a base coat can be floor screed or polymer blend. Due to its special properties, the polymer coating is the optimal basis for drawing and mounting a 3D floor.
Leveling process for flooring When making a three-dimensional coating as a base coat can be floor screed or polymer blend. Due to its special properties, the polymer coating is the optimal basis for drawing and mounting a 3D floor.
If you wish to install a self-leveling floor using natural and artificial materials, the base coat will serve as a background, and according to its color and quality of installation, special attention should be paid.
The polymeric basecoat is applied as well as a normal polymeric floor. The main requirement is the absence of air bubbles and evenness of the surface. The evenness of the surface is achieved with the help of the rule and periodic inspection of the building level.
Drawing the picture
") Drawing the picture on the floor
Drawing the picture on the floor
The picture is applied to the prepared base layer using one of two ways: painting or sticking an image. Drawing an image is a more expensive option and is performed with acrylic or polymeric paints that are resistant to UV light. The services of the artist will cost you much more if you yourself do not have artistic talent. In this case, your gender will be unique and individual.
After applying the image, wait until it is completely dry before applying a protective layer.
The most popular method of applying a pattern on a polymer base is considered a sticker. This is done by graphically processing the selected image and printing it onto a carrier, in the role of which is banner fabric or vinyl film.
") Self-leveling floors - bubbles The printout of the design can be carried out at the printing house.
Self-leveling floors - bubbles The printout of the design can be carried out at the printing house.
The image size should exceed the floor area, otherwise under the transparent layer of the polymer coating there will be visible joints that will spoil the entire appearance of the floor.
The drawing of the pattern takes place in several stages:
- The base layer is treated with a primer, which can serve as a finishing polymer coating with a solvent in a 2: 1 ratio. For polymerization, the primer should be left alone for 24 hours.
- It is worthwhile to approach the label of the vinyl image on the base, which must be made without air bubbles in the process. It is necessary to tightly press and smooth the film during operation.
- The image on the banner cloth is fixed on the surface using a thin layer of adhesive.
At this point the drawing can be considered complete.
Filling of the finishing layer
") Structure of the self-leveling floor
Structure of the self-leveling floor
Pre-count the amount of polymer layer to cover the finish base. The most important is the thickness of the future coating, which should not be less than 3 mm. With such a thickness for processing 1 square. meter will need about 4 kg of a transparent polymer mixture.
The process of applying the finishing layer:
- in a 2 liter capacity mix all the components that make up the mixture. Do this work with a drill with a nozzle;
- cover the floor with the printed image with a uniform mixture;
- level the surface according to the technology;
- To get rid of air bubbles, you need to roll applied with a needle roller. This process continues until the floor is set to freeze. As a rule, it takes from 15 to 30 minutes.
Leveling and rolling the floor can be done by moving it in shoes with spikes.
For the surface to gain maximum strength, it must be covered with plastic wrap or foil for several days. The period of complete drying of the floor covering depends on the temperature and humidity in the room.
Varnishing
") Picture of Flower Glade
Picture of Flower Glade
Waiting for the final hardening of the floor and curing the transparent topcoat The surface is treated with a layer of protective varnish.
The lacquer layer is necessary to give the surface additional protective properties that protect the coating from the effects of external mechanical factors, thereby increasing its service life. If you wish, you can choose a varnish that will make the self-leveling floor anti-slip.
Caring for a three-dimensional floor does not require much difficulty. Due to the applied lacquer coating, the surface acquires dirt-repellent properties; therefore, to clean it, it is enough to treat it with a damp cloth or a special sponge. Since the varnish has protective characteristics, you have the opportunity to use cleaning and detergent substances.
If you approach with full responsibility to study the technological process of laying a three-dimensional self-leveling floor, the final result will be original and unique. Thus, you will receive an original floor covering that will make your interior suitable for your desires and taste preferences. Despite the fact that this work requires a lot of effort and patience, the result will undoubtedly justify them and will please you for a long time.
Video
This video provides information about 3D flooring
Photos
") Interesting design of the leveling floor
Interesting design of the leveling floor
") Interior with leveling floors
Interior with leveling floors
") Designer floors
Designer floors
") 3D technology in floor design
3D technology in floor design
") Bathroom floor
Bathroom floor
") 3D floor - a bird's-eye view of
3D floor - a bird's-eye view of
") 3D floor - a seabed
3D floor - a seabed
Search
Related Articles
Art Deco style in the interior
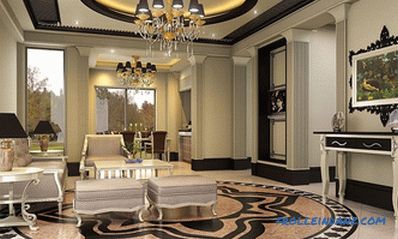
The Art Deco style in the interior was designated in the first half of the twentieth century. Its appearance was preceded by the events of the First World War, a tough economy regime, and the defici...
Summer shower do it yourself + photo scheme
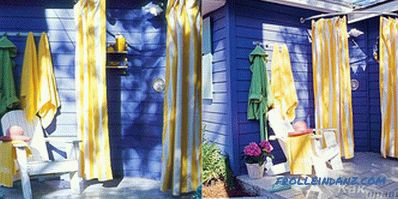
Perhaps, all gardeners know that it is just impossible to do without a shower at the site. This is especially important in the summer, when, after a day of work on the beds, it is necessary to take...
Abyssinian well do it yourself - how to do it (instruction)
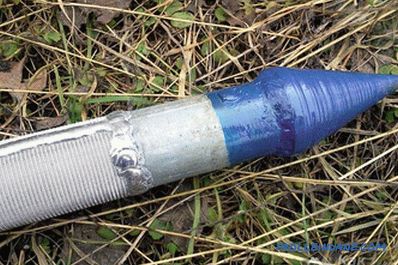
Initially, the Abyssinian well was named after the inventor - Nortonovsky. However, soon this man was forgotten, and since the first such well was installed in Abyssinia, such water sources began to...
How to install a sidewalk curb - installing a curb
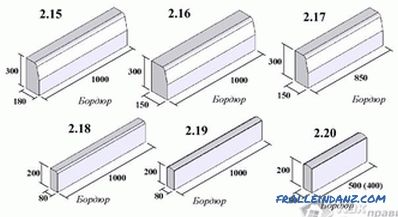
When laying paving slabs, you need to know how to install the curb. That he will bring the appearance of the track or platform to the desired state. To achieve this goal it is necessary to follow a...
Adjustable floors on logs with their own hands
As one of the possible options for arranging rough flooring today, quite often, specific designs, called adjustable floors, are chosen. Arrangement of such structures involves the use of a lag syste...