Regardless of the financial condition and capabilities of a person, there is always the desire to create something with his own hands. With the advent of the child, his needs grow day by day, which can often be satisfied quite easily.
")
You can make a wooden table for two children by yourself if you follow the instructions.
Selection of materials
Before you make a children's table with your own hands, you need to carefully consider the choice of materials. Here not only its reliability is important, but also absolute security.
")
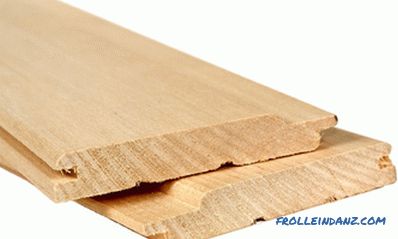
Three boards are fastened with crossbeams with glue or screws.
Laminated chipboard is used most often, and always light, thin options, characterized by low strength properties. Working with him is convenient, and the speed of installation is fast enough. No complicated tools or special training are required, but you shouldn’t claim to originality. The color scheme is almost unlimited, but it will not work to create a natural pattern.
Fiberboard is the most popular, even under conditions of high density. Its price is quite low, but the strength indicators are low. The main advantage is compliance and availability.
Board and timber are usually needed as a supporting structure, but with a skillful approach you can build an interesting tabletop. This material is the highest quality of all, but the end result is far from always appealing to children, since the color range is limited to only natural wood shades. The furniture panel can be attributed to this group, because it possesses a similar set of qualities, but is used only for visible parts due to the very high price.
In terms of complexity, work can vary significantly, as can be seen in fig. 1,2, 3 and 4 (ascending). For the base, it is best to consider a complex option, since having accurate skills in complex actions, it is not difficult to combine them into simple ones, and it is better to use chipboard because of its high popularity.
Sawing and assembling
")
The legs are fastened with screws close to the crossbars.
Tools and materials:
- jigsaw;
- screwdrivers;
- chipboard;
- furniture screws;
- screws;
- tape measure.
After you have managed to decide on the material and the finished product, you need to start working on making the table. For this work, it is better to purchase 2 LDSP plates that differ in color coating (in this case, white and blue), but it all depends on individual preferences.
")
The cross-pieces for the seats are fastened with screws to the legs, positioned strictly horizontally.
The cut itself looks like this:
- main bearing plate - 39 * 40 cm;
- additional bearing plate - 38 * 40 cm;
- back panel - 10 * 50 cm;
- worktop - 42 * 60 cm;
- shelf - 10 * 36 (2 pcs.), 10 * 25 (2 pcs.) and 30 * 36 cm.
When assembling, special furniture screws are used, with which you should seize each joint 2 times. Before screwing in, a small diameter hole is made, after which a final fixation occurs. If this is not done, then the plate will be split with high probability.
It is not necessary to fix the shelf, and we do it separately. At the upper edge, which will be located at the open part of the table top, a rail is fixed, and a similar rail is fixed on the reverse side from the bottom. With such a diagonal fixation, they are not visible, but there is no chance that the shelf will fall off.
As a result, it turned out to make a table with your own hands, but it has a small roll, which is compensated by 2 rollers. Fixation depends on the manufacturing plant - bolts with nuts or screws. When using bolts, you need to cut off the excess threads, and choose nuts with a capsule at the end, so that the child will not be able to catch on them.
Completion of work
")
The table is turned over on its legs, the seats are attached to the crossbars with screws and fixed with wood glue.
Tools and materials:
- mallet;
- plastic edging;
- knife;
- furniture plugs;
- glue.
After you have managed to make a table with your own hands, you need to finally shape its appearance. Usually paper or polymer edging is used for chipboard ribs, but in this case an exception must be made so that the child does not have the opportunity to remove it. With the help of a milling machine, grinder or jigsaw, a small groove is made exactly in the center of the plate throughout its length. The depth of the groove is 2-3 mm, and in order for it to go out smoothly, you need to initially draw everything out. The plastic edging is driven into the groove of the mallet to the limit, and the end is trimmed and carefully polished with light movements with an emery paper.
At the very end, you need to close all furniture screws with special slips.But taking into account the purpose of the furniture, the overlays are planted on glue on metal or wood. Clay should definitely be allowed to stand, since some brands require 24 hours of exposure for full effect.
A small nuance, but significant enough: if you want to form a pattern in a solid plate, then with a drill with a drill 1-1. 3 cm a hole is made away from the edge of the pattern, after which the desired pattern is cut with an electric jigsaw.
Anyone can make such a table, but you should always be attentive to the material, since the child should be comfortable using this piece of furniture.
The low mass and the presence of rollers will allow the child to easily turn the table on his own in any convenient direction.
Didn't find the answer in the article? More information on the topic:
-
")
How to repair the stools with your own hands
Do-it-yourself stool repair: basic repair options for individual parts. Repair legs: installation with glue; thread restoration and improvement of the old thread. How to repair a seat.
Search
Related Articles
The foundation for a garage with your own hands
Garage construction is troublesome, but partly pleasant. At the very least, everyone who is passionate about construction works can enjoy the process itself. The construction of the garage begins, o...
How to lay a massive board: tools, materials, technology
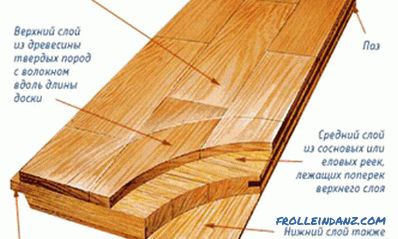
A massive board resembles a parquet according to its external characteristics and acts as one of the most durable materials used to decorate the floor covering. The array is different from the parq...
preparation and selection of the coloring composition
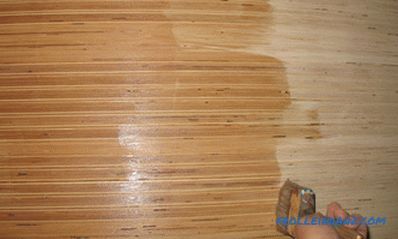
Plywood in modern construction and repair is used quite often, so painting plywood is a very topical issue. The peculiarity of this material is in the method of its production. For its manufacture...
Interior living room in a private house - 53 ideas for inspiration
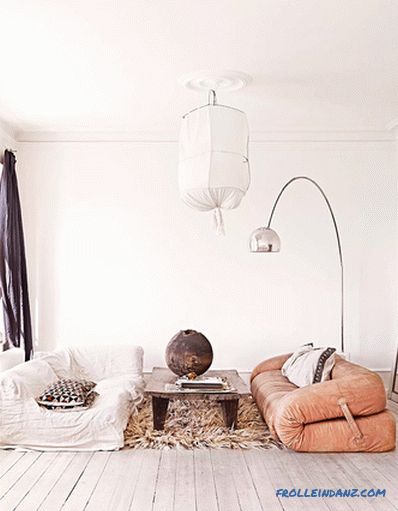
What does the living room of your dreams look like? Do you like the simplicity of the laconic Scandinavian style? And the comfort of the Danish style Hugge? Or maybe you like the eclectic combinatio...
tools, materials, work order (video)
For the installation of wooden lining their own hands do not need to be a specialist in wood processing. It is enough to have the skills to use some tools that are often used in everyday life....