In order to elevate your own personal plot, you often do not need a lot of investments. Comes to the aid of imagination and the ability to do anything with their own hands. This category includes garden furniture. It can be presented in various versions: from single chairs and benches to complete sets, which invite family and friends to rest.
")
Making garden furniture with your own hands will make it possible to turn into reality any design ideas, as well as create additional comfort on the territory of your site.
Let us take an example of how to make wooden garden furniture with your own hands.
Tools required:
")
Tools for making garden furniture.
- Gauges: square, tape measure, pencil.
- Saw-hacksaw.
- Jigsaw.
- Drill, screwdriver, drill set.
- Carpenter glue, fasteners.
- Sandpaper of a different fraction or sanding machine.
- Wrench suitable for fasteners.
- Bulgarian.
- Paint coatings.
- Brushes, rollers, sprayers.
Wood is used as a material. We chose the manufacture of a country set - a table and a pair of benches. It is quite functional: you can set the table, arrange blanks, make something. In general, the kit will not be superfluous. So, proceed to the installation.
Garden bench with a back
")
Scheme of a garden bench.
If the home worker has already set himself the goal of making something on the site, he has probably already learned a lot of information and knows that this piece of furniture is a pair of canvases fastened together in bars. This is in brief. Now more: first, templates are made to the desired size. For the length we take 150 cm without armrests, the width of the seat will be 350 mm. Having prepared templates from plywood, they can be laid on the material, clearly tracing all the contours. The electric fretsaw cut out the details.
At first it is supposed to make a frame for the subsequent upholstery. To do this, you will need bars with a section of 5 * 7 cm. If the legs are something architecturally exquisite, you should also use the template, having previously drawn each detail separately. Basically, the frame involves armrests bonded to each other with bars. Therefore, the bearing elements should be at least six, depending on how strong the structure should be. If the bench will serve for children's games, it is possible to reduce the number of bars.
")
Garden bench with backrest.
So, prepare the armrests. They look like the English letter h. All sawn elements must be immediately processed either with emery paper or machine. Then holes are drilled into them for fastening and for inserting reinforcement. An important rule: the load-bearing elements are bolted, the reinforcing elements are screwed, and the decorative elements are mounted on glue. In the armrests also drilled holes to strengthen the bottom. To do this symmetrically for both parts, you should lay one on top of the other and thus do the work with a long drill.
Now you need to start working with long bars.
A chisel in the armrests selects slots for the elements.
If you just screw the structure onto the bolts, the tree will not receive adequate strength. Choosing grooves, it is necessary to combine the timber with its specific location each time so as not to do careless work. Such grooves will need multiplied by two the number of bars on both sides of the bench.
Then the frame is assembled. If everything satisfies, then you can finally fasten the design clean, again communicating with the rule specified above.
Seat and back. If you make a bench of the classic type, a team of individual rails, then each will have to be specially processed. To do this, use a machine with a grinding wheel. Then the bars are stuffed on the frame. It should be noted that the thickness of such rails should not be less than half the width of the support bars. If the garden owners decided not to bother with difficulties, then a beautiful multi-layer plywood is purchased, the sheet is cut according to size, and the cloths are screwed to the frame - cheap and cheerful.
The bench is ready, but if you use it immediately, then it will stand a maximum of one season. To extend the service life, it is necessary to process it with all kinds of protection and paint it. Although the natural pattern of the tree is very beautiful. You can simply emphasize the stain or varnish. To work with coloring and coating compositions it is necessary to apply measures of personal protection: gloves, respirator.
")
Garden table layout.
First, a composition protecting against rotting, i.e., water-repellent, is placed on the tree. It is worth knowing that fire, bio and other components in one bottle may not work.From the basic knowledge of chemistry it is known that when mixing one with another, third substances are obtained. Thus, it is not necessary to be under a delusion that, having bought three protective equipment for the price of one, you solved all the problems at once. The procedure should be as follows: moisture protection, insect repellent, fire retardant, that is, a means against fire. Each layer needs to be absorbed properly, and only then can the next be applied. Decorative processing is carried out only after the protective compositions.
Here, in fact, is all the manufacture of the bench.
Practical guidelines for making the table
First make the supports. They will be in the shape of the letter "X". For this, boards of good thickness, 4-5 cm, are used. The ends of them are sawn at an angle so that the pair is one plane with the table cloth. To combine them, in one of the legs is chosen a groove width corresponding to the board. The support is bolted. Also come with the second pair. It is recommended to process the supports before work, pre-drill holes in them for metal fastenings, in order to then apply the decorative composition, without fear that the corrosion from the bolts will in any way affect the wood.
Now the canvas. It can be any: consist of separate boards or solid plywood. And still in demand framed canvas. It is only important that it rests steadily on the supports. When the canvas is ready, it is screwed to the supports, while laying on the ground, it will be easier to work. After the installation is completed, the finished table is turned over and processed.
Natural garden furniture with your own hands
You are used to the concept of furniture as objects made of wood. However, the creative got here. Now come into fashion tables and chairs, made by nature itself. Well, with the participation of man, of course. These are some mounds of ornamental grass overgrown with grass, similar in appearance to household items. However, they will not be able to take this form on their own, so they should be helped. So, it will be necessary:
- Plywood.
- Natural soil.
- Seeds of fast-growing lawn.
The manufacturing process is very fast. Outlines of furniture are cut from plywood: a chair, a table. To keep this whole thing on the ground, grooves for inserts are sawed through. "Furniture" immediately placed in designated areas. Then the ground falls asleep between the plywood circuits. This should be done carefully, tamping layers tightly to stiffen.
After that, the lawn seeds are evenly poured on the last layer, and the whole thing is covered up with another layer of earth. Then the future furniture spills water from a hose with a spray. A sort of shower, after which the "furniture" evenly covered with grass. Of course, such crafts are decorative in nature, but with success, over time, you can relax. Examples of such work can be seen on the net.
Create anything. Using a tree or other material, you can decorate your own site so that the neighbors will ask you for advice when they see such beauty. Well, you can be proud of yourself, each time looking out the window of the garden house.
Didn't find the answer in the article? More information on the topic:
-
")
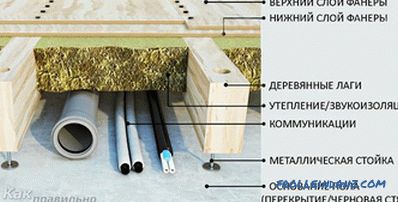
How to make a wooden floor on the ground?
Wooden floor on the ground: the device of the coating, the required materials and tools. Technical features of the work stages. The process of mounting your own hands.
Search
Related Articles
Do-it-yourself conditioner repair - how to repair an air conditioner

Do-it-yourself air conditioner repair is not the easiest thing. After all, not every master is familiar with the device of climate technology. However, today many of these systems have special indic...
calculations and determination by tables (video)
Purchase of sawn timber is accompanied by calculations of their quantity. At the same time, most sellers voice the cost of wood in cubic meters, especially if the question concerns the type of ma...
Adjustable floors on logs with their own hands
As one of the possible options for arranging rough flooring today, quite often, specific designs, called adjustable floors, are chosen. Arrangement of such structures involves the use of a lag syste...
Do-it-yourself ventilated facade - design features of a ventilated facade
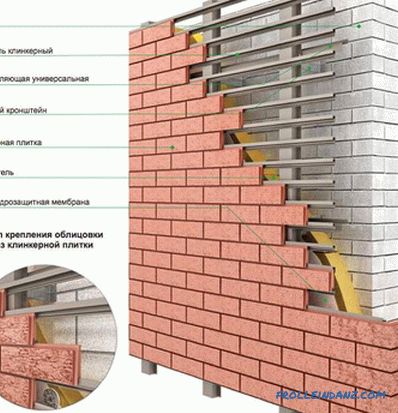
There are many options for finishing the facade of the house, and the modern construction market provides the widest range of materials for the implementation of pans. In addition, we must not forge...
10 best pressure washers

The characteristics of any equipment is the main criterion by which the choice is made at the time of purchase. But there are a lot of additional questions that can be answered only by those who per...