Do you want to visually increase the space and height of the room? In this case, the ideal option would be to make a multi-level ceiling. Do not think that this work is only under the power of professionals who take a lot of money for it. If you delve into the installation technology of this design, then you will understand that this work is within your power. Although in this case will have to sweat, but the result will satisfy you completely. So, let's get to work!
What to do and why?
 Materials used
Today there is a wide variety of building materials, which, in fact, can be used to make multi-level ceilings. For example, one of the most popular and more affordable materials is drywall. It is about this material that will be discussed further. But you ask: why should I spend money on this type of decoration, plus my own time? After all, before doing something, you need to understand why you need it. So, what will this drywall construction give you?
Advantages:
- Thanks to it, you can visually increase the overall space of the room, moreover, it will geometrically rearrange the look of the room.
- You can easily close some defects of the draft ceiling, as well as put communications in it: wiring, ventilation, plumbing and even sewage.
- Zoning of a large room without partitions. For example, it is possible to distinguish one or another figure with different functional areas - kitchen, living room, dining room, etc.
- Unique ways of illumination at different levels are created.
And these are just some of the reasons why you should choose this type of treatment for your ceilings. Now take a closer look at the process of manufacturing and installation.
Getting started - the work of the master is afraid!
 Design design
Like Any other work, installation of multi-level ceilings should begin with preparation. Before you decide to make it a project, it is important to understand what function it will perform. Here are some of them:
- Highlight the functional areas of the apartment.
- Zoning of space.
- Emphasizing the individuality of the room.
- Decor element.
- Screen to hide communications.
Whatever the function of such a ceiling, it is necessary to make its sketch at the very beginning.
When creating it, be sure to consider the size of the room. A large figure in a small room can diminish its value. It should fit perfectly in the size of the room. For example, the project can be implemented using computer programs. If this is not possible, you can take a large sheet of paper. Here, everything will depend on your imagination. Do not follow the patterns that you see on the Internet. Try to approach the creation of a sketch creatively and individually.
The frame - the base of the ceiling
 The frame of the multi-level ceiling
For the manufacture of the frame is used galvanized profile. Before installation, mark it up on the ceiling. At this stage of work, high accuracy is extremely important. At the same time it is better to use the water level, which will help you accurately establish the basis - the first tier. On the perimeter on the wall beat off the base line. After stuffed UD profile (guide). After a distance of 40 cm, a CD profile is inserted into the guide profile UD. This profile should be fixed directly to the ceiling, with the help of suspensions (or as they are called - crocodiles).
Do not ignore tools such as plumb, level, level and other auxiliary tools. The accuracy of the next ceiling levels completely depends on the accuracy of the first tier.
In those places where the laying of the second and third tiers is planned, the structure should be strengthened. If the subsequent levels will have minor dimensions, then the enhancement should not be carried out. As soon as the first stage is completed (the GCR is sewn up), the figure of the second and third layers can be transferred to the ceiling itself. After using the same profiles and suspensions you create the necessary line. Respect proportions and sizes. Always monitor the horizontal structure, checking it with measuring devices.
The final touch!
 Plasterboard coating
You can safely say when the frame ready, half done. After all, headlining does not take you as much time as designing and manufacturing the frame itself. However, before you can sew up each level with drywall, you should not forget about lighting. To do this, you need to lay wires to the places where you plan a lamp or chandelier. Illumination will give the whole figure a gorgeous look. After plastering with a special crown, you can cut holes for the future fixture.
 Installation of the stretch part of the ceiling
For the installation of the vertical part of the structure, namely the end parts, it is necessary to properly measure the desired width of the strip. For example, it can be pre-cut on the floor, or directly on the ceiling. How? First, fasten a strip of larger GCR, and then with a knife or a special hacksaw, cut out exactly the size. In this case, the reference will be the profile itself.
If curved strips are provided, wet the drywall and after 15-20 minutes it can be bent into any shape. At the same time, carefully bend it and screw it in parallel.
This work is best done by two people. When everything is ready, it remains only to procure. Glue the corners on the corners. If it is curved, then buy a plastic corner. If straight, then aluminum. Always seal all seams with special tape and putty for seams. After grouting you will only have to paint it. So, your ceiling is completely ready!
Photos of multi-level structures
 Bedroom
 Office
 Kitchen
 Living room
 Children's room
 Dining
Use your imagination
 Unusual design
There is no limit to imagination to create a multi-level ceiling. This article dealt exclusively with drywall. But there are building materials that can also be used. For example, some combine them: drywall and suspended ceiling. Look for the most original ideas. You can share them with us. Write in the comments to this article, what difficulties you encountered and how you overcame them. Your experience will help many more, so we are waiting for your participation!
Read also:
- how to hang the chandelier on the hook;
- how to glue the ceiling plinth to the wallpaper;
- How to glue meter vinyl wallpaper.
Video
Search
Related Articles
Country gazebos do it yourself (photo and video)
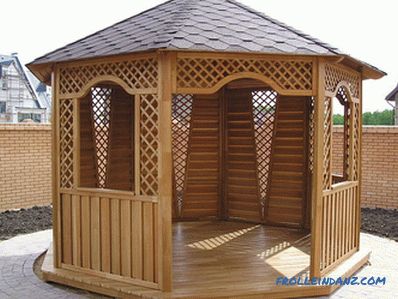
Perhaps the only place for a modern person where you can be in nature every week is a summer cottage. On it you can break a small garden, plant flowers. It is in silence, far from the noise of the...
How to increase the pressure in the water supply

One of the pressing problems of owners of country houses or apartments located on the upper floors is the pressure in the plumbing system. The lack of pressure leads to the fact that a thin stream o...
What should be the slope of the sewer
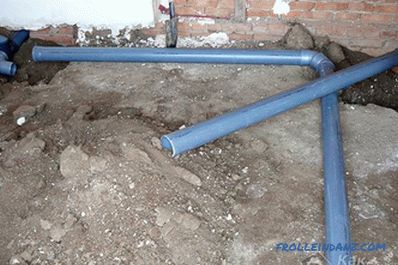
For those who have not encountered the laying of sewer pipes, it may seem that everything is elementary and simple, but it is worth noting - it only seems that way. The question of what should be th...
How to choose a water meter for an apartment (water meter)

Installing a water meter has long been considered not a whim, but a necessity for many families, because thanks to this the owners have a great opportunity to control water consumption, which leads...
cover removal and frame repair (photo and video)
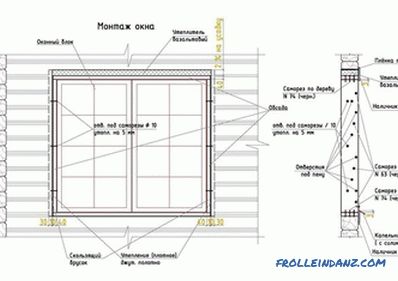
Despite the popularity of modern plastic windows, traditional frames, made of solid wood, for many people remain the best option for protecting an apartment. But in this case, the house craftsmen f...