Laying linoleum on a wooden floor is considered a task that even a person who does not possess special skills can cope with. To do this, it is enough to study the rules and subtleties of laying this type of coating. Let's take a closer look at what needs to be done to replace the floor covering that has been used when the wooden floor acts as a base. But before you start exploring the question of how to lay linoleum on a wooden floor, we note the main parameters of the coating itself.
Free laying of linoleum on a wooden floor can be done in rooms up to 20 square meters.
Characteristics of a linoleum coating
Linoleum is a popular type of finish for a universal purpose floor, equally successfully used in everyday life, at work, and in offices.
For its production, raw materials of natural origin are often used:
- jute;
- tree resin;
- crust flour;
- lime powder.
Varieties of material depending on the components:

Varieties of linoleum in terms of performance characteristics.
- Glyphthalic. Its main components are alkyd resins, mineral fillers, pigments. This coating is available in a wide color range. The surface can have a pattern, it can be just plain. The coating with alkyd constituents has enhanced thermal insulation and wear resistance properties. Brittleness - a significant lack of material.
- PVC linoleum. Make it from polymers. The most common type of coating. It may have one layer and several, fabric or heat insulating base. Its disadvantage is that when the temperature decreases, elasticity is lost.
- Relin (rubber based coating). The composition consists of small pieces of rubber and bitumen, the upper layer is represented by artificial rubber. Due to such characteristics as increased moisture resistance and elasticity, has found wide application for the conditions of industrial areas.
- Koloxylin (linoleum with nitrocellulose). It has excellent elasticity and moisture resistance. The coating has a single layer with an attractive shiny surface. Flammable, household use is not recommended.
There are also varieties of linoleum:
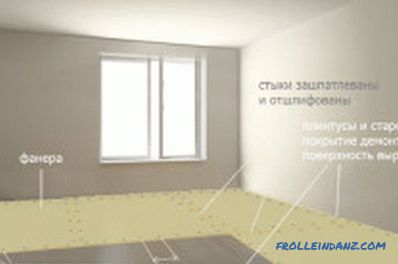
Surface preparation for laying linoleum.
- By performance: for living space, household linoleum on PVC base with medium strength suffices; a semi-commercial one, which has more durability than the first option, is suitable for the hallway and kitchen space.
- For elasticity and softness: for an apartment and a house, linoleum will be optimal, which includes foam and felt, giving it excellent sound and thermal insulation qualities. The foam eliminates shrinkage, is resistant to moisture, so this material is often purchased for laying in the kitchen.
- According to the color scheme: linoleum on a foam base has a wide variety of colors and ornaments. 0.2-0.6 cm - the thickness of the painted layer, the thickness of the protection layer - 0.15-0.7 mm. The latter determines the shelf life of the product.
How to lay linoleum on a wooden floor?
Laying pattern of linoleum on a wooden floor (steps 1-3).
First of all prepare the basis for laying. The aesthetic and operational properties of the material are entirely dependent on the effectiveness of the basic training.
If all the cracks with uneven wooden floors are left intact, they will very quickly appear on the surface of the renewed flooring. Therefore, the elimination of defects on the basis of the tree should be given increased attention.
Also, do not forget that, over time, wooden floors begin to deform, which has a significant impact on the service life. In order to eliminate the influence of such a feature of the tree, a substrate of plywood, fiberboard or OSB is laid on the floor (layer of plates in thickness from 0.5 cm). If the wooden floor is damaged very noticeably, then in such a situation the thickness of the flooring layer should be more than 1.5 cm.
Laying linoleum on the wooden floor: preparatory work
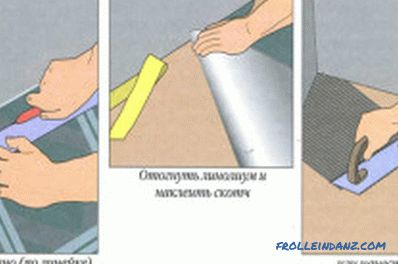
Linoleum flooring on wooden floor (steps 4-6).
- First get rid of the old paint. Its removal makes sense to make a small spatula (15-20 cm wide), while heating the paint at the same time perform building hairdryer. A blowtorch can be replaced by a blowtorch, and not with a worse result. However, no finishing work should be carried out indoors in this case. Because outgoing smoke from burning paint can spoil the finish. If there is neither the first nor the second device, get a special liquid to remove paint.Instructions for its use is very simple: using a brush, the entire surface is painted with a paint with a paint, some time is waited for the reaction to appear, the paint remains are scraped off and the floor is washed with water.
- Then analyze the surface for the absence of defects. Damaged boards are removed, replacing with new ones. Creaking and sagging boards are nailed to logs. Nails sticking above the floor are clogged.
- Every nail in addition is finished off with a dobrain in such a way that the caps go a few millimeters inside the tree. This technique is required before the next procedure.
- The surface is leveled with an electric planer or belt grinder. For this kind of work, a parquet sander is ideal. In the absence of power tools work manual, but the process will become much more tedious.
- Sometimes the cleaning process is not given due attention, so the process of mounting the plates is difficult. Meanwhile, the floor should be vacuumed, rinsed and dried.
- Installation of plywood, OSB, DVP boards. Sheets are attached either by gluing or screwing. The location of the plates are from the corner, always banding 1.5 sheets. If an adhesive method is chosen, then the slab is placed on the floor and its outline is outlined with a pencil. After that, the sheet is lifted, and glue is laid on its contour. The tool (notched trowel, brush or roller) for applying glue is selected on the basis of its appearance. After sizing the contour, the slab is returned back, screwing it in addition with screws with an interval of 40 cm. If the plates are more than 20 mm thick, then glue is not used.
- Following the gluing of the plates, the seams are additionally processed. They are sealed with liquid nails or the composition on which the plates were glued. When the glue dries, the seams are sanded.
Laying linoleum on a wooden floor is impossible without such painstaking preparation. However, only in this case, the flooring will serve for a long time, so it’s not worth it to go round the surface leveling.
Laying linoleum on the prepared base
Sequence of actions:
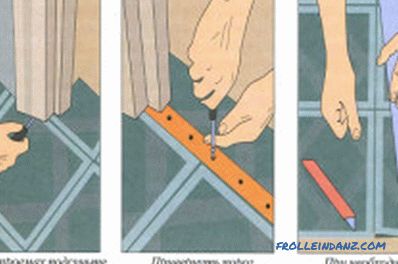
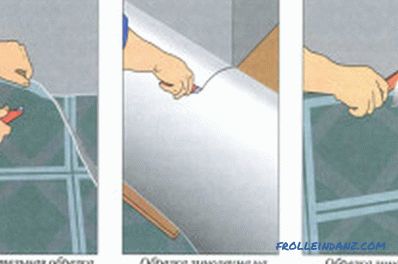
Laying linoleum on a wooden floor (steps 7-9).
- Before directly mounting linoleum on a wooden base, it should be brought into the room in advance and left to rest in it for a couple of hours. So the covering will pass acclimatization and it will be easier to lay it. Then it is spread on the floor surface, trying to align. Irregularities are pressed with special weighting. Important: this stage does not involve cutting the material. The edges are thrown onto the walls and left to lie for a day. Before laying the linoleum on the old floor of wood should find out what are the humidity and temperature in the room. The latter should be above 15 degrees, and heat and humidity indicators at the level of 40-70%.
- Making calculations is the next stage of work. All you need to find out is the width and length of the room. Here it is important to consider that measurements should be carried out in the widest and longest parts of the room. All existing recesses and grooves in the walls, for example, a niche for the battery, are also taken into account when calculating the values. The total length is increased to the depth of such a notch. To the calculated amount add another 10 cm for stock. For a pattern with an ornament take into account the fit.
After the calculations have been made for the material, they proceed to the final stage of work.
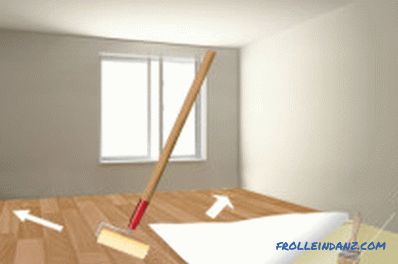
To remove air from under the canvas, use a special heavy roller or wooden block.
The tools you need to do this:
- iron ruler;
- knife;
- linoleum roller;
- paint roller;
- trowel with teeth;
- brush;
- glue.
After picking up the tool, proceed to stacking.
Linoleum is attached to the wooden base exclusively with glue.
The options "dry" or double-sided tape should be excluded, since this will greatly shorten the life of the material. If for any reason linoleum is laid, collecting it from several parts, then the joint is placed in the center of the board.
Spread linoleum over the entire area, cut out the space for niches and cut through the corners. Then straighten and cut, stepping back from the surface of the walls about half a millimeter.
Then begin to glue. Bend one half and put adhesive on the surface of the floor, spreading a uniform layer with a roller, notched trowel or brush (depending on what they use). Then return the bent part to its former position and thoroughly smooth the roller from the middle to the walls. By analogy, the same procedure is carried out with the second half of the material.
All, the process is complete. Make a pause for the glue to dry. After the glue dries, they install the baseboards and place the furniture.
Didn't find the answer in the article? More information on the topic:
-
Making a table in the bath with your own hands
It is easy to build a table in a bath with your own hands. Materials for the table use different, often take those that are on hand. Used wood has a number of requirements.
