We present to your attention an article on how to install a shower cabin yourself. Most apartment owners can handle this job on their own if they use the right materials, tools and methods.
Today the market has a large selection of showers. There are, for example, cabins, which are delivered in an already assembled form. They are easy to install, but they are not popular because of their size (they simply do not pass through the openings of typical doors). Cabs that require assembly, have become more common, and we advise you to pay attention to such models, and from our article you will learn about the method of their installation.

To install a shower cabin, you need the following:
Materials:
- shower enclosure complete (or separate pan and frame with walls);
- siphon with flexible connection pipe;
- elbow;
- silicone sealant .
Tools:
- adjustable wrench;
- gun for silicone sealant;
- drill and drill;
- spirit level;
- tape measure; pencil;
- protective gloves and goggles.
Tips:
- before starting work, read the manufacturer's instructions;
- make sure that the floor is the mounting position of the shower enclosure is absolutely level;
- insulate the junctions of the drain elements;
- seal the junction between the frame and the pan.
Installing a shower tray pan
Installing a shower tray is not a very difficult task, especially if you pay attention to several important aspects.
1. First, before installing the shower tray, make sure that the floor is even. Small deviations can be negated by adjusting the height of the legs.
2. Secondly, you must place the drain in the floor in the right place, since the hole in the shower stall must be a short distance from it. If for some reason compliance cannot be achieved, the project will still be completed with additional adapters and a long flexible hose, but this will take more time and effort.
3. Thirdly, you must properly connect and seal all the elements, otherwise water may leak when using the shower.
It should start with the purchase of tools and materials that you will need during the implementation of this project. You will need an adjustable wrench, spirit level, silicone sealant and a gun for its application. We recommend using only high-quality materials, otherwise you will have to do a small repair every few weeks.

Gun for applying silicone sealant.
As a rule, they try to make the drain hole of the pallet located exactly above the hole in the floor leading to the sewer pipe. In our case, the bathroom was already tiled, and there was no wish to open the floor in order to transfer the already made drain to the right place. But even out of difficult situations, you can find a way out, so we bought a flexible hose and elbow. Using these elements, we will connect the shower drain to the sewer. This may take a little longer, but in the end no one will feel the difference.

Drain hose-accordion and sewer knee at an angle of 90 0 with a diameter of 50 mm.
Using a spirit level, make sure the floor surface is even. It is better to do this before facing the floor tile.
If it turned out that the floor in the place where the shower stall will be located has a slope, we recommend pouring a layer of self-leveling coating for leveling. In the meantime, you carefully read the instructions of the manufacturer of the shower and familiarize yourself with the installation methods.

Drain hole in the floor.
The next step of the project is to connect the flexible hose with the elbow pipe and seal the place of their junction with silicone. If the flexible hose enters the knee tightly enough, then sealing will not be required. Allow the silicone to dry before connecting the hose to the shower tray.
 Sealing the joint between the hose and the elbow.
Now look at the shower tray. We installed a high base shower tray, but the installation methods are the same for any type of shower tray. As you can see in the photo, the base has several adjustable legs, allowing it to be leveled during installation.
Pay attention to the drain hole. As a rule, try to make it located above the drain in the floor. In our case, this is not the case, therefore, to connect them, we needed a rather long flexible hose.

Feet and base of the shower cabin.
Attach the siphon housing to the drain hole of the sump, then secure the flexible hose to the siphon.

Connection of the siphon and hose to the drain hole of the pallet.
Insert the other end of the hose (elbow) into the floor drain. Make an effort to make the nozzle drown deep enough.

How to connect a shower to a sewer.
It is necessary to connect the drain to the sewage using a siphon. Some models of siphons consist of one flexible hose, from which it is necessary to form a bend of the desired shape and fix it with the help of special tools included in the kit.

A siphon formed from a flexible hose should have a similar bend.
It is very important not to skip this step, otherwise you will constantly feel an unpleasant smell from the sewage system.
As we already mentioned, the shower tray is equipped with adjustable legs. To level it, you need to change the height of the legs with a wrench.
Tip: Turning clockwise will cause a slight decrease in the shower tray, counterclockwise will lead to a rise.

Pallet legs.
Align the shower tray to all its edges, using a spirit level to control. If necessary, adjust the height of the legs using the appropriate key.

Leveling the pallet.
After adjusting the height of the pan and securing it to the wall, seal the gaps between the shower base and the wall with silicone sealant.

Installed shower tray.
Installing the walls and doors of the shower enclosure
You have installed the shower tray; now it is time for fiberglass walls and doors. Shower cabins from this material are gaining more and more popularity due to its flexibility and ease of installation and maintenance.
Installing the walls of the shower - the work is quite complicated, but if you ask a friend to help you, you will definitely cope with it. Before installation, we strongly recommend that you carefully read the manufacturer's instructions. Different showers can differ significantly from each other, so first of all you should be guided by the manufacturer's recommendations.
Tip: Align the frame members at both ends before fastening with screws / screws. In addition, carefully check their plumbness, otherwise you will not be able to subsequently place the glass panels.
Even if you bought a kit that includes a pallet and a frame with panels, check their compatibility. Unpack the wall components, taking care not to damage the glass panels, as they are quite fragile. Before starting work, make sure that you have all the necessary tools - a tape measure, a good drill, a screwdriver and a gun for sealant.

Elements of the framework of the walls of the shower cabin.
The first step in this phase of the work is the assembly and installation of the metal frame. Do not overtighten the screws.
Tip: Before attaching the frame members, check that they are aligned at both ends.

Frame Assembly.
After the metal frame has been assembled, we recommend that you place it on top of the pallet and make sure that they fit together properly. It is good if you have an assistant, as the frame does not have sufficient rigidity until it is attached to the wall.

Frame installation.
Using a spirit level, make sure that the frame posts are truly vertical. After that, mark on the wall the place where you will drill holes for the subsequent fastening of the frame.
Tip: Be sure to check the verticality of both racks.

Marking of places for drilling holes.
Now, temporarily remove the frame to the side and drill holes in the wall. Considering that you have to drill tiles, you must work with great care, otherwise it can easily crack. Use a good concrete drill and reduce the speed of your drill as much as possible. As the depth of the hole increases, gradually increase the speed.
Tip: Before drilling holes, make sure that there are no water pipes or electrical cables in this place in the wall.

Drilling holes in the tile.
With holes drilled, insert plastic dowels of suitable size into them. It is important that the dowels fit the size of the holes, otherwise they will not properly hold the structure.
Tip: Immediately before attaching the frame, apply a layer of sealant onto the face of the frame that will adhere to the wall.

Sealing of the frame with silicone.
Put the frame in place and fasten with screws. Spinning them, make sure that there are no gaps between the walls and the frame.
Tip: Remove excess silicone before it dries, otherwise it will be much more difficult.

Attaching the frame to the wall.
Following the manufacturer's instructions, secure the side panels. Use a screwdriver to install the supplied mounts. Check if the panels match the rest of the structure.

Installation of translucent walls.
After fixing the side panels, your shower should look something like the photo. If you bought another model, you should read the instructions and follow its recommendations.
Make sure that the glass panels are installed correctly, otherwise the shower will not be waterproof. Be careful and cautious if you want to get a professional result.

Walls of a shower cabin.
Install the rollers on the shower door in accordance with the manufacturer's instructions and fasten them with screws. The same applies to door seals and other items that are supplied.
Tip: Ask a friend to help you when installing the door. This part of the work is more convenient to perform together.

Installing clips.
Install the door casters in the channels and check how easily they slide along them. Adjust the rollers if necessary, but do not apply too much effort.
Tip: We have seen many cases where negligent workers simply broke doors during installation. In doing this part of the job, you must be extremely careful.

Door installation.
In this photo you can see the clips placed inside the channel. If the rollers are installed incorrectly, the shower door will not move easily along the walls.

Shower door.
It remains only to attach the door handle to the place and insulate all the seams. Apply silicone sealant to all edges, especially at the junction of the frame to the pallet. We recommend that you hold the gun at an angle of about 45 °. After applying the silicone, swipe it with a wet finger. Wait a little for the sealant to dry.

Handle installation.
If you followed our advice and manufacturer's instructions, very soon you will be able to use the shower for its intended purpose. Agree to wash, realizing that the installation of the shower cabin is carried out independently, much more pleasant.
Source of translation: www. howtospecialist. com
Search
Related Articles
Coffee table do it yourself from scrap materials
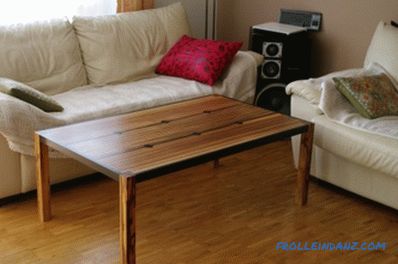
Furniture makers distinguish 3 methods how to make a coffee table with their own hands from natural wood. The manufacture of such furniture is made using a drill, tape measure, screwdriver, nails,...
Bulk floor on wooden floor: features

Most often, the self-leveling floor on a wooden floor is found in wooden-type houses. It is possible that it was built for a very long time village houses or large cottages, built on modern designs...
Loft-style bedroom - 52 interior examples
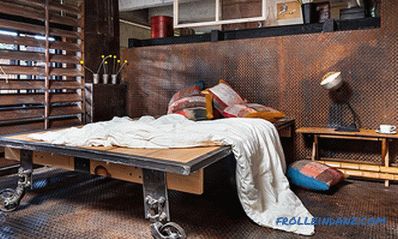
In the past few years, original and stylish, but quite simple and unassuming loft-style interiors have become very popular. Transforming old factory workshops into residential space is no longer a n...
Screed floor do it yourself in a new building

The joy of buying a new apartment can be darkened only by the thought of the upcoming renovation. Rare luck falls to those new settlers whose long-awaited housing received in the new building has n...
Wardrobe with your own hands - how to do it right: drawings, diagrams (video)

Often, a ready-made wardrobe purchased in a store does not fit into the size and interior of the apartment. In this case, you need to solve the question: how to make a cabinet with your own hands...