Does not require special evidence that the drill in the process of work loses the sharpness of the cutting part, that is, simply speaking, it becomes dull. A dull drill doesn’t cause concern until it is needed. Then it suddenly turns out that it is impossible to work with a worn out or blunt drill. It remains only to regret that the geometry and size of the drill were not restored in time. This article will explain how to sharpen a spiral drill bit, as well as a hard taper drill bit for drilling concrete.

How to properly sharpen a spiral-type drill bit
One should not worry about sharpening a drill on a tree, such a drill can work for many months and even years without any sharpening. Unfortunately, this can not be said about the drill for metal, which must necessarily be sharp. That is, you can drill metal with an extremely sharp, well-ground drill.
A sharp creak at the beginning of drilling is characteristic of the loss of sharpness of the drill. A drill that is not sharpened on time produces more heat and, therefore, wears even faster than a sharp one.
You can sharpen the drill on special machines or with the help of tools. Naturally, when possible, it is preferable to do it on special equipment. But in the home workshop of such machines, as a rule, not, so you have to use an ordinary electric grinder with a stone.

The main components of a twist drill.
So, let's consider how to sharpen a metal drill? The type of sharpening depends on the shape that should be given to the back surface of the drill and can be single-plane, two-plane, conical, cylindrical and screw.
The sharpening of the drill is carried out on the back edges. Both teeth (pen) drill should be sharpened exactly the same. Manually making it is not easy. It is also not easy to manually sustain the desired shape of the back face and the desired back angle.
1. Single-plane sharpening of the drill is characterized by the fact that the back surface of the pen is made in the form of one plane. The back angle in this case ranges from 28-30 °. The drill is simply attached to the circle, so that the cutting part runs parallel to the circle and does not rotate, without moving the drill, sharpening is performed. With such a sharpening during drilling can cut out the cutting edges of the drill, which is a disadvantage of this method of sharpening. This is the easiest way to manually sharpen, which can be used for a thin drill with a diameter of up to 3 mm.
2. Drills with a diameter of more than 3 mm are preferably sharpened conically. Manually without skills such sharpening is difficult, but possible. The drill is taken with the left hand by the working part as close as possible to the intake cone, and the right hand by the tail. The drill is pressed against the end of the grinding stone with the cutting edge and the surface of the rear part, and it sways slightly with the right hand, creating a tapered surface on the rear feather face. The drill during sharpening does not detach from the stone, hand movements are slow and smooth. For the second pen, everything is repeated in the same way.

Move the drill bit with the cutting edge to the grinding wheel.

Swing the drill to the bottom, and then up again.
When sharpening, you should try as much as possible to maintain the original shape of the factory surface of the rear part in order to maintain the desired rear corners. If sharpening is done correctly, then on drills with a diameter of up to 10 mm it is quite sufficient. With diameters higher than 10 mm, this sharpening can be improved by trimming the front surface, as shown in the photo:

The point under the front surface.
What is the point of a point? By reducing the rake angle and increasing the angle of the cutting edge, the resistance to chipping increases, which increases the life of the drill. In addition, the width of the transverse edge becomes smaller. The transverse edge does not drill, but scrapes metal in the central part of the hole. In the second figure it is clearly seen that it is shortened here, which facilitates drilling.
For drills with a selected small back angle, the back surface can be further sharpened. The drill is less than rubbing in the hole of the hole with the back surface. See photo:

The undercut is undercut.
In production conditions after sharpening, as a rule, finishing is done, which smoothes the surface, removing small notches. The drill, on which the finishing is done, wears out less than just a sharpened drill bit. If possible, you should do the finishing.
For finishing, it is necessary to use grinding stones made of green silicon carbide (grade 63C, grain size 5-6, hardness M3-CM1) on a bakelite bond, and also circles from elbor LO (grain size 6-8) on a bakelite bond .
Below we present to your attention an excellent selection of training videos by looking at which you can precisely sharpen your drills.
Video: Manual sharpening of spiral drills. A part - 1.
Video: Sharpening spiral drills.Part - 2.
Video: Sharpening spiral drills. Part - 2.
Video: Sewing in the jumper rib. Part - 3.
Video: Sharpening drills is an application.
Video: Sharpening drills is an application.
How to sharpen a pointy drill with taps
A pointy drill may also become blunt. The dull drill overheats during operation, drills poorly and makes a strong screaming sound. Of course, you can change the drill by buying a new one, but it’s better to save and sharpen it with your own hands. To do this, you will need a sharpening machine (electric sharpener) with a diamond stone and coolant. An ordinary emery stone is no good for sharpening a drill from a win. Before you start sharpening, make sure that it is possible, in principle. To do this, measure the height of the cutting part of the drill. With the height of the cutting part of the drill, i.e. soldering about 10 mm sharpening is possible.
Do not forget: the harder the material, the lower the grinding speed should be. The angular speed (the number of revolutions of the stone) when sharpening a poorest drill should be reduced regardless of what tool is used for sharpening.
The sharpening of the drill is performed by short touches with an emery stone drill. Pobeditovoe drill sharpens quickly, as a rule, you only need to tweak the loosened edges there, so you should carefully control the process so as not to cut off the excess from the working surface of the drill.
It is recommended to grind drills with taps similarly to simple small-diameter drills, i.e. you should make the sharpening of the back surface flat. At the same time, the back surface should be sharpened, as shown in the photo, by grinding the drill down to the soldering:

Honed drill with soldering.
It is advisable to sharpen the front surface. If the soldering is already done right down to the drill itself, then you simply cannot do without undercuts, since the soft metal comes out to the cutting edge from the front surface. The front surface simultaneously undermines so that the thickness of the center of soldering becomes less.

The soldering point under the front surface.
While sharpening the drill, try to be precise and be careful that its cutting sides are the same size. If this cannot be achieved, then the offset center of the spine will necessarily lead to the fact that the drilling hole will be enlarged and uneven. Regardless of the device on which the grinding is performed, it is necessary to control the ratio of the front and rear corners of the cutting edge in the direction of rotation. Another rule that should be followed in order to properly sharpen the drill bit on concrete: the harder the material, the greater the angle of sharpening. To win it is 170 degrees.
During the sharpening process, the drill must not be allowed to heat up, since cracks may occur and carbide plates may become detached. In order to prevent this, periodically cool the drill with a liquid. You can use ordinary water for cooling.
We offer to see a selection of videos on sharpening drills with pokavitovymi tipped.
Video: Sharpening drills for punch. A part - 1.
Video: Sharpening of drills for the puncher. Part - 2.
Video: Sharpening drills for a punch. Part - 2.
Search
Related Articles
Shelves in the steam room with their own hands: recommendations for the device, care
In order to have a full-fledged rest in the steam room, you will definitely need high-quality shelves that allow you to relax in the bath, raise your spirits and gain strength. However, when constr...
Arbor with a lean-to roof with their own hands

Arbor - one of the most necessary buildings in the country or in the courtyard near the house. This is the place where the whole family can gather at dinner. In the hot period of the day you can hid...
Do-it-yourself sliding partitions - installation and manufacturing (+ photos)

Practicality, high functionality and attractiveness of sliding partitions popularizes the use of these structures in houses and apartments. With their help, you can significantly save space. First o...
How to bend a pipe without a pipe bender for a canopy
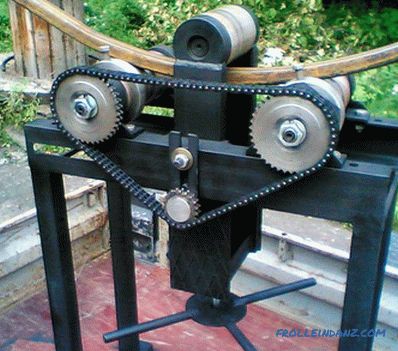
Nowadays pipes are used in many professional fields. They are used in construction, manufacturing, mechanical engineering and even in agriculture. In the process of performing various tasks on the a...
The foundation for a bath with his own hands
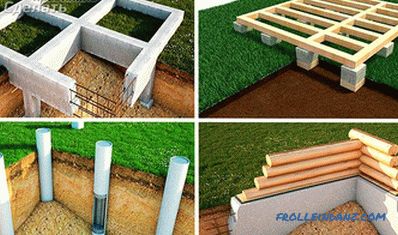
In this article we will talk about how to make a foundation for a bath with your own hands, consider the options for strip and column foundation. Types Before building the foundation, you mus...