There are many reasons why it is sometimes necessary to change the outlet. For example, I want to install a modern and beautiful device, and maybe the contacts or the fastening of the old outlet have become unusable. Of course, you can call an electrician, but many will prefer to save money and learn how to replace the outlet with your own hands.
Dismantling the old outlet
 Turn off the electricity beforehand
Before you begin dismantling the old outlet, be sure to de-energize the wires that are supplied to it. This can be done quite simply - in the electrical panel, if the work is carried out in an apartment building, you need to switch the toggle switch to the "off" position in your unit or unscrew traffic jams belonging to the network of your own apartment. It is advisable to work in the daytime, since the lighting will not function in the apartment. If you have to do a replacement outlet in the dark, then you need to have a flashlight or, in extreme cases, a candle.
Before replacing an electrical device, you need to prepare yourself - buy a new outlet and, if necessary, a plug. In addition, the work will need pliers and a screwdriver, the size of which should fit the bolts used to fasten the socket elements. Phase indicator will not be superfluous - with its help you can check the presence of current in the network. If you arm yourself with the necessary tools, the work on replacing the outlet will be quick and easy.
 Removing the front panel
- To remove the old outlet, you must first remove the front panel. At its center is a hole through which the panel is screwed to the base. This screw must be unscrewed with a screwdriver and remove the cover.
- To make sure that no current flows through the wires, you must use an indicator. Wires are separated on the phase thread and zero. If the light comes on when the wire and the indicator come in contact, it means that the power supply failed and the outlet has voltage. If the indicator does not react when the probe is in contact with the bare ends of the wires, it means that the current in the network is turned off and you can work without fear for your life.
The indicator will not show the phase if you do not touch the metal part in the screwdriver handle. For the indicator screwdriver on batteries, such actions are not needed.
 Rules for using the indicator
-
 Loosen the screws and pull out the wires After making sure that the network is de-energized, you can continue to dismantle the outlet. First you need to unplug the wires from the outlet, which are fastened with clamps with screws. Loosen the screws, remove the ends of the wires. Then comes the turn of the spacers that attach the outlet to the wall from the inside. To loosen the struts, you also need to unscrew the corresponding screws, and then pull the socket out of the cell.
 - Dismantling the outlet often reveals that there is no socket in the niche. This means that the socket was simply attached to the walls of the hole. It is not possible to install the socket this way, because in this case the fixing of the device will not be reliable. In the houses of the old building it is common.
- Also, there are cases when a metal undermount is installed, but there are no fastener bolts. The design of such podrozetnikov provides fixation by means of its own spacers, but they do not provide a secure attachment.
Installing a New Socket
 Installing a Subject
- Installation of a new outlet begins with the installation of a bottom plate. In size, it should freely enter the hole. If, however, when installing the underside, it didn’t completely go into the hole, you need to enlarge the hole to a size that would allow the part to fit in the recess. The deformation of the substrate in this case is unacceptable.
- A new part under the socket must be firmly and securely fixed in the allotted niche. To do this, you need to apply the mixture on a cement-sand or plaster basis. Gypsum in this case is preferable to use.
- To prepare such a solution, add a little water to the dry mixture and mix the solution. It must be of such a consistency that it could fix the box in the cell.
- A window is made on the side from which the wires will enter it. Then, the prepared mixture is applied in a specific quantity with a narrow spatula into the prepared hole, after which the underside is inserted into the prepared niche. Next, the solution aligns the place of the junction with the surface of the wall. After that, you need to wait for a while until the mixture hardens.
There are 2 holes on the outer edge of the planner - they must be set horizontally.
 Connecting the wires
- Usually aluminum wires are supplied to the outlet, which often a little longer than necessary. You do not need to cut off the excess - the wires can be bent in the space of the socket. If you need to remove the insulation from the wire, then this should be done very carefully, since the old aluminum wire, even with a slight incision of the core, becomes very fragile. It is best to heat the insulation with a cigarette lighter and then take it off.
- The next step is to remove the cover from the outlet. To do this, you can unscrew the screw located in the middle of the panel. Stripped wires are inserted into the socket clips and the fixing screws are tightened with a screwdriver.
The wire with the phase is connected to the contact located on the right, and with the zero - on the left. The correctness of the connection is checked by the indicator.
- After that, the outlet can be installed in its place. Watching the horizontal installation, the bolts, which are responsible for fastening the spacers to the socket, are tightened with a screwdriver.
- The cover is placed on the socket and secured with a central screw.
After installing the socket, the machine is turned on and its operation is checked.
Video
Below you will see detailed instructions for dismantling and installing the outlet, learn how to replace the outlet without disconnecting electricity:
Search
Related Articles
How to choose a gas meter - the right choice of gas meter
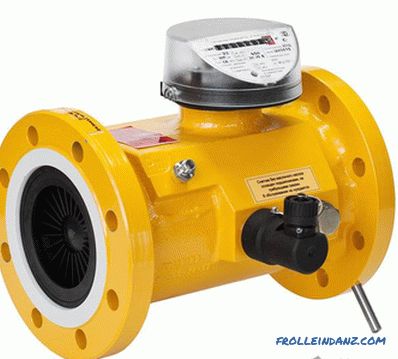
The gas meter is a special meter. The cost of gas is constantly growing, so the need arises for organizing an accurate accounting of the consumption of gas resources. A gas meter is capable of measu...
drawings, sizes, schemes (photo and video)

The stairs to the attic are easily made at home. Preliminary need a pin, tools, finishing materials and workspace. How to make a staircase to the attic, professionals know. They recommend it to be...
Do-it-yourself rafter installation: step-by-step instructions
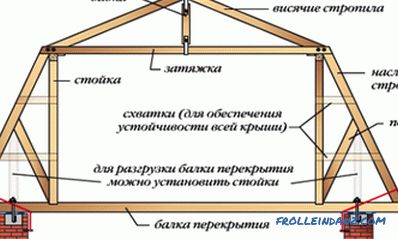
Installing the rafters, as well as creating the entire roof, is a very important process. Taking into account the fact that the base of the roof can be fixed to the wall, using the available means...
How to paint a cast iron bath - painting a cast iron bath
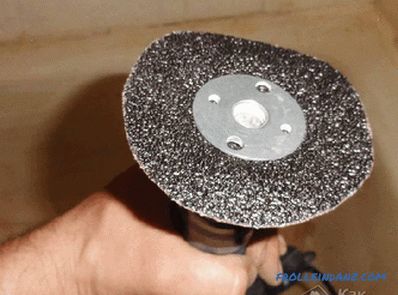
After a certain time, the enamel coating applied to the surface of your bath usually loses its “original” appearance. At the same time, well-defined chips and cracks form on it, the protective ename...
Decorating the bathroom with PVC panels with their own hands and high quality + Video
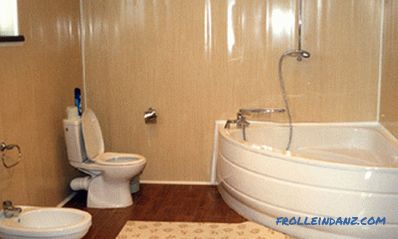
It is no secret that repairs in such an important room as the bathroom was always in last place and never differed in simplicity. Most likely, this is due to the fact that the bathroom itself is a r...