In many cases it is necessary to raise the level of the floor on the balcony. This is due to the fact that when leaving the balcony, in most layouts, the floor level is much lower than in the apartment. In addition, the high threshold of convenience does not add. The ideal solution in such a situation would be to raise the floor of the balcony to the level of the apartment. This not only allows you to warm the floor on the balcony, but also makes the passage more comfortable, now you don’t need to stumble, and your loved ones will just say thank you. The easiest way to raise the level of the floor is considered to be a concrete mix. This is what we will do.
Assess the condition of the balcony
 Assess the condition of the floor
Before repair work on balcony, you need to evaluate the initial condition of the floor. In a new building this may just be a bare concrete slab. In the secondary housing there are often wooden squeaky floors in a very unsatisfactory condition. For the real owner in his house, the balcony is an extension of the apartment and he, too, must be kept in good order. If you want to equip a balcony and turn it into a comfortable resting place, or connect it with an apartment, preliminary work should be done right now.
Preliminary works
 Repairing the balcony
If the floor of the balcony is bare concrete slab, you need to thoroughly clean the surface from debris. Very often there are gaps between the walls and slabs, they must be sealed with cement mortar. After that, you can begin to apply waterproofing. There are several reliable, proven and simple ways to do this.
Bitumen mastics and special water-repellent penetrating mixtures have proven themselves very well. They are easy to use and perfectly protect the coating from moisture.
We determine, look, measure. ..
 Concrete screed
Now you can begin to raise the floor level. Here it is necessary to decide how and what to raise. The simplest way is considered to be a conventional concrete screed. Such work practically does not require experience, there is nothing complicated. As a result, you get a smooth, durable and durable coating on which you can then put any flooring, from the carpet to the laminate flooring. However, this method has one major drawback - it is a lot of weight. Balcony can simply not stand it.
It is categorically not recommended to use a concrete tie for a balcony if its thickness is more than 8 cm. Also this method cannot be used at temperatures less than 10 ° C.
Work execution
 Measurements
- Measurements . The floor level must be strictly horizontal. To do this, mark its position on the walls with the help of a level.
- Creating formwork. This is necessary if there is a possibility of concrete running off at the edges of the slabs. As a formwork will fit any timber or planks that need to be securely fastened to the outer parts of the concrete slab. After curing, the formwork must be removed.
- Waterproofing. Regardless of whether you use water-repellent mixtures, or waterproofing in the form of flooring, both options should provide for overlapping walls above the level of the future floor. If a special film is used for waterproofing, ideally it should be a single piece. Fortunately, most balconies have a small area. However, if you have to use more than one piece of material, a large overlap of at least 15 cm is required.
- Beacons. As beacons, aluminum U-shaped profiles located horizontally with sharp edges facing up are best suited for such a tie. It is on them that the rule will slide. After leveling the profiles by level, they are additionally fixed by placing cement mortar down. After its hardening, you can continue to work.
- Damper tape. On the balcony can occur quite large temperature drops. To prevent the concrete screed from collapsing due to thermal expansion, it is necessary to stick a special damper tape on the walls.
- After completion of the preparatory work, you can proceed to pouring the floor with concrete. To do this, dilute the mixture according to the instructions, mix thoroughly and begin to pour. It starts from the far wall, moving towards the exit. The mixture is superimposed just above the beacons, a width convenient for alignment. The rule is chosen so that its length is slightly more than the width between the lighthouses. Putting the mixture, gradually move along the lighthouses, leveling the floor.
- The next day, the lighthouses must be carefully removed and the surface must be leveled with a cement-sand mortar.
 Installing beacons on the floor
It must be remembered that the thicker the layer of concrete screed, the longer it will dry. This can occur within a few days.At the same time, the high temperature on the balcony during freezing can damage the tie, cracks form on the surface. To prevent this from happening, it is necessary to cover the new floor with a plastic wrap for two weeks, wetting it with water. After complete hardening of the composition, it is necessary to completely level the surface, removing various artifacts and flows. The final touch before laying the finish coating is a base primer.
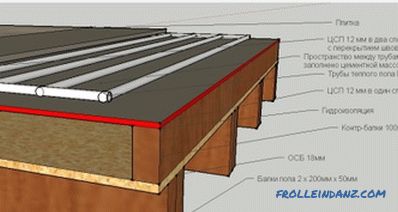
 The floor on wooden logs on the balcony
You can raise the floor on the balcony in a simpler way by setting logs and laying wooden flooring. See more about this technology in the video at the end of the article.
See also:
- how to level the wooden floor under the laminate;
- which punch to choose.
Video
Tips on floor raising technology on the balcony. Lifting method with wooden lag:
Search
Related Articles
How to make a six-sided arbor of wood

With the arrival of the warm season, most residents of large cities begin their trips to household plots for outdoor recreation with their family and friends. Finding a place that is suitable for th...
DIY plastic window adjustment
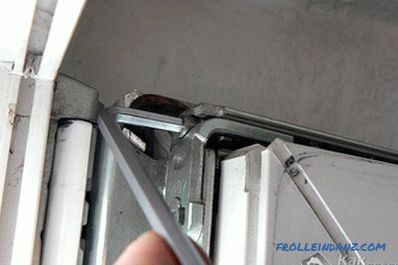
Modern plastic window designs are quite reliable and unpretentious in operation and, as a rule, do not give their owners any particular trouble. But at the same time there are always situations when...
Oven Swede DIY + photo, video
The well-known modification of domestic stoves called "Swede" can be used both for heating country houses and for cooking. Differing in relatively small size, furnaces of this class have a number of...
How to make a septic tank with your own hands in a private house
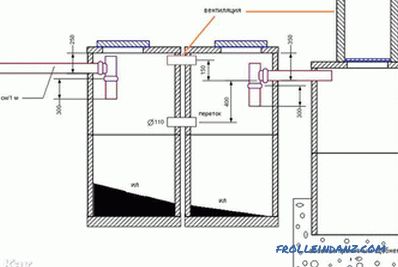
For a number of reasons, the owners of country houses prefer to have a drain hole or septic tank, which do not require regular maintenance (emptying of sewage with the assistance of a cesspool machi...
Screed on a wooden floor with their own hands
It used to be very prestigious to have a wooden floor at home. Of course, after a certain time they lose their attractiveness, and, accordingly, the owners come to the conclusion to replace them. I...