The finished appearance of the ceiling and walls can be given by focusing on the baseboard for the ceiling, securing it around the perimeter of the room. Before choosing it and finishing it is better to find out what you have to deal with, because the problem for many is the joining of the plinth in the corners. In the process there may be a lot of difficulties, since the angle of the docking is not easy to make perfect and smooth. In this article we will discuss how to make the corner of the ceiling plinth, doing the work correctly and beautifully.
Some features
Going to the market for materials, it should be noted that the range today is quite large. Leading positions among materials are wood and foam.
 Wooden ceiling plinth
- Wood products often look impressive. With the help of such plinth you can hide irregularities, as well as add zest to the interior. To fix the wooden cornice of the ceiling, you will need screws or nails (depending on the material of the walls).
- Polystyrene has long occupied major positions in the construction market. A wide range, as well as ease of installation determine the high demand for products. It is worth noting the excellent decorative qualities.
 Expanded polystyrene
When choosing between the first and second options, they take into account the style interior room.
It is impossible to perform high-quality gluing of the plinth to the ceiling, if you do not cut the corner correctly. It would seem that simply cutting the baseboard at an angle of 45º, but in fact, if you measure the angle formed by two adjacent walls, it may not be 45º at all, but, for example, 42º or 50º. As a result, the plinth, the cut of which is made at an angle of 45º, will not work. In this case, when the connection cracks and gaps are formed - the general view will be spoiled. Keep in mind, novice masters easier to adjust the ceiling baseboard foam.
When performing the inner corner, it is necessary to make its lower part rise above the upper, and the outer one - vice versa.
Methods of forming angles
 Internal and external angle
Assembling to arrange the ceiling plinth, it should be noted that the corners in the rooms can be internal and external. It is with the latter that difficulties often arise. But thanks to the advice of experts, everything can be done in one of the following ways:
- If the process with trimming the ceiling plinth is beyond your power, then you can buy special accessories. In the hardware store, you can pick up both internal and external corner elements of the desired shade. From the inside of the corner, on both sides, insert the ends of the ceiling plinths. Cut the corner in this case is not necessary, and the result will please the eye.
- Trimming of the edges of baseboards at a certain angle, which will ensure perfect joining of two elements.
Cutting can be done in the following ways:
- using a special template tool — a block;
- manually using a markup performed by a specific method.
With the help of a special tool
 Chairs
Perform precision cutting ceiling skirting for beginners is recommended with the help of special auxiliary tools. So, for example, professionals carry out the fitting of baseboards with the help of the miter box and the electric saw of the electric model.
To know how to properly trim the ceiling plinth with a special tool, it is enough to familiarize yourself with a brief guide or instruction. For the budget option include a simple hacksaw and a manual block. Despite the affordable price and the primitiveness of the tool, if the corners of the room correspond to 45º, the result will be excellent.
When working with a special tool, some features are taken into account:
- there is no need to cut the foam plinth, a simple construction knife will suffice;
- measuring the length of the ceiling along the line plinth pads are carried out in the first place;
- depending on the model, the block allows you to trim for different angles;
- if uneven edges are present, it would be more expedient to use a stationery knife.
 Trimming with the cloth
To cut with the cloth, perform such actions :
- We set the necessary parameters.
- Insert the first plank, and then the hacksaw for metal.
- We make cutting.
- We insert the second bar, which should dock with the first in the same way.
- Holes are opposite, but the angle should be the same, for example, 45º.
- We make cutting.
If all actions were performed correctly, then as a result, when joining two baseboards, the parts should match up perfectly. After that, you can safely proceed to the sticking.
It is necessary to consider which corner is in question: internal or external.The process of trimming the outer corner is carried out according to the following positioning scheme in the fabric:
- the left-mounted strap should be applied to the side of the equipment next to you with the bottom side up;
- the handsaw should be inserted into the near left and the far right groove;
- the bar to the right of the corner is set in the same way;
- the hacksaw is inserted into the near right and far left groove.
 Trimming the inner corner
To trim the inner corner, the baseboard is laid in the same sequence and the placement of the hacksaw is different: first, the blade is inserted into the near right and far left grooves, and then vice versa.
A manual block requires care and accuracy. With careless use, you can easily ruin the ceiling plinth.
Manual trimming
If you don’t have a special tool, you can also cut the plinth elements manually. We will look at how to cut the ceiling plinth using standard tools:
- ruler;
- stationery knife;
- corner.
 Construction knife
Action algorithm:
- Measuring the corner of a room with a corner. The tool is applied in the corner compartment to the ceiling surface. The indicator must be equal to 90º. If there is a deviation, it can be argued that the angles are uneven, which means that cutting the plinth will be more difficult.
- Apply a ruler to the baseboard at an angle of 45º. With a sharp stationery knife with a sharp movement we cut off the unnecessary part. If we are talking about wooden plinth, then first make the markup with a pencil, and then perform cutting with a hacksaw.
- Verifying proper cutting: ceiling plinths are applied to the corner of the wall. If the work is done inaccurately or there are minor defects, then you can eliminate them with emery paper (unless the part turned out to be smaller than necessary).
In the presence of an uneven angle, it is necessary to measure its degree, and divide the resulting number by 2. As a result, we obtain the required value for cutting. For example, if there is an angle of 80º, the baseboard angles should be equal to 40º.
You can adjust the baseboard in place, in this case, follow the sequence of actions shown in the photo:
 Manual trimming
Gluing Guide
To easily cope with this step, which does not involve any difficulties, you should consider a few basic rules:
- Fixing ceiling skirting begin with corners, to immediately perform the most time-consuming work.
- Connect the elements so that there are no gaps. And the excess glue is immediately removed.
- When finished, glue the rest of the elements.
- If the choice fell on a plinth made of plastic, then use a finishing putty to stick it.
 Sticker plinth on liquid nails
Fasteners are well moistened with a solution of primer or water. After the putty dries, you can proceed to the sealing of seams or crevices. For these purposes, suitable common compounds that are similar to the sealant.
When choosing compositions for sealing seams, pay attention to the types that are made on the basis of acrylic.
Video
Visual aid for fitting the baseboard in place, see below:
If something is not clear about working with the body, see this video:
Read our other articles as well:
What kind of glue to choose for ceiling baseboards
Ceiling decoration
Sticking ceiling tiles
Search
Related Articles
The foundation for a bath with his own hands
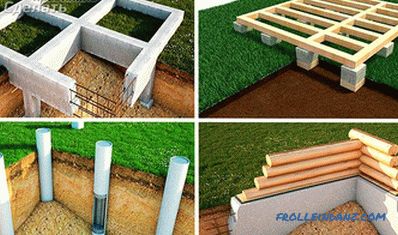
In this article we will talk about how to make a foundation for a bath with your own hands, consider the options for strip and column foundation. Types Before building the foundation, you mus...
Warming the foundation with your own hands - we warm the foundation
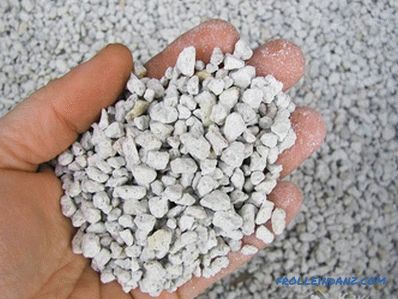
0 Now it is rare to find that the house under construction was without a warmed foundation. How can you make the foundation warming with your own hands, and what is the reason for the need to perform...
from mounting racks to installing stairs
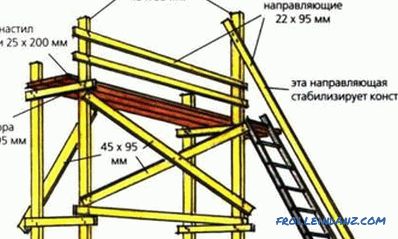
A variety of equipment is used during construction, but scaffolding is indispensable. They allow to carry out high-altitude work, workers are able to be in complete safety at the desired height. Th...
Installation of shingles do it yourself
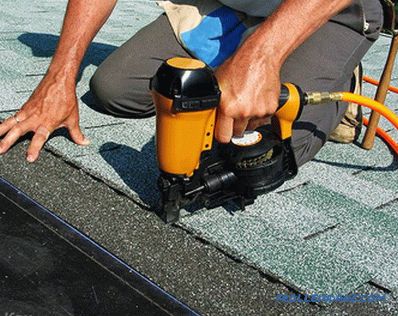
Reliable, but at the same time inexpensive roofing is a dream, perhaps, of every home owner. Such characteristics possesses shingles. In order to end up with a high-quality coating, we suggest you t...
Planning of the suburban area - how to zone (+ schemes)

Planning and breaking down a summer cottage is a big creative process that will require not only certain knowledge from you, but also your own imagination. At the same time, knowledgeable people rec...