Many people want to put linoleum, laminate, parquet, tile or carpet on the floor made of wood. Before you get down to business, they are often faced with the question of how to level the wooden floor? Leveling work is not easy. However, following all the recommendations, you can get a perfectly flat and practical surface that will last a very long time.

The plan for leveling a wooden floor with plywood.
Wood for the floor refers to materials that require regular maintenance. The tree is subject to warping, cracking and drying. If you level the wooden floor, you can eliminate a significant portion of such defects. It is especially important to carry out these works before laying the flooring. Today alignment can be carried out by such methods:
- surface scraping;
- using leveling mixtures;
- putty and white glue;
- sheet method - flooring with plywood sheets.
Consequently, the tools are varied. These are:
- hammer;
- cycler;
- rule;
- empty tanks;
- roller and others, in depending on the option chosen.
The first step is to determine the condition of the wooden floor

The leveling scheme of the wooden floor with a wet screed.
In order to decide which methodology to apply for alignment, it is worth examining the floor and identifying all defects, making an assessment of its condition. The first thing to start working with is to inspect the boards, whether they are damaged by rot or insects. To do this, it is necessary to tear off the board and inspect its back side and the lags on which it is fixed. If the surface of the back side is clean, dry, and there are no visible signs of damage, the board is mounted back. If various defects were found, then such an element should definitely be replaced, since it will not last long.
The second criterion for evaluating the condition of a wooden floor is the degree of deviation from the horizontal plane. This test is best done using a laser level. If there is no such level, you should use the usual assembly level, but it will take a little longer.
How to level a wooden floor: a wet screed
To carry out such an alignment, apply a solution, which includes cement, sand and fine crushed stone or screenings. Using this technique, you can achieve the following result:
- complete alignment of the entire base;
- increased heat and sound insulation;
- significant floor reinforcement.

Wood floor scraping scheme.
In order to carry out all the work yourself, you need to prepare a solution or purchase the finished product in the store. With self-preparation, additional additives may be added to the solution, which will significantly increase its technical qualities. After the screed is applied to the surface, no cracks should form on it during the drying process.
Before proceeding to the screed, it is necessary to mark with a level. After the marking is done, you can prepare the surface. To do this, it removes all dust and dirt. If there are sufficiently large gaps between the boards or cracks on the surface, they must first be painted over with a solution and allowed to dry slightly. In order to level the floor with a coupler, it is necessary to install beacons, thanks to which the surface will be flat. Cement mortar is poured into the space between the installed beacons and leveled using the rule. The screed dries out within 8-18 hours, but it is possible to exploit this floor no earlier than after 4 days.
Advantages of the method:
- low cost of all materials used;
- small thickness of the screed;
- high level of waterproofing;
- reliable and durable base.
Disadvantages of the method:
- long time of work and drying;
- low sound insulation.
Wood floor scraping

Laying the wood floor with putty.
Scraping can be called the easiest method of leveling and renovating a wooden floor. But at the same time, this method requires very large labor costs. Most often, this technique is used in the event that the wooden floor is covered with varnish or paint. The scraping can be performed both manually and mechanically. For large rooms, the use of the manual method is almost futile. For this function, it is best to use special machines that do their job much faster and with better quality.
Stages of scraping work
- To begin with, the room should be freed from all furniture, since there will be a very large amount of dust in the process.
- The wooden floor should be checked for the presence of nails and buttons in order to protect the machine from breakage.
- When cycling the floor, it is worth using protective equipment - goggles and a respirator, headphones (since the machine is quite noisy) and gloves.
- Floor scraping is carried out from the corner. After removing the first layer, it is necessary to seal all cracks and holes. For this you need to use a special putty. It can be matched to the color of the floor, so as a result it will become invisible. Heavily damaged boards should be replaced with new ones. For the most inaccessible places and corners, you should use manual scraping. After the putty is completely dry, you need to re-clean the floor.
- After removing the debris, the surface is well wiped with a rag and degreased agent. After that, the surface can be varnished or painted.
Putty and PVA glue: features
Today, the leveling method using putty and PVA glue is very popular. To level the wooden base, preparing a mixture based on sawdust and PVA. After application and drying, the base is very durable and difficult to work.
Using the PVA-based putty, you can treat all the defective places on the surface.
The main stages of work:
- Cleaning the floor from debris and dust.
- Installation of beacons. For this you can use wooden slats.
- The entire surface between the slats is filled with a solution of glue and sawdust. In order for the sawdust not to absorb all the moisture from the glue, before preparing the solution they should be soaked briefly in water.
- If it is necessary to make a coupler of large thickness, this happens in several stages. The first layer is made small, and only after it dries it is possible to apply the second one.
- Throughout the work, it is very important to control the level of the floor.
Only after several days can you start laying the flooring.
In some cases, an additional layer of plywood, drywall or chipboard is needed on such a layer, this will provide greater strength and reliability.
Using plywood to level the floor
This method is the most popular and practical today. As a result, the surface is perfectly flat and smooth, which makes it possible to use almost any floor covering. The main thing - to comply with certain recommendations when installing plywood.
Plywood is attached to the floor with screws. It is very important to control that their caps are slightly buried in plywood, otherwise they may further damage the coating.
Today you can level the wooden floor using any method, the main thing is to make the right choice. Staging of work and compliance with the technologies will provide an opportunity to get a quality result and the basis on which any kind of flooring can be laid.
Didn't find the answer in the article? More information on the topic:
-

How to level the floor in a new building with your own hands?
Instructions on how to level the floor in a new building with serious drops in the horizontal surface of the base. Preparation and leveling of floors using log or cement-sand screed.
Search
Related Articles
Installing a shower cabin yourself - detailed instructions + photos
We present to your attention an article on how to install a shower cabin yourself. Most apartment owners can handle this job on their own if they use the right materials, tools and methods. Today...
How to purge the battery heating - ways to purge batteries
The efficiency of the heating of a dwelling is largely determined by how well the seasonal work has been done in preparing its heating system for operation. That is why with the arrival of cold weat...
how to ramp up timber or boards
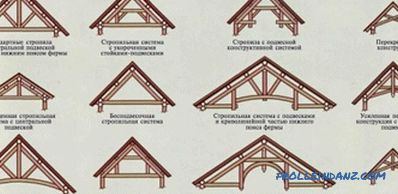
There are two main goals at the roof of the house: protecting the house from adverse weather conditions and maintaining heat inside the house. The basis of the carrying capacity of the roof, which...
- technical specifications and scope of application + Video
One of the important points in any construction is waterproofing. If proper protection of materials and structures against moisture is not provided for, the service life of the structure will not be...
Summer kitchen in the country with their own hands + photos, diagrams, drawings

In the fresh air not only the appetite is stronger, but the food is absorbed much better. In warm weather, do not want to sit in the room. Conservation for the winter is also easier to do outside. I...