A bathroom does not always have the large dimensions we need, because not everyone lives in new houses built in recent years. In view of this, the topic of saving space in a bathroom of small dimensions remains relevant. How to approach the solution of this issue?
In the article we will tell how to install a shower tray with our own hands, we will show photo and video instructions.
Installation
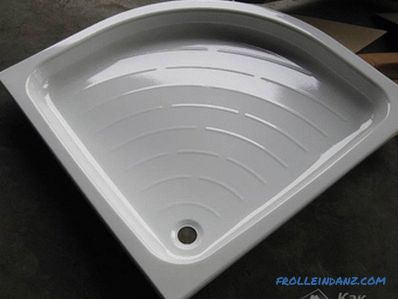 Cast iron shower tray
We immediately decide which dimensions of the shower tray we need. Having defined them, we can choose the type of pallet, more precisely, the material from which it will be made - metal, ceramics or acrylic. Also possible options for products made of wood or even built of stone. We order the desired pallet in the store or using online resources and wait for the arrival. As a rule, the delivery time is from several hours to a couple of days - it all depends on how far the store is from the place of delivery.
Finally, the pallet arrived - brand new, sealed. Now the question may arise, how to install it correctly. Assembling a pallet is not an easy thing, because the space under it is rather small, and any inconvenient nuances during assembly simply cannot be considered.
Sewage pipes should be inclined for good water flow.
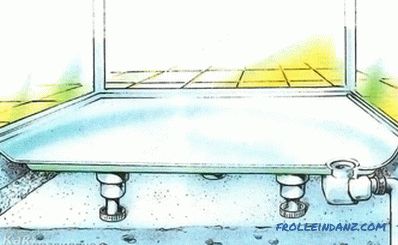 The principle of installation of the shower tray
When choosing a shower tray, initially we will pay attention to the drain holes . They are often located at the bottom, there are also options with holes on the side. Usually, the siphon and the said opening for drains are combined into one unit in order to save space under the bottom. Which of the options to choose, decide, starting from the characteristics of the bathroom in the house and the position of the sewer pipe. The main thing is that later it was convenient to connect everything, leaving no room for a leak.
We assemble the pallet only after we apply the markings on the floor and walls. We choose a place, put a pallet there, and then mark it, noting the marks of the drain hole and profile. Of course, the markup should be taken as seriously as possible, putting it very accurately. After this procedure, remove the pan to the side, severing the drain hole, and connect its output with the sewer pipe. After this, the location of the gutter hole should be exactly the same as previously marked.
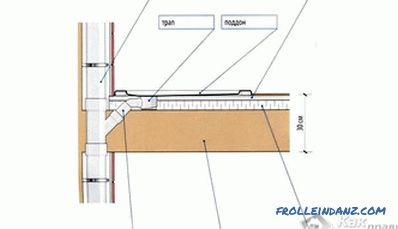 Option of installing the pallet
Again we carry out the above process - just install the pallet on the marked marks and check whether the drain hole is correctly positioned. Its desired position is opposite to the outlet of the sewer drain built into the pallet, at the same time at the positioned height. The slope mentioned earlier should be lower by no more than 2-3 cm. We carry out the installation of pipes, firmly connecting the joints, after which we install the product from above.
Nuances
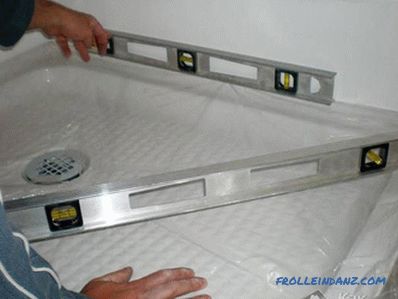 Setting the pallet to the level
Check whether the position of the pallet horizontal or not, you can use the water level. There are different opinions on whether to put it strictly horizontally or with a slight bias. Since each option has its own advantages and disadvantages, it’s better to familiarize yourself with them and make the right decision. When installing with a slope, it is necessary to strengthen the pallet securely and firmly so that during use it does not bring unexpected and unpleasant surprises. The drain hole itself must be made airtight, then the top of the drain should be screwed on. After lining, the pallet must be sealed.
Do not forget about sound insulation, if you do not want your neighbors to be irritated by the sound of pouring water spurting on the pan. It is not enough just to put something, for example, bricks, as was done before. There are new technologies that allow the use of various types of insulation.
If you want the pallet to look bigger, you can make a brickwork around it, and then sticking ceramic tiles to it, as it is resistant to moisture. The tile at the same time should lie with a slight inclination towards the pallet, so that there is no water on it.
We recommend:
- how to replace the cartridge in the shower mixer;
- how to install the shower drain correctly;
- how to wash the shower cabin at home.
Video
