Non-woven wallpaper is an excellent finishing material that will satisfy the most demanding customer. The thickened structure of non-woven wallpaper ideally masks minor defects of the walls. Therefore, preliminary careful preparation and creation of ideally smooth surface of walls is not required. How to glue non-woven wallpaper, so that they serve for a long time and pleased with their quality, you will learn from the step by step instructions, which is given in this article.

Photo - mitre10. co. nz
Non-woven wall covering does not need special care. Wet cleansing completely updates the wallpaper. Contaminated places are perfectly removed with special cleaning agents. The undoubted and important advantage of non-woven wallpaper - a stunning visual effect.
Non-woven wallpapers after stickers are resistant to deformation, shrinkage and stretching. Acrylic and dispersion colorants are perfectly applied on fleselin wallpapers. They are not afraid of moisture at all, so they are easy to wash. If necessary, during the repair it will not be difficult to remove the old wallpaper, and then paste the new ones. Thanks to the relief, you can create the illusion of a beautiful relief plaster.
Preparation for pasting with non-woven wallpaper
Required tools
- laser level;
- tape measure 5m;
- special roller with a long bristle;
- plastic spatula: which should have a soft edge for a perfect rolling of wallpaper;
- brush: used to smooth glued wallpaper;
- a sharp wallpaper cutting knife;
- special mesh for removing excess glue from the roller;
- narrow metal spatula;
- two buckets: for glue and clean water;
- foam sponge;
- pencil.
Preparation and marking of walls
First, it is necessary to inspect and prepare the surface of the walls for pasting. An excellent surface for storing non-woven wallpapers can be: paper, wood, drywall, chipboard, plaster, concrete and other similar materials.
Tip: the color of the surface of the walls for the sticker of the wallpaper for painting should be uniform. It is desirable that the color of the surface is not very different from the color of the painted wallpaper.Note: Flizelin is thin, so the color of the base may be noticeable.
The preparation of walls for pasting is started with the surface cleaning of old wallpaper, dirt and removing defects. It is advisable to remove the old paint. In extreme cases, carefully treat the painted surface with emery paper (medium caliber). Treat the prepared surface with a primer.
Non-woven wallpapers have smooth, high-quality edges. This makes it possible to use the “butt” sticker method. At the same time, visually adjacent panels look almost seamlessly, like one web. Because non-woven wallpaper often produce a wider format, then we will look at how to glue wide non-woven wallpaper. Work is best to start from the corner of the room. From the corner of the room at a distance of 1 meter strictly vertically with the help of the level we draw an approximate line.
The purpose of markup: when sticking wallpaper, stick to vertical lines exactly. Using a level, strictly vertical lines are applied across the wall in 1 meter increments. The standard width of non-woven wallpaper is 1.06 m. Therefore, as a rule, with a sticker, some margin is created. Then it is convenient to use when making a clear joint in the corners of the room.

Drawing a strictly vertical reference line.
Photo - kvotvet. ru
Wallpaper preparation
So, the surface marking for the wallpaper is ready. The next stage is the preparation of wallpaper for the sticker. We recommend cutting wallpaper blanks at once to all the walls of the room. The complexity of cutting depends on the pattern of wallpaper.
If the pattern docking is not required, cutting does not cause difficulties. The only note is: before cutting the next wallpaper blank, measure the height of the wall at different points (for example, 30 cm). And just making sure that the height of the walls is the same everywhere, cut the wallpaper blank of the required size.
If you glue wallpaper with a large pattern, then the wallpaper will require the selection of a pattern. To find out what size fit, for your wallpaper, you can simply look at the pictogram on the label. When marking, make sure that the picture matches. To do this, you will occasionally have to move the subsequent workpiece up or down. The main thing is to avoid mistakes and prevent you from having to paste pieces of wallpaper from below or from above.
On some sites you can meet the advice to leave when cutting wallpaper with a pattern of a reserve height of 10-15 cm. Note: if you have high ceilings, this does not always save the situation.
For example: the size of the fit is 48 cm and the height of the room is 2.5 meters. In this case, according to the rules of cutting, the length of each workpiece must be a multiple of 48, but must be greater than the height of the room. For our case: the required length of the workpiece is 2, 88 m.
After the mathematical calculations proceed to cutting. Right on the floor we lay a clean plastic wrap or wash the floor well. Face down roll out a roll of wallpaper. We measure out 2 m 88 cm (with a margin for adjustment) and make a serif with a knife. Then, by cutting the wallpaper, we bend it so that the edges of the bent part and the main bottom panel coincide. All checked, cut a sheet of wallpaper along the fold line.
We grow the next sheet of wallpaper by turning it with the same side as the previous one. Then we check the fit of the drawings of the two canvases obtained: the lower one, which lies on the floor, and the upper one, cut off, by bending their edges. To control, we find and visually select a noticeable detail of the picture. We try to combine both blanks in this figure. If everything is done correctly, proceed to the preparation of the next workpiece.
Attention: the roll must be rolled out one after the other. Thus, cutting of blanks is performed at once for the whole room.

Special table for marking wallpaper. Photo - mega-anunt. ro
Preparing glue
What kind of glue should you use on fleisilin wallpaper? For sticking non-woven wallpapers, you need to choose a high-quality adhesive composition specifically for non-woven wallpapers. The technology of its preparation is simple. To do this, in the necessary instructions, a small amount of water gradually pour in a thin stream of glue powder, stirring the mixture vigorously. Let the mixture stand for some time, and then mix it again and remove the lumps, if any. Glue mixture is ready.
Step-by-step instructions for wallpapering
Now let's talk directly about how to glue non-woven wallpaper.
Step 1. To avoid misunderstandings, first read the factory instructions included with the wallpaper. Perhaps there are specific notes on the sticker technology. Some, few manufacturers recommend smearing not only the wall but also the wallpaper itself.
Attention: we recommend to coat a little larger area than wallpaper width for better adhesion of the edges of the wallpaper with the wall.
Try to apply the adhesive evenly. When pasting fleselin wallpaper, as a rule, the adhesive mixture is applied with a roller only on the surface of the wall. Undoubtedly this is a more comfortable and easy way to wallpaper stickers. Use glue designed for non-woven wallpaper and do not try to use glue that has remained since the last repair.
Step 2. The result of the entire work depends on the quality of the first blank label. It is the first sheet that will be the starting point for comparing verticality for subsequent blanks. Therefore, it is especially neat and strictly vertical to position the first sheet of the workpiece from top to bottom. To fasten a sheet of wallpaper to the wall, smooth it with a spatula. Squeeze out excess glue in the direction where there is no wallpaper pasted.
Note: if a wallpaper with a deep texture is applied, then use a wallpaper roll to smooth out, while pressing it strongly should not be.
Step 3. Cut off the extra residue of the wallpaper below. Skirting can cover only 3-4 cm, so do not cut off too much. Then we see if there is any extra wallpaper near the ceiling. Carefully trim, leaving a small margin for the subsequent closing of its ceiling plinth. Excess strips of wallpaper cut off, pressing the spatula with wallpaper in the corner. In this case, the knife does not come off the cutting line, only the spatula moves. This technology removes excess wallpaper allows you to save the cutting line straight.

Trimming wallpaper, top left, bottom right near the floor.
Photo - axsoris. com
Step 4. Traces of excess glue on the ceiling, remove the washing surface with a damp sponge or rag. Do not be afraid to soak non-woven wallpaper. Carefully wipe the corner seam to remove all traces of glue. Manufacturers of glue bases sometimes assure that the glue will not leave marks after drying. Still, places with glue will shine ugly.
Step 5. The next sheet is glued end-to-end to the previous pasted blank. Wallpaper does not shrink after the glue dries, so there will be no gaps. We roll out the prepared panel of wallpaper vertically along the wall, combining the outlined details of the drawing and at the same time moving it to the previous one. Ironing the joints with a roller. Excess glue is removed to the side free from wallpaper. Excess wallpaper from the bottom and top cut off.
Step 6. Similarly, we glue and trim wallpaper in the corners. The difference is, gently press down both panels on both sides of the corner with a spatula and trim at the same time. We take out from under the cloth one of the extra cut strips. For the reliability of bonding, we additionally coat the corner with glue if it has managed to dry out and press the panel of wallpaper to the corner.
Video: Sticking non-woven wallpapers
Search
Related Articles
instructions and recommendations for laying (photo and video)

Properly selected floors in a wooden house provide a more presentable look and a comfortable atmosphere in the rooms. Floor installation scheme in a wooden house. In wooden houses, the flo...
How to level uneven wooden floors do it yourself: technology (video)
The quality of floors and the comfort of staying in a house or apartment are always closely interconnected. A lot of inconvenience and trouble deliver uneven wooden floors. They creak, make unpleas...
main works, drawings (photo and video)
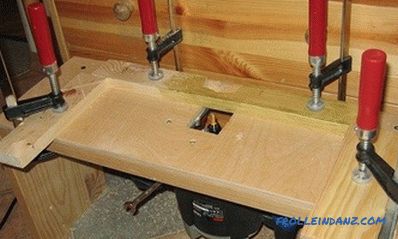
Milling equipment must be moved along the surface of the product, which is firmly fixed and stationary. To ensure comfortable work with small analogues, experts recommend making a table for the rou...
House made of cinder block with his own hands
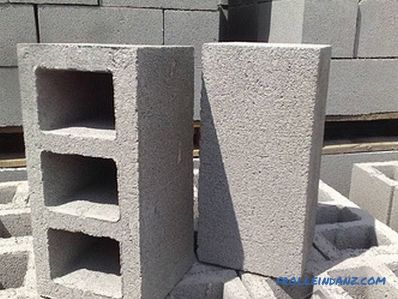
When you start building, you want everything to be done as quickly as possible, cheaper and more reliable. All these factors can satisfy the built house of cinder block with their own hands. This bu...
We lay plywood on the wooden floor by ourselves
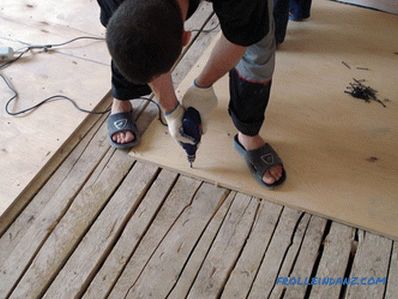
For flooring, materials such as plywood are increasingly used. However, if we are talking about wood, then putting plywood on a wooden floor is not so easy, there are certain nuances that need to b...