When you start building, you want everything to be done as quickly as possible, cheaper and more reliable. All these factors can satisfy the built house of cinder block with their own hands. This building material can be made independently. We will consider both the technology of its production, and the construction process from marking up to roof installation.
Advantages and disadvantages
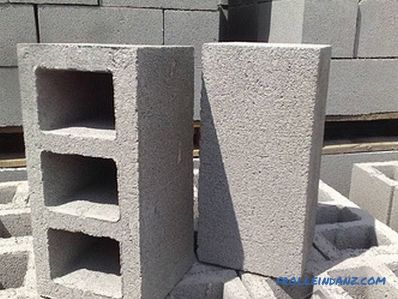 Slag stone
At some point, the cinder block became very popular. This is explained by the fact that the waste material, which remained after the smelting of the metal, had to be used somewhere. It was decided to use it as a filler for building components. So this artificial stone appeared. But then he was not distinguished by very good qualities, because from an environmental point of view, he had certain shortcomings. He had to stand on the street for about a year and only after that let him into work. Today, the situation is a little different and it seems that this is the most popular material for the construction of low buildings. Its strengths are:
- Long life. With the right approach, the stone will last about 100 years.
- Good thermal insulation. Thanks to the method of manufacturing with air chambers, the material perfectly retains heat.
- High erection speed. Due to its large dimensions, walls can be driven out much faster than from ordinary bricks.
- Resistance to the development of mold and mildew.
- Possibility of an individual approach to size.
- Material is unloved by rodents and other pests.
- A house made of such material is easy to repair.
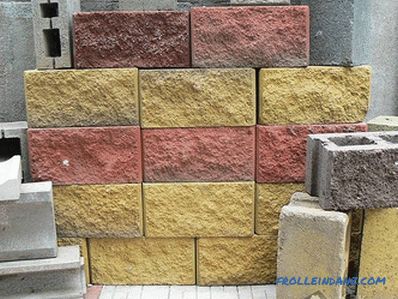 Lightweight blocks with decorative trim
Disadvantages:
- It absorbs moisture well, which leads to a loss of heat capacity.
- Poor adhesion of the plaster to this building block.
- The impossibility of erecting a building of more than 2 floors.
- The need for a quick roof construction. The fact is that the walls thrown out cannot be permanently left uncovered, since this will lead to their rapid destruction.
- The importance of strict adherence to masonry technology.
- The need for a high foundation.
- Construction work is important in dry weather.
- Poor portability of shrinkage of the building. In this case, a split is possible not along the seams, but along the blocks themselves.
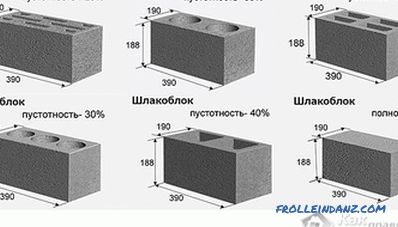 Standard blocks
If you decide to purchase cinder blocks, then there are several nuances that are worth paying attention to. Well, if there is an opportunity to take measurements with a dosimeter. Thanks to this, it is possible to determine how ecological the material is. See the conditions in which it was stored. It is important that this is not an open space where it is exposed to precipitation. It should not be chipped and cracked. With the help of roulette you need to check its size. Parallel sides must match.
The machine for the production of cinder block
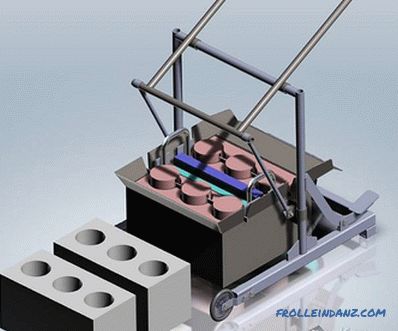
The manufacturing technology is quite simple. For successful advancement in this direction, it will be necessary to acquire some equipment, as well as to precisely maintain the proportions. So, the first thing is to construct a rammer. This will require:
- sheet metal with a thickness of 3 mm;
- a pipe with a diameter of 75-80 mm;
- a Bulgarian;
- a welding machine;
- tape measure;
- electric motor for creating vibration.
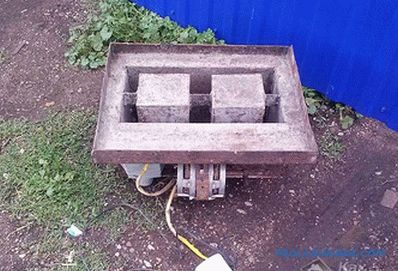 The motor is attached to the washing machine
The engine can be used from the old washing machine machines or from the grinding machine. More power is required. The main thing is to properly place the weight, which will shift the center of gravity.
The sequence of work will be as follows:
- billets are cut from the metal. Two of them with dimensions of 200 * 400 mm, the other two 200 * 200 mm.
- They need to be welded together to make a small box.
- Three sections of the pipe are cut by 170 mm. Along the length, the size is smaller so that the bottom wall thickness is at least 30 mm.
- Along the end of the sleeves, cuts are made to a depth of 50 mm. One of the sides is given the appearance of a truncated cone.
- Cuts to a depth of 50 mm are made from the other end. They fit a strip of metal with a length of 400 mm. It connects all three elements together.
- The pipe ends are closed with plugs.
- This design is placed in a box and fixed to the walls.
- A rim is welded on the upper end of the container to make it more convenient to fill and tamp the solution.
- Additionally, you can make a mechanism by which the drawer will be lifted up. To do this, you can use the profile square tube. If there is no desire to complicate things, then it is enough to weld two handles on the sides of the box.
- The engine is attached to the larger side. To do this, four bolts are welded to the wall so that their location coincides with the holes in the unit case.It is pressed with the help of washers and nuts of suitable diameter.
- Additionally, a cover is made, which improves tamping. For it you need a sheet of metal 195 * 395 mm. It is necessary to make holes for the pipe (they should be 5 mm larger than the diameter of the sleeves) and cut into two parts along. This must be done so that it calmly sinks and does not rest against the partition that secures the hollow cores. The parts are interconnected using brackets made of reinforcement. It is also necessary to make a depth stop, which will exclude its immersion deeper than 5 cm.
- In order to speed up the work, you can combine several such containers together.
- Two bolts are welded onto the motor shaft on both sides. This must be done symmetrically. In the future, to adjust the frequency and force of vibrations, it will be sufficient to tighten the required number of nuts.
- The final touch will be thorough polishing and painting. This is necessary to ensure that the solution subsequently lags behind.
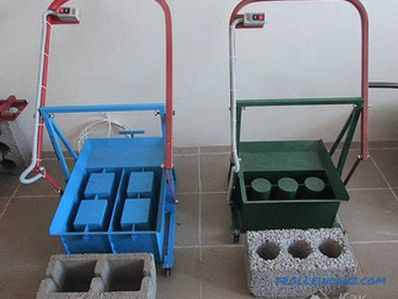 Machines for the production of various cinder blocks
There are many options on sale today already finished machines. If you do not want to waste time and energy, you can simply buy or rent it.
Making a cinder block
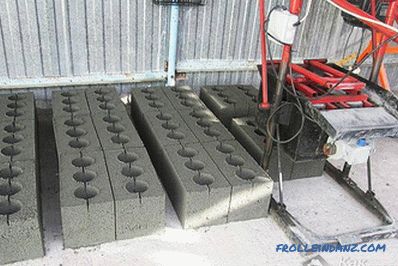
The key to durable and resistant blocks is a properly prepared solution. In the case of using a tamping machine, it should be sufficiently dry. If it is wrong to calculate the proportions of water, then after lifting the tank it will just disintegrate. In the role of filler, you can use the ashes from the burned coal, the breaking of bricks, small crushed stone, slag, etc. Plasticizers are used to impart additional resistance to moisture. The first version of the mixture will be as follows:
- 9: 1 - cement and slag, which is well sifted so that there are no excess inclusions;
- water should be about half of the cement.
The second method of preparation:
- 4: 4: 1 - production granulated slag, crushed stone of fine fractions, cement;
- water is the same ratio as and for the first option.
The best consistency can be roughly defined as follows: you need to take the finished solution and squeeze it in your hand. He must keep his form. If you then throw it on the ground, it should be spread. After squeezing him again, he must hold his form again.
The best place for work will be open air. In such conditions, the solution will dry out and set faster, which will increase productivity. It is desirable that the place was smooth. This can be a concrete path or a sheet metal lining, knocked down into boards, etc. The process of preparing the blocks will be as follows:
- The unit is installed at the place where the laying begins.
- The prepared mixture is poured inside. Its quantity must be greater than the actual capacity.
- The vibrator motor turns on for a few seconds. Part of the solution sits, so you need to pour more.
- The vibrator starts again for a few seconds. Finishing is done and the upper end is closed with a lid.
- Seal is in progress. If the cover has reached the limiters, then you can raise the capacity.
- Full setting takes a period of 4 to 9 days.
- Finished products can be stored indoors. You need to move them there after a day of drying on the street. If the composition has a plasticizer - then after 6 hours.
- For more convenience, they can be folded together.
- They will be ready for the construction process in 1-2 months.
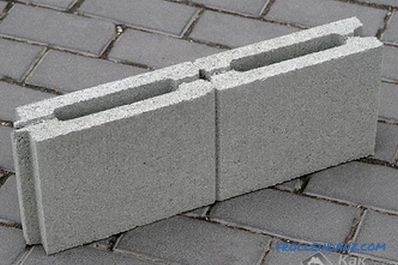 Partition slag stone
Often, the switchings are laid out from blocks that are smaller size. For their manufacture, it will be necessary to make the form according to a similar principle, as described above, but its dimensions will be 120 * 400 * 200 mm. Here, it is better to use rectangular inserts as holders of voids. They must be of such dimensions that the walls are not less than 3 cm.
Calculation of the number of blocks
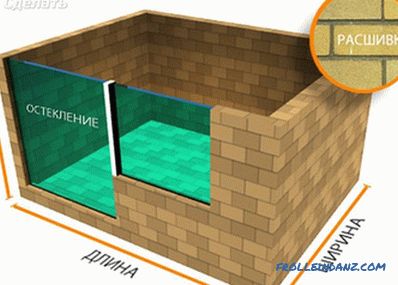 When calculating the blocks, doors and windows
Projects must be approached rationally. It makes no sense to be overly economical, because it will affect the quality of the future structure. Also, there is no reason for excessive waste. Especially it concerns the number of blocks. To begin the calculations should be determined by the thickness of the wall. This size is due to several factors, such as climatic conditions and the condition of the soil. If the temperature falls too low during the winter period, then it may be necessary to make a wall of 40–60 cm. In other zones, 20 cm will be sufficient, which will also be insulated with foam plastic or foam plastic. Masonry can be done in several ways:
- per half of the stone.This does not mean that the block will need to be cut into two parts. This means that he lays down along. That is, in the case described, this is a thickness of 20 cm.
- The whole stone. This one that lies across, while the wall is 40 cm.
- In a half stone. By simple addition we learn that it is 60 cm.
- B two stones - 80 cm.
Suppose that the project of the future house with dimensions of 10 * 12 m was chosen, one-story with height walls in 3 m. First of all it is necessary to calculate the total area of the walls. To do this, multiply the length by the width. 3 * 10 = 30 m 2 , 12 * 3 = 36 m 2 , now these results are doubled and added together, because two identical planes. 30 * 2 + 36 * 2 = 132 m 2 . So the end result is 132 m 2. We determine the area of one block - 0.2 * 0.4 = 0.08 m 2 . Divide the total area of the walls by the block area - 132: 0.08 = 1650. But this figure is valid if the wall is planned in one stone. If two, then the final result will be 3300 blocks.
These calculations intentionally did not take into account the openings that will be made under the windows and doors. This is done in order to have a small stock. While working with the material, there may be a rejection, and our surplus compensates for it.
The amount of stone for the rearrangements is calculated in the same way. In fact, the final figure will be the sum of blocks for the main walls and internal ones.
Laying the foundation
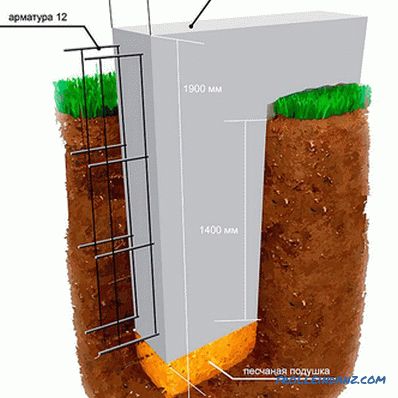 Reinforced strip foundations
As already mentioned above, this type of construction requires a high foundation. In addition, it must be very durable so that in no case the cracks begin to form, which must pass through the entire wall. The work will have the following order:
- The area selected for construction is carefully examined. It is better to know in advance which part of the area the groundwater is at a lower level. That it is suitable.
- Everything that clutters up is being tidied up; the grass is mown to the lowest possible level. This is necessary to estimate the overall bias and markup.
- According to the drawing, landmarks are transferred to the terrain by the size of the future building.
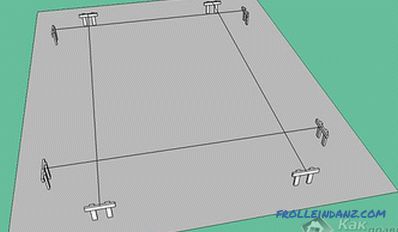 Marking of the section
- At each corner, one peg is driven in.
- Check for correct sizes. In addition to the length and width, diagonals are also measured - they must coincide so that the shape is correct and not trapezoidal (if this is not provided for by the project).
- Holders are made for the guide line. This will require 16 wooden bars of arbitrary size, but not less than 90-100 cm long. You will need another 8 small planks. Their length should be 10–15 cm greater than the width of the foundation. From the boards is made bar for two bars. A letter-shaped construction should turn out.
- Two self-tapping screws are twisted on each crossbar. The distance between them should be equal to the width of the foundation.
- All elements must be driven into the ground. This is important to do at such a level that the screws are located at a height of 70 cm above the surface. The order of the supports - two at each corner so that they are opposite each other in pairs.
- A fishing line or string is stretched between the elements. It is more convenient to use the line, which has a bright color. She is not lost on the background of surrounding objects.
- At this stage it is once again necessary to check the diagonals between the angles that the tensioned thread has formed.
- A trench is being dug. Its depth should be 50 cm below ground freezing.
- Sand falls asleep to a height of 25 cm. It is aligned and well rammed. After that, it is necessary to wet it with water and allow to dry. If necessary, you need to add a level.
- Another 25 cm is made of crushed stone. This layer is also well rammed. The tamper is best done using a special electric or gasoline tool.
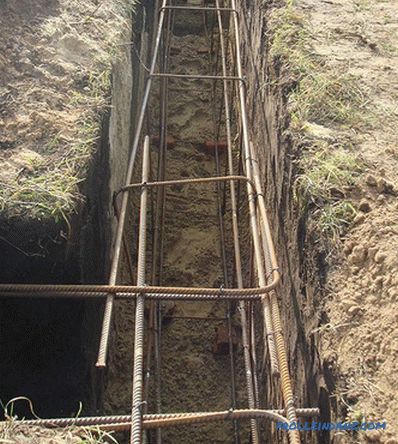 Reinforcement of the foundation
- Next, a metal grille is made. For the foundation of the planned height will require the laying of two or three elements. For work, you will need ribbed reinforcement with a diameter of 10‒12 mm. It is better to assemble the structure on the surface. Its dimensions should be such that 5 cm on each side to be immersed in concrete. That is, the total length and height should be at least 10 cm less than the length and height of the foundation. On the total length laid out a few rods. The distance between the horizontal components should not exceed 30 cm. If there are no strips of the required length, then you can get from several. In this case, the binding between them must be at least 1 m. Staples are made from smaller rods. Their height should be equal to the size of the planned obreshetki, and curved elements should be the width of the structure.They are attached to the laid elements every 30‒40 cm. Instead of brackets, you can make ordinary vertical lintels. They are fixed between themselves by knitting wire. Above the inner side is attached the same number of longitudinal rods, as well as the bottom.
- Typically, the height of one such structure is 40‒50 cm.
- At the bottom of the pit, supports are laid out that will allow concrete to close the reinforced base from below. For these purposes, you can apply bricks or other homogeneous elements. The minimum height is 5 cm.
- Formwork is made from a cut board made of shields, plywood or other durable material. It must be strong enough to withstand the pressure that concrete will exert. Be sure to install the booms, which will be stops from the outside. The distance between the boards should be the same, so that the foundation is smooth.
- After the preparatory work, you need to prepare a solution for pouring. You need to make sure that there is an assistant and productive concrete mixer, you can use several. This is very important, because it is necessary to ensure a good volume. Due to this, the construction will be monolithic, not puff, which will reduce the strength. The mixture will be 3: 1: 3 - crushed stone, portland cement, sand. Portland cement is perfect for such purposes. The fact is that it contains calcium silicate and gypsum supplements. This results in a fast setting and durability. Be sure to add a plasticizer, thus the fluidity and filling of voids will be improved, frost resistance will increase, as well as moisture resistance.
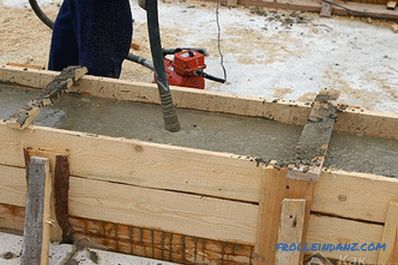 Compaction of concrete with a vibrator
- Periodically during pouring it is necessary to perform treatment with a vibrator . So concrete is better compacted and the structure will subsequently pick up maximum strength.
- During pouring, you also need to try to distribute the entire level of concrete. Subsequently, it will help to quickly deal with the pasture walls.
- If the weather is hot enough, then it is necessary to moisten the surface abundantly with water, it would also be good to cover the foundation with building film or pieces of roofing material.
- At high speed, the formwork can be removed after a week.
- Further work is better to continue after a month. This is the period necessary for the cement-sand mixture to gain all its strength.
If you decide not to fill the foundation as high as previously described, then you need to take care of the construction of the base. This is a continuation of the foundation, which stands above the surface of the earth. It is important to remember that before you begin to lay it, you must provide waterproofing. For this purpose, ruberoid or bikrost is laid on the foundation. The height of this design should be 70 cm or more. Then a layer of waterproofing is placed on it again, and only after that the erection of the walls begins.
Walling
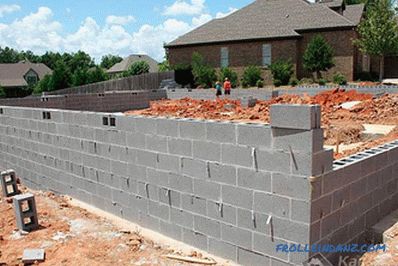
When building walls, the main task is to make them even, without protrusions. The first step towards this result will be the determination of the highest corner of the foundation. The fact is that during pouring it is difficult to deduce the ideal value. This measurement is done using a water level. In advance, you need to make sure that its length is enough for the length of the foundation.
- An arbitrary angle is selected. It is installed one flask fixtures. The other part is moved to different ends. Due to the difference in the position of the water, it is possible to determine where the highest point is. Laying and alignment need to start from here. Make it very important, because if you start the construction from the lowest point, you will have to subsequently cut the stones. If this is done from the highest, it will be enough just to make the seam a bit larger.
- By setting the starting point, you can do the same for the other corners. To do this, you need the same hydro level. The task will be to supply 4 more stones so that they coincide with the reference one on all planes. Additionally, you can check the diagonal.
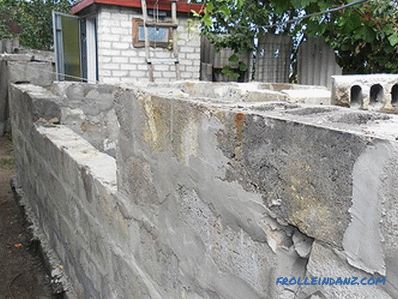 The line
- is stretched along the outer edge of the wall fishing line or twine. It will help to make the wall flat in the horizontal plane. It is necessary to raise it to the height of one row and after each new rearrange to the same level. During the work, it is necessary to ensure that the benchmark does not cuddle or hurt, otherwise there will be no sense from it.
- You can use several tools to keep the wall vertical. For example, after laying each row, check the plane with a construction level. An ordinary plumb line will also serve as a guideline. If there is no desire to tinker with such devices, then you can build stationary reference points.To do this, metal pipes are buried in the ground, which fit close to the wall. They are set in planes and fixed. Thanks to them, you can control the process.
- The solution has good thermal conductivity, therefore, due to it there can be significant heat loss. To lower this value, it will be enough to control its layer. It is better if it does not exceed 1.5 cm.
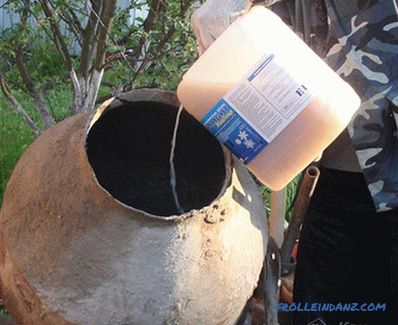 Adding a plasticizer to the solution
- If you do not have much experience in laying, then add a special plasticizer to the cement-sand mixture, which will slow down its setting. This will help to safely expose each element without having to redo it.
- Do not try to seal the cavities in the stone with the help of mortar, this will only worsen its properties. If desired, they can be filled with bulk insulation.
- Every 3‒5 rows you should put in a metal grid. It will increase the rigidity of the whole structure.
While laying the last few rows, you need to remember to bury the pins. It will be good if you can bend them and tie them up with a seam of one of the rows. They should protrude above the surface for a distance that is 4 cm higher than the Mauerlat beam. The pitch can be kept in 1 meter or less. Instead of studs, you can use rolled wire. Another option would be to fill the armored belt with the installation of studs in it.
Roof
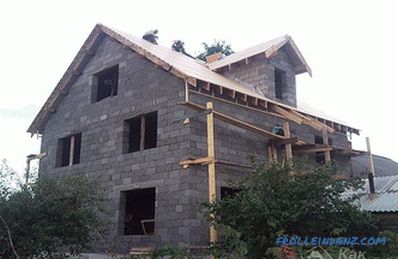 Production of the roof
To install the truss system and Laying the flooring should be started as soon as possible after the termination of the wall pasture. Before you choose the desired shape of the future roof, you need to analyze what the maximum amount of precipitation can fall, what gusts of wind are. You also need to consider what buildings or trees are nearby. Usually, all data can be obtained from the relevant services. This information will affect what angle you need to observe.
If the terrain is famous for having strong gusts of wind, then the roof slope must be maintained in the region of 15‒20 °. Even with sufficiently strong snow drifts, the layer will not remain, it will simply inflate. In the case when the territory is quiet, but there is a lot of precipitation, then the best solution would be a spread of 35 ° -40 °. With such a slope the snow will not be able to linger in large layers.
A gable roof or all sorts of multi-skid variations look great on private homes. We will consider an example of the construction of the first option. If the principle is well understood, then you can move to more complex structures.
- Installation begins with the installation of a base plate. They can tie the longitudinal walls on which the rafters will rest. Or install it around the perimeter, which will facilitate the construction of the gable, if it is wooden, not brick. To do this, you need a bar section from 50 * 150 mm to 200 * 200 mm. It should be located in the middle or no closer than 5 cm to the edge. A layer of waterproofing must be laid under it, which will prevent the accumulation of moisture and the decay of wood. In the locations of the studs are drilled holes. Boards are fixed with the help of nuts with washers or knots when using wire.
- At its core, the truss system is a designer that includes a large number of parts. In shape, it resembles the letter A. In this case, the beams act on the gap, i.e. the force is applied in such a way that the walls are under constant stress. This option is not very good for the house of cinder block, so it is desirable to use additional connecting elements. They are racks and lezhi.
- First of all, ceiling beams are installed. After that, the entire area can be closed with a film so that rainwater does not fall inside the building.
- Next lie down on which will stand. They should go parallel to the power plate. The distance between them will depend on how the attic space will be used. You can make them from the same bar as the base.
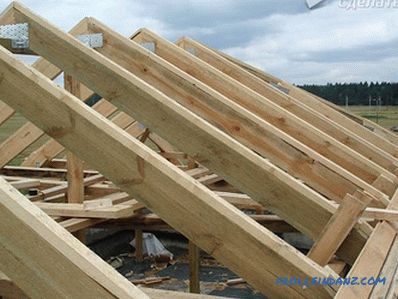 The device of the rafter
- The rafter legs are interconnected with nails or nail plates. In some cases, metal braces are additionally used. If they need to be lengthened, then do it better with overlapping, it should be about 1 m.
- Beams can be two or more. It is important to remember that the distance between them should be no more than 50 cm.
- The trusses must be the same size in order to withstand the plane of the roof. You can collect them both on the building and below. In most cases, the second option is more secure and reliable.
- Two ready-made elements go up to the top. They are installed at the ends of the roof and fixed with temporary struts.
- Three fishing lines are pulled between them.One is on the top corner, the other two - from the middle of each side. They will serve as landmarks for how the following farms will be mounted. Instead of fishing line, you can use the paddle board. It is important to put it on temporary supports and check that it is level in the plane.
- All other farms are installed. In order that they do not move, jumpers are mounted, which will then be removed. The step between the rafter legs must be followed by one that will facilitate the simple installation of insulation.
- The entire area from above is tightened by means of a hydro-barrier membrane.
- What material should be used for the batten is usually indicated in the recommendations for the flooring to be used.
- The final step will be roof insulation. This is usually done with mineral wool. This is a very important stage, because it will reduce heat loss and reduce the cost of various types of fuel.
It is better to close the gables as quickly as possible. This must be done so that the wind does not blow the sediments inwards. So moisture will not accumulate and destroy building material.
Interior and exterior finish
 External finish
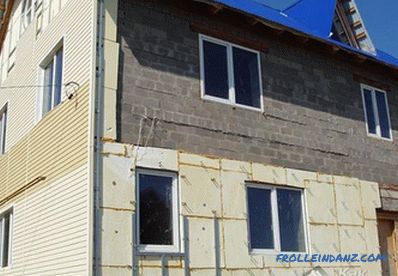
It is advisable for a long period not leave the walls naked. Their finishing can be carried out in parallel with the roofing work. For the outside, the ideal solution would be insulation using foam. It is attached with special dowels, umbrellas. It is better to start from below. The first thing is mounted metal starting plate. In her role can be a profile for drywall. It must be set to the level that will simplify the task in the future. A hole is drilled in the wall through a sheet of insulation using a perforator. Glue is applied to the back side of the insulation, and ordinary polyurethane foam with a small expansion can play its role. Each element must fit snugly to the previous one. During installation, it is advisable to check the flatness of the surface with a level. After that, the entire surface is covered with adhesive intended for this purpose. Along with its application, a reinforcing mesh is laid, which will prevent the appearance of dents from impacts. The final layer will be decorative trim. This may be a bark beetle or relief plaster.
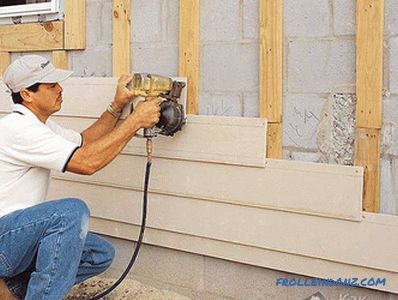 House covering with siding
The house can be sheathed with siding. In this case, mineral wool can also be used for insulation. Suitable product with high density, for example, foam. First, the crate is installed under the cladding. After that, a heater is inserted into the space between the beams. It can be fixed to the wall in the same way as foam.
As noted above, it will be almost impossible to use plaster for interior decoration. But this is not a problem, since it is possible to sheathe rooms with the help of drywall. This will compensate for any irregularities, as well as apply the desired finish to it. It is important to take care of the vapor barrier so that moisture does not leak to the cinder block.
It will take a fair amount of time to complete all these works. But with good organization and planning, you can meet within a reasonable time. It is always interesting to look at finished projects. Share your observations and suggestions in the comments to this article.
Video
In this video you will see how you can make a cinder block at home:
Observe the process of laying cinder block:
Photos
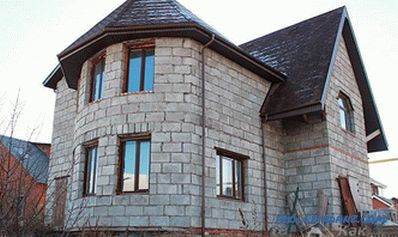 Slag-Block House
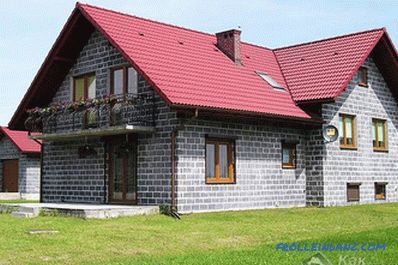 House and garage from cinder block
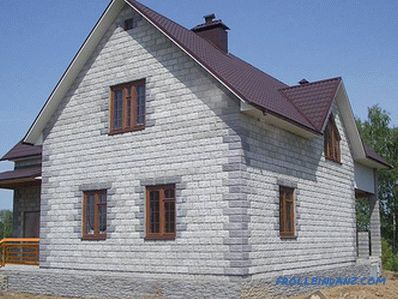 The house is built of blocks with decorative finishing
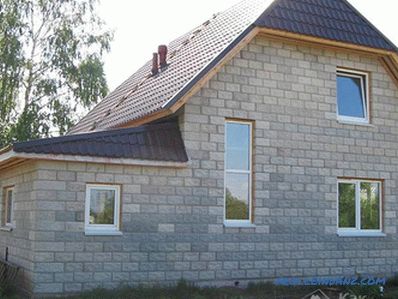 House with an extension
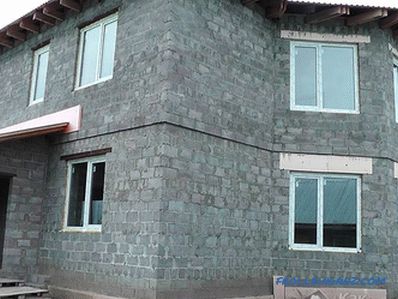 Two-Storey House from cinder blocks
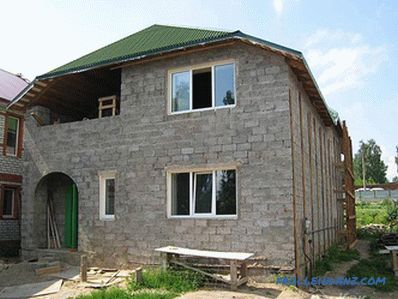 This house will have a ventilated facade
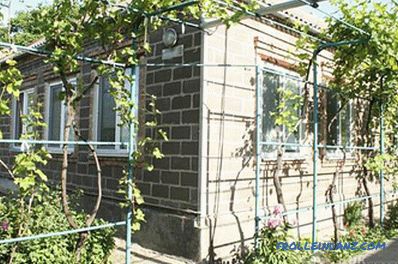 This cinder block house for many years has
