Typically, the construction of a building is not the end point of the entire project. In order for the house to serve a good time, it is important to follow the rules of care and preventive maintenance. This is especially true for log buildings. One of the key points to know is how to caulk a log cabin.
What, why, when
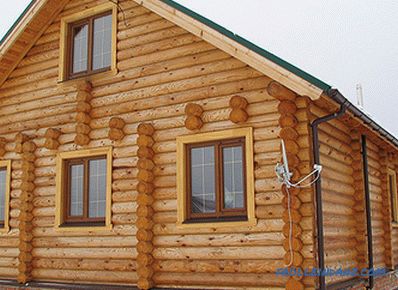
 Shrinkage of a house from a bar
Bath or House, which were built from logs or logs, usually shrink. In some cases, this value can reach 15‒20 cm in the first year. This factor must be taken into account when designing. This phenomenon is due to the fact that some of the moisture is lost and drying occurs. During the course of this process, loose contiguity of the material may appear where everything previously seemed quite tight. To compensate for this unpleasant fact, it will be necessary to seal the seams. Simply put, this is an event that aims to seal the gaps to prevent drafts, as well as reduce heat loss. Carry caulk need to have after complete shrinkage, which occurs within 6-7 months.
The better
 Tool
Tool
In order to make the process as high as possible compaction of a log house, it is necessary to acquire not only a good tool, but also suitable material, and also to have an idea of how to use them correctly. Of the tools we need:
- Blade . This is a small device that resembles a chisel or chisel in appearance. Usually for the quality of the tasks required at least two types. One of them is called typesetting. The width of its blade can reach 10 cm. Thanks to it, it is possible to pass large sections faster. The second one will be smaller, about 2–3 cm. It will be needed during the compaction of the corner joints. Skilled craftsmen use the curve tool that allows you to perform work much better, but requires special skill.
- Material with which the gaps will be filled. Previously, only natural fibers were used for this purpose. Today synthetic materials, as well as various sealants, have already been invented.
- Hammer . In this case, you can use any that is in the household, but it is better if it is a small sledge hammer.
Some craftsmen believe that it will be more convenient to work with a wooden or rubber mallet, since the blow is soft, as a result, the logs are not damaged. Opinions may diverge, so everyone chooses for themselves the most appropriate tool.
 This moss is used for caulking
with Moss
For these purposes, swamp red moss is used. This is one of the most environmentally friendly methods. It serves as a kind of antiseptic that prevents rotting. It has been used for centuries. This material allows wood to breathe in the best possible way. It can not be laid too wet, you need to give it a little dry.
If this is not done, this may lead to the fact that the joints will begin to rot and the structure will become unusable. But to lay it dry is also not recommended. In this state, it will crumble easily, and also subsequently will not be able to close the seams tightly. Before its driving it is necessary to make certain processing. Preparing a solution based on water (10 liters), in which 500 ml of oil and 250 g of soap are added. Everything is mixed until the soap is completely dissolved. After that, the moss is soaked and laid to drain a little. For ease of forming the roller, some craftsmen add tow fibers.
 Tow
Tow
Tow
This is also natural a material that is very familiar to plumbers. Due to its fibrous structure, it serves as a good compactor. Some craftsmen do not really like this fiber. The fact is that it is quite difficult to work with him. Also, over time, the tow becomes useless, which will force the removal of its remnants and do everything again. Before laying it will need to be treated with a special substance that will serve as an antiseptic, as well as scare away insects that can feed on both the fibers themselves and harm the wood.
 Felt
Felt
Felt
Excellent material, which, like moss, allows the tree to breathe. It is a good filter that does not let in odors. In modern material began to add additional synthetic inclusions, which made it even more durable. The main disadvantage of using this solution is that the mole loves to feast on felt. Before caulking, it is treated with special compounds that scare this insect.
 Lnovatin
Lnovatin
Modern material, which is 100% flax and is a waste product. It is a good seal that does not hinder air circulation. It has some stiffness, which complicates the process of the caulker.
 Jute
Jute
Jute
One of the best materials. It not only perfectly fills the cracks, but also protects intervening space from moisture penetration. Birds do not use it for the construction of their nests, so do not have to worry that they will peck it. It is made from wood of the family of lime. Usually it is imported from other countries. The material has softness and plasticity.
 Blade with a rope
Jute rope. In addition to its intended purpose, this cauldron performs the role of decorative trim.
 Sealant for log caulks
Sealant
This is a modern method. Many manufacturers joined in this race. Material is supplied in special tubes. It is applied to the joints, after which a beautiful seam is formed.
What to choose is the decision of everyone personally. Everything will depend on the budget, as well as on the availability of a material in a particular area. But the material is better not to save.
Technology
 How to caulk
How to caulk the seam joints divided into two types. They are interchangeable and, rather, complementary.
- Stretching . This look got its name due to the fact that the material stretches along the entire seam and the fibers intertwine with each other. Usually it is used for primary caulk. After the construction of the log house, the cracks are still quite small, so it makes no sense to hammer them in with a thick layer of insulation and it is useless. The material is arranged in fibers so that they are perpendicular to the logs. With the help of a tool, it is pushed through the slots. After this, the ends that remain hanging are tucked into a roller and tightly tamped into the seam.
- To the set . This method is applied after the log house shrinks and the gaps become more visible. To do this, you will need to collect all the fibers in a pile and make ropes of them, which are then wound into a ball. Moreover, the thickness of such a rope will have to be calculated separately for each seam, because the gaps are not always the same.
After the roll material spread, the process of sealing the seams was significantly simplified. Primary stacking is usually done right away when laying logs. To do this, rolled material is laid on the lunar recess and secured with a construction stapler. Further the log is located on the place. No need to carry out additional work after complete assembly.
 A large layer of material for a caulk
During primary sealing It is important not to save material, but also not to lay it in a large layer. One lane will not be enough, so two fit. One should go next to the other, and the edge to act a few centimeters. It is very important to give stability to the log and make it easier for you to carry out the task when re-processing is carried out.
The secondary seal, which is done at least six months later, is not the last. After about 4–5 years, when the building finally sits down, it will be necessary to once again process the seams. You can follow the following sequence:
- We clean the seams of debris and material that has come out or worn out. You can go vacuuming to simplify your task.
- A caulk blade should be manufactured poventso, not postlin. That is, you need to move along the circumference of each row. It is important that there is no skew and the building was not damaged.
- You should start from the outside, and then go inside the building.
- Need to unwind the tape. Its length should be 15‒20 cm longer than the wall. This is important, because in the process of compaction folds are formed, to which this stock will go.
- Now it is important to gently tuck one of the edges of the tape into the slot to fix it.
- Next, with a caulk and a hammer, we make a seal. To do this, raise the hanging end, tuck it and beat. This operation must be performed in several passes. It is not necessary to try to score everything at once, as it can quickly become skewed and the sealing itself will be worse. When twisting several times, a seam in the form of a rope is formed, which is dense enough not to allow air from outside.
- We repeat the operation from the inside.
- We are moving from the lower (pit) crown to the upper one. Perhaps at the top it will be enough just to tuck the material gently with little effort so as not to hinder further shrinkage.
You need to be careful not to overdo it with the layer. During the caulk, the frame is raised. If you make the lining too thick, it can lead to the fact that the rise exceeds the size of a single log. The consequence may be that the dowels will not stand up and the bars will fall out.
Insulation with sealant is much easier. For this, a special string of suitable diameter is purchased. It is usually made from synthetic materials. Without effort, it fits into the seam to cover the gap. After that the mastic is applied. Its layer should be from 5 mm wide and from 10 mm high. After applying the composition is sprayed with impregnation, and then leveled with a small spatula. In the first few days you will have to curtain the seams on the sunny side, since usually the manufacturer advises to avoid direct sunlight until it dries.
Sealant is also used after applying natural materials. It helps protect the sealer from pests and animals. Inside the house, instead of a sealant, it will be possible to use a string of sufficient diameter to decorate the pierced joints.
Usually, the self-sealing of a log house does not cause much difficulty and does not require great skills. The only thing you need is patience, because time is running out.
Video
This video shows the caulking process with acrylic sealants:
Search
Related Articles
Sharpening circular saw with their own hands: how to sharpen

Regardless of the tool used in the work, it is always subject to wear, but in some cases temporary restoration is possible. So sharpening a circular saw with your own hands is a natural process th...
How to chop a log house into a bowl: a sequence of operations
Today there is a great interest in the construction of wooden houses, including according to the old technology of log. This is due to the desire of people to live in an environmentally friendly ho...
How to cut glass with a glass cutter
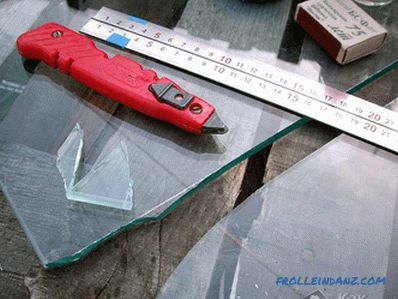
Not everyone can afford to buy and install plastic windows. Therefore, some people prefer to repair old windows made of wood, believing that they will serve for some time. The main problem associate...
Roof of metal tiles do it yourself
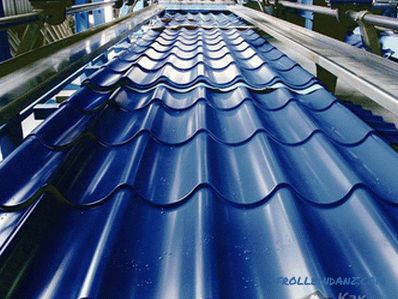
Metal tile is an easy-to-use material that you can install yourself. Some beginners believe that working with metal tiles is available only to highly qualified professionals. In fact, there is nothi...
Frame construction do-it-yourself + photo

A warm, fast-built, not too expensive, but at the same time quite reliable house is the dream of any owner. And if it is still possible to build it almost completely with your own hands, then such a...