If you are reading this article, then most likely you have decided to start breeding and keeping chickens. This idea has many positive aspects. For example, you will always eat fresh eggs and be able to cook nutritious foods from them. In addition, domestic chickens are also fresh meat. And if you keep a lot of chickens, then you can sell eggs, that is, sell them, which will serve as an additional source of income for your family’s budget. However, first you should make a reliable and durable chicken coop, which will create ideal conditions for the life of poultry.
The construction process consists of several important steps. You should not assume that everything is simple, especially if you want to keep chickens in the winter season. After all, you need to worry about high-quality ventilation, reliable roof, walls, heating and other important components. This article will provide full material on all construction and equipment processes. Interesting videos, collections of photographs and schemes will make the process of learning information fun. A step-by-step instruction will allow you to figure out how to build a chicken coop.
What should be a house for chickens
 A house for chickens should not only be cozy inside, but also beautiful outside
A bird, as well as a person, needs a comfortable habitat, so before starting construction it is worth highlighting several important factors that will make it possible to make a warm and cozy chicken coop. This room has a number of requirements:
- Temperature conditions . If you plan to keep the bird in the winter, it is important to worry about the proper temperature. So, in winter the temperature should be not lower than 12 ° С. Indoors there should be no drafts, they are a threat to the health of the bird. In the summer, the room temperature should not exceed 25 ° C. If these temperature regimes are not followed, the chicken will stop laying eggs.
- Lack of moisture. To keep the chickens sick, there should not be high humidity inside. Ventilation can solve this problem. Here there are several ways of its device, it can be forced or natural.
- Lighting . Light is life. As a result, chicken production depends on the availability of light. Inside the chicken coop should be light bulbs that dissipate warm yellow light. To ensure the lighting mode, some home craftsmen use automatic timers and relays that turn on / off the lights at a specified time. Conducting an electrician, you must do everything so that all cables are not accessible to chickens.
 Safety for poultry above all
- Calm . For a normal and quiet life of chickens around there should not be a lot of noise. Therefore, the chosen place must be isolated from the busy country house.
- Security . This is another important criterion that ensures the serenity of the bird. The coop must be protected from the penetration of rodents and other predatory animals. Given this, many decide to build on a columnar base.
Video: features of the hens in the hen-coop
Where is the best place to put the coop
 The chicken coop should be away from the residential building
The location of the house is an important step in the preparatory work. You need to think not only about yourself so that an unpleasant odor does not penetrate into a residential building, but also about the comfort of chickens. For example, some breeds do not like frequent invasion of their territory. Because of this, they begin to run worse.
A suitable place would be a remote corner in the territory of your summer cottage. If you have a farmyard, then it is important to remember that outside noise also negatively affects their egg production. Often, many decide to attach a chicken coop to an existing barn. But here, consider what kind of pet will be neighbors to chickens - calm or mostly noisy.
When choosing a place it is important to worry about the place for their walking. Often, you can watch the picture when chickens are walking throughout the yard. It does not give beauty, besides, on the threshold of your house you can stumble upon the "present" left by them. Place for walking chickens should be limited. As a rule, up to 2 m 2 is allocated per head. So, when keeping 20 chickens, the plot should have dimensions of 4 * 10 m. And this is only for their walking.
 A great aviary for walking chickens in the summertime
If you can not afford such an area, keep in mind that some gardeners resort to the original solution, making recreational tunnels around the perimeter of the territory of the metal mesh.
The selected place should be at the same time with areas shaded and illuminated by sunlight.The shadow will protect the birds from overheating on hot days, but they can also bask in the sun in cool weather.
Video: the best place for a chicken coop in the barnyard
For building a chicken coop, it is recommended to choose an elevated place. This will prevent flooding during the rainy season or when snow melts. If this is not possible, then dig a drainage ditch to remove excess moisture. Although the hill can be made artificially, pouring rubble, gravel or earth.
 Metal mesh tunnel. An excellent solution is that chickens do not walk around the yard and garden
It is desirable to position the windows of the coop on the south side for better and long-lasting sunlight inside the room. It is also recommended to install a manhole, a door and build an aviary on the south side. The south side is most protected from cold winds.
What should be the size of the house
 The coop must be of sufficient size so that it can accommodate and live the chicken
Having decided on the construction site, it is necessary to decide what dimensions the house will have. This parameter is influenced by several factors. It is necessary to build on the maximum number of chickens and accurately calculate the effective area:
- If you plan to contain meat breeds, 3 heads must be from 1 m 2 ;
- For keeping egg species on 4 heads - from 1 m 2 ;
- For breeding and keeping chickens for 15 pieces - from 1 m 2 .
We should also say about chickens. They should have individual rooms separated from adults. This will allow them to have free access to the feed. However, you should not allocate too much space for them. As a rule, a small box is enough for spending the night. On the other hand, one should not create conditions for their crush.
 Up to 10 chickens
So, a poultry house designed for keeping 10 chickens can measure 2 * 5 m. As for height, it should be convenient for you when you have to go there. Too low a ceiling will create discomfort during cleaning and cleaning the chicken coop. The optimum height is 2.2 m.
Given this, it will be practical to equip the gable roof, lifting the ridge to 2.2 m, and leaving the walls at a height of 1.5 m. Such a chicken coop will be convenient for chickens and for his service. On the other hand, it is much easier to implement a shed roof. In the low shaded part, you can install sockets.
We have prepared several suitable diagrams and drawings. Based on them, you can make an individual project or build a house on the ready. We offer you to look at several interesting options in the next section.
Drawings and diagrams: ready projects for the construction of the poultry house
 The drawing of the chicken coop outside and inside in size
 Drawing of the chicken coop, top view. Excellent plan for the implementation of
 The diagram shows the size of the open-air cage
 The layout of the correct location of all the rooms in the chicken coop
 Chicken coop scheme in which up to 10 chickens
 can get along the layout of the nest and nests in relation to each other
 Diagram of the distance between important elements of the chicken coop
So in order to summarize everything, for the construction of a chicken coop for 10 hens, the drawings should be calculated based on the following parameters:
- Area b proc eed 4 m 2 .
- Availability of up to 4 sockets.
- Feeders should be along the wall and opposite the perch.
- Outside there must be access to the cleaning and feeding system.
- From the floor level, the trough and the feeder should rise at least 50-100 mm.
- The floor should be smooth, but not slippery.
- Perches at a height of about 600 mm.
- The area of all windows should not exceed 10% of the floor area.
- We recommend the availability of an open-air cage.
- The presence of a ladder in the hen house is obligatory.
Plus, the whole area and the layout of the future house will depend on what you want to place inside it. To save and optimize the internal space is set perch perch. This role is usually handled by an ordinary snag. Chickens can sleep on it.
When organizing a perch, it is important to consider that one bird will lay one egg in 1-2 days. Therefore, one place will be enough for 4 hens. The roosts should be high, as this will prevent damage to the egg. Moreover, they should be located in a clean, dry place and away from the place of overnight stay. Otherwise, chicken droppings may be on the eggs.
As far as norms are concerned, there is SNIP 30-02-97, which indicates the following room parameters:
- At the dacha, no more than 40 chickens can be kept and raised.
- From the chicken coop to the border of your territory should be at least 4 m.
- If there is an adjunction to a residential house, then from the front door to the house should be at least 7 meters.
- When carrying out the extension to the house, it is recommended to coordinate the project with the architectural commission.
If chickens are kept for personal use outside the city, there are no rules or restrictions.
Types of chicken coops based on the needs of
 Coops can take on different forms and types. The main thing is that they meet the needs of birds
There are several types that can be built:
| Types | Description |
| Without going outside | This is one of the simplest options to implement. In this case, the chicks will always be closed until they are released. |
| Open | In this case, chickens will be able to go outside on their own. As a result, they will have more room for walking. |
| Winter | Such a chicken coop will differ from its counterparts, since the walls, roof and floor must be well insulated . |
Build a new or reconstruct a finished building
 It is easy to reconstruct a shed under a chicken coop
If you have an unnecessary shed or garage, then you may need to think about how to reconstruct it. You can pretty save money on the purchase of building material. You will only need to equip the room inside for normal habitation.
On the other hand, such a room is not always suitable. For example, inconvenient location, small area and the like. Today, there are many ready-made schemes that will help to quickly develop a finished project. In this matter you should not think only about saving money. As mentioned above, the egg production of birds and their health depend on how comfortable the conditions inside the chicken coop are.
If you still prefer the old room, then make sure that inside it there are no lumber, covered with lead paint or used previously for the storage of various chemicals. All this can have a detrimental effect on the health of chickens.
Stages of building a poultry house
After reviewing all the requirements and regulations for the construction of the chicken coop, we highlight the main stages of construction:
stage 1 - design.
2 stage - production of the foundation.
Stage 3 - the construction of walls and partitions.
4 stage - construction of the roof.
5 stage - production of flooring.
6 stage - "furnishing".
7 stage - insulation.
8 stage - manufacturing of heating.
These are, perhaps, the main building processes you should tune into. We will consider all these processes, and also give a few step-by-step instructions.
The foundation is the basis of any building
 Very often the foundation for the column coop
Installing a chicken coop directly on the ground is a bad option, so a foundation must be built. For the house the base can be made using different technologies:
- columnar;
- slab;
- tape.
In the manufacture of slab foundations, the work technology is as follows:
| Stages | Description of the work process |
| Step 1 - markup | To begin with, using the cord and pegs, the perimeter of the future structure is indicated. |
| Step 2 - Digging | At this stage, remove the top fertile layer of soil to a depth of 350 mm. |
| Step 3 - backfilling the pillow | Now the bottom of the base is covered with sand and fine gravel. Everything is thoroughly rammed. |
| Step 4 - formwork | Plank formwork is installed before pouring concrete around the perimeter of the foundation. |
| Step 5 - concrete work | Finally, pour a layer of concrete onto the cushion. Pre-woven reinforcement mesh with cells up to 100 * 100 mm is placed on the bottom. For concrete used cement M200. |
As you can see, the process of making the foundation is not so complicated. Although it takes a lot of effort. This kind of foundation is ideal for a chicken coop built of blocks or bricks.
 The foundation is easy to make from blocks
It is much easier to build a chicken coop on a columnar base.We have prepared for you a step-by-step instruction on the construction of a poultry house on a column base, so you can find all the details of this process in the following subsection. The only thing worth saying is that steel pipes, bricks, blocks and similar material can be used as support columns.
Video: features of the breakdown of the foundation
Wall construction technology
Walls must be not blown and warm . The choice of material for the construction of walls depends on the fabricated foundation. If tape or slab was made, then you can use a cinder block, foam block, and even brick. However, these materials have a high level of thermal conductivity, so they should be insulated outside and inside.
 The walls of the chicken coop can be made from a USB plate
if the foundation is selected columnar, it is better to give preference to a light frame structure of wooden bars. A wooden frame is placed on top of the supporting pillars, on which the entire frame of the future chicken coop is fastened. For the construction of the walls of the free-standing part, it is recommended to use a metal grid. It can be mounted on a metal corner.
Another option for building walls is polycarbonate. This building material is practical. For example, it is easy to wash, it is beautiful, strong and reliable. However, such a chicken coop will be problematic to use in the winter season. Some gardeners use logs for construction.
Saber is often used. Saman bricks can be made independently using clay and chopped straw. Such walls will provide a sufficient degree of heat preservation and comfort. The only problem with this material is leveling the surface.
 If adobe is available to you, then the walls will also turn out to be quite warm
As you can see, there are quite a few building technologies and materials that can be used to make a reliable and beautiful house. In any case, regardless of the chosen material, it is important to take care that the walls are decontaminated, in order to avoid the appearance of fungus, bacteria and the like.
Video: building walls from OSB plates
Wall insulation - winter version
To keep chickens in winter, walls should be insulated. The modern market offers various thermal insulation materials. To insulate the walls of the coop, you can use mineral wool or other plate material, such as foam or foam plastics. To attach these materials do not take much time and effort.
 Mineral wool - an excellent thermal insulation material for the chicken coop
So, if you decide to insulate the walls with mineral wool, then on the walls you should make a frame of 50 * 50 mm bars. The bar is fastened strictly vertically. The step of laying timber is regulated based on the width of the insulation. So, if the width of the mineral wool is 600 mm, then the timber pitch should be 590 mm. This will allow you to tightly pack mineral wool, leaving no possible gaps.
The bars are fastened to the wall with screws (if the frame is made of wood) or with dowels. It is also recommended to make a vapor barrier layer. For this, a plastic film is fixed to the wall before laying mineral wool. Its installation should be overlapped to 150 mm.
The thickness of the heat insulating layer must be at least 50 mm. If after installing the insulation you find the gap, then they can be filled with foam.
 The original solution for the external insulation of the walls of the coop with straw
As for the outdoor wall insulation, then it is better to use foam or foam. For fixing, a special plastic dowel with a cap is used. This method of attachment is used when the walls are built of bricks, blocks and the like. The heat-insulating layer must be covered with protective plaster using a front mesh.
In some cases, outdoor insulation should not be performed, especially if you live in a warm region. Outside the chicken coop, you can simply sheathe plywood and paint it with moisture-resistant paint.
The roof - reliable protection against precipitation
 The roof of the chicken coop can have 2 slopes in the opposite direction
The best option is the gable roof of the house. Due to this, the ceiling height inside the room increases. If the roof is well insulated, then do not even need a gasket ceiling. For covering the best option would be metal or slate.
 Thanks to this roof, you can easily collect rainwater
The technology for manufacturing a gable roof is as follows:
- The rafters are installed on top of the wall framework.
- A waterproofing sheet is laid and nailed onto rafters.It is necessary in order to prevent the insulating layer from getting wet. Film thickness can be 200 microns. Each waterproofing strip should overlap up to 200 mm. It is desirable to glue them together with tape. Due to this, the coating will be completely sealed.
- After that, it is necessary to fill the sheathing for the roofing. It is stuffed over the waterproofing. The pitch of the batten will depend on the type of flooring chosen.
- When the lathing is ready, you can proceed to the installation of roofing.
Video: making the roof of the house
Warming the ceiling - additional protection from the cold
The procedure for warming the ceiling of the house is necessary if you live in a cold region. In this case, beams are additionally fixed to the truss system. On top of the beams, that is, from the attic, you can fix the plywood, which is fastened with conventional screws.
 Thermal insulation of the ceiling reduces heat loss
Thermal insulation material such as mineral wool is placed in the space between the beams. Additionally, you can fix the vapor barrier film. It is attached with a stapler. The ceiling is hemmed with the same plywood or wooden lining, drywall and the like can be used.
Floors in the coop
 The floor in the coop must be warm and dry
Finishing the floor - one of the main activities in the internal arrangement of the chicken coop. The method of finishing depends on your goals. If you want to raise and keep broilers for meat, then it will be enough to make a light, non-heated floor. However, the floor must still have a double construction. It is easy to implement, especially if you have a column base:
- Beams are installed on the support frame, which perform the role of lag.
- Bottom must be hemmed boards.
- On top of the boards, insulation is laid, for example, mineral wool.
- Next, a clean floor is laid out of the boards.
In the case of manufacturing a shallow strip foundation, floors can be made earthen or earthenware. To do this, prepare a mixture of finely chopped straw and clay. The clay mixture is applied in layers. Each layer is carefully rammed. In this case, before laying the next layer, the previous one should dry out. The process is rather long, but the basis will be reliable.
 A heated floor will protect the paws of chickens from freezing
enough to make wood flooring. However, it is better to use a different insulation or bed waterproofing. Mineral wool absorbs moisture. Next, the process of making the floor is as follows:
- The base must be protected from penetrating moisture, so the top can be covered with roofing material. Cloths must be glued together with a special bitumen mastic. Due to this, reliable waterproofing of wooden flooring will be created, which will be fully protected from the penetration of waste of hens.
- A mound of sand, straw, hay, or sawdust is made on top of the flooring. However, hay and straw absorb moisture and dry out badly. Because of this, the flooring will rot and provoke the appearance of fungi and bacteria.
To eliminate this probability, the layer of straw or hay must be made thin, and it is recommended to change it regularly. Therefore, as practice shows, for the flooring it is better to use sawdust, especially since they can be easily purchased in the carpentry shop, sometimes even for free.
The interior of the house
 The hens in the hen house should be comfortable for the bird
One of the main places inside the chicken coop is the roost. A roost is a wooden pole. It is in it that the chicken spends most of the time. An important rule is not to have perches one above the other. It is necessary to calculate about 30 cm per hen. The distance between the poles should be about 50 cm. >
As for the location of the feeders and drinkers, they should be higher. Given that chickens often arrange "disassembly" in the territory, dust can build up inside the chicken coop. To protect the drinker from dust ingress into it, a small visor should be made on top.
 Several nests for laying hens
Nests should also be made. These places should be dark and secluded. This will ensure good egg production. There should also be a litter inside the nest. The nests themselves are made in the form of boxes, which are covered with a removable lid on top. As practice shows, the nest should be landscaped with a separate cover. This will remove the eggs and replace litter.
 The original homemade drinking bowl for chickens
The location of the feeders should be done at the height of the back of the bird. Due to this, the chicken will not scatter the feed with its paws, but will reach it by slightly pulling the neck. The number of troughs and feeders should be sufficient so that they are completely enough for all the chickens.
Video: arranging the inside and outside of the house
Heating - comfort and comfort
The chicken tolerates the cold. Particularly severe cold and drafts adversely affect the feet of chickens, freezing due to the lack of feathers on them. As already mentioned in this article, the indoor temperature should not fall below 12 ° C. If you live in the northern areas, in addition to the insulation of walls, floor and ceiling, it is recommended to install heating devices.
In the absence of heating, the bird eats more food, grows fat, and becomes sluggish. This is an additional expense. If you breed chicks in an incubator, the heat of the chicken itself may not be enough. For these and other reasons, heating the coop is necessary.
Video: chicken coop - winter version
Two heating methods: natural and artificial
Heating of the chicken coop can be done by two methods. Under natural heating means maintaining a comfortable temperature without the use of heaters. The bottom line is to use the litter mentioned above.
 Flooring in the hen house is natural heating
In October, the floor is dusted with hydrated lime 1 kg / m 2 . The thickness of the litter of peat, sawdust, hay or straw reaches 7 cm thickness. As the hens live, the litter is trampled down and must be poured. Before the flooring it is necessary to stir with a pitchfork. By spring, the litter thickness can reach 25 cm.
The characteristic of the litter is that it generates heat in the composting process. Accordingly, the temperature in the house is stably maintained at about 12 ° C. The available heat slows the decomposition of the litter and disinfects the pathogenic microbes. But with all this it is necessary to organize high-quality ventilation. Otherwise, harmful ammonia will accumulate in the coop. In addition, in winter, the ventilation pipe should be briefly closed with a lid so that the warm air does not quickly evaporate.
 An electric convector for heating the chicken coop will provide the necessary heat
However, if the outside temperature falls below - 10 ° C, then all these methods are ineffective. You should use another method of heating - artificial. We offer you to consider several options presented in the table:
| Heating method | Feature of the organization of heating |
| Electric heater | This is one of the affordable and inexpensive heating methods. You can use different heaters, for example, convectors, heaters, fan heaters, oil radiators and so on. It is necessary to select the capacity based on the area of the chicken coop and the number of chickens. The presence of automation will allow you to set the mode off / on. |
| Gas heater | Using gas to heat the house is also equally effective, but only for large houses. It is unprofitable to purchase an expensive gas boiler for a 30 or 50 hen house. Moreover, gas equipment must be constantly monitored. |
| Oven heating | This category includes a common stove. However, its use includes a number of difficulties. The problem is that due to high humidity, the metal corrodes. In addition, it is always necessary to have a supply of coal / wood. It is also necessary to constantly maintain combustion, build a separate chimney, isolate the heating elements of the furnace, and strictly observe fire safety. All this requires more labor. |
| Diesel furnace | Such a furnace is safe to use. It does not smoke and has a small capacity. |
| Buleryan | This is a special air-convection oven that works effectively on different types of fuel. |
| Infrared heaters | As you know, an infrared heater does not heat the air, but objects. This method has its advantages, since the objects will longer retain heat than the heated air exiting through the ventilation ducts. Such heaters with a capacity of not more than 500 W can be fixed to the ceiling. |
| Water heating | If the chicken coop is attached to a residential house, water heating can be added to it. Given that the heat inside the house is maintained regularly, the proper temperature will always be maintained in the house. |
As you can see, there are many ways to create heating for the house. You should choose the one that you can organize and which will draw the family budget.
Video: Features of the organization of heating
Heat insulation without energy costs - an innovative solution
We have considered with you a traditional solution regarding how to organize heating inside the chicken coop. When a device for artificial heating is spent a lot of money, and if you apply the above-described technology for natural heating, you have to put a lot of effort to control the level of humidity, otherwise there is a risk of fungus and mildew.
Given the pros and cons, some summer residents resort to the original solution, using a mixture of net-formation used for space ships. The net layer is bacteria that should be settled on the floor in the house, namely in the prepared bedding. The composition is packaged in packs of 0.5 and 1 kg. According to some calculations, 1 kg of this mixture will be quite enough for heating 20 m 2 . Moreover, these bacteria will live for about three years.
 The net-layer will allow to organize heating in the chicken coop without power consumption
To begin with, sawdust is poured in the chicken coop, You can also add oat husks and dry straw. All components are thoroughly mixed together. Next, the bacteria Net-layer should be evenly poured on the resulting mixture and re-mix.
Heat in this case will appear this way:
- Chicken bowel movements fall to the litter.
- When they come into contact with these bacteria, heat begins to be released. At the same time the unpleasant smell is completely excluded.
In another way it is called fermentation litter. From time to time it is enough to loosen the litter slightly and, if necessary, add sawdust or straw. However, do not have to clean the coop.
With an outdoor temperature of -20 ° C inside the house, it may be + 15 ° C. If the frost is stronger, then you can additionally connect a temporary electric heating.
 The net layer is a special bacteria that mixes with the flooring in the chicken coop
This solution has a lot of positives. For example, there is a big savings due to the fact that electricity and fuel are not completely consumed. After a while, there is no need to clean the chicken coop, as the composition of bacteria can lie down with litter for about 3 years. And after this time, you can get high-quality fertilizer for the garden.
Ventilation of the interior: a few common methods
With the onset of winter, ventilation plays an important role in keeping birds, although in summer it is not the last thing. It's just that everything becomes simpler in summer, because you can open doors and windows and organize fresh air intake. Decomposing chicken manure releases a harmful substance - ammonia. If not to establish good ventilation, then there is a serious risk of disease of chickens and even the person who will serve the chicken coop. Worst of all, due to the lack of ventilation, the walls and the entire interior decoration will start to rot and become unusable. For this reason, even at the project development stage, it is important to consider the manufacture of ventilation.
 Ventilation in the hen house will provide a good indoor climate
When developing a ventilation project, it is worth considering some nuances. For example, in winter, the flow of fresh air should be strictly regulated. Otherwise, there is a chance that the temperature will fall quickly and chickens will be cold. Drainage should also be minimized, which also adversely affects the health of the bird.
So, we can distinguish 3 of the most common ways how to organize ventilation in a chicken coop:
- mechanical or forced;
- natural;
- inflow exhaust (kind of natural).
Consider separately the features of each of them.
Mechanical ventilation
 Organization of forced ventilation in the hen house
Forced ventilation is beneficial to do if you have a lot of chickens, and the chicken coop has a large area. Under such circumstances, it is important to organize a stable air change. Implement it is easy. We will provide you with a quick guide to this process. Additionally you can watch the video materials:
| Work steps | Manufacturing Process |
| Step 1 | The place is determined first where the fan will be installed. Some decide to install it in a wall, instead of a vent, or even in a pipe. In the latter case, the diameter of the fan should coincide with the internal diameter of the pipe.How to make such ventilation, you can learn from the prepared video. |
| Step 2 | Having defined the place, for example, in our case it will be a window or a window, if any glass is removed. In its place will be installed plywood, so the size of the plywood must match the size of the window opening. |
| Step 3 | Using a screwdriver and screws, the plywood is fixed in the opening. Previously in plywood should make a hole in diameter of the fan. |
| Step 4 | Now you can install the fan, securing it also with self-tapping screws. |
| Step 5 | After installing the fan, you must connect an electrical cable to it. Here you can use a wire section of 2 * 2.5. A switch is also installed to control the fan. |
| Step 6 | Make sure that all the cable clamps and its connections are carefully insulated. In addition, the wire is better placed in the protective corrugation. |
Additionally, the system can be equipped with temperature sensors to monitor the ventilation operation. You can also purchase equipment to automatically turn on / off the fan. How this can be done, you can learn from the video.
Video: organization of forced ventilation
Natural ventilation
 Natural ventilation scheme in the chicken coop
This type of ventilation is the easiest to organize. There are 2 interesting solutions that we offer you to choose from. Compare them and note the pros and cons:
| 2 ways | Features of the technology |
| Open vent / window | This is perhaps the most primitive way of organizing ventilation. But this method is relevant only for summer hen houses. In winter, warm air will cool off very quickly due to the open window and air vents. Plus, you have to constantly run to open / close the window in time. This method is used in exceptional cases. |
| Installation of pipes for air intake and exhaust | In this case, the ventilation process is automated. Immediately, we note that this method is also relevant if you keep 100 chickens or more, and the room has an area of up to 20 m 2 . So, you need 2 pieces of Ø200 mm pipe. Accordingly, one pipe will be installed on the inflow, and the other on the air outlet. Installation of the pipe is carried out in different corners of the coop, or rather, in the opposite. The chimney can be installed near the bird's perch at a distance from the ceiling up to 200 mm. It is recommended to arrange the outlet of the exhaust pipe to a height of 1.5 m from the roof. In order not to blow cold air on the chickens, the intake pipe should be removed in the opposite corner from the chick's roost. The lower end of the pipe should be at a height of 200 mm from the floor, and from the level of the roof at a height of up to 300 mm. A special umbrella is put on the upper end of the pipe, which will prevent rain, snow, birds and other things from getting into the ventilation duct. The ventilation pipe must be insulated to prevent condensation. For efficient operation of the system, it is recommended to install dampers in the canal in the winter time, which will preclude quick leaving of warm air. Although at strong frosts there is a high probability of pipe freezing. |
We propose to watch the video, which tells about the manufacturing technology of a similar ventilation system.
Video: making natural ventilation in the house
Building a frame hen house: step by step instruction
To fix all the material, we suggest you familiarize yourself with the step by step instruction of construction home conditions. In addition, you can watch the video materials:
| Instructions with photos and explanations for the construction of a simple wooden frame chicken coop on a columnar foundation | |
| Work | Workflow |
| | First you need to make support columns. Given the weight of the whole structure of the chicken coop, steel pipes Ø100-150 mm should be used as the basis for the pillars. You will also need a sheet of metal, cut into squares. Metal thickness not less than 4 mm. Carved squares should be welded to support posts. Immediately it is worth noting that the pillars must all have the same size. |
| | In the next step, you need to select the appropriate place for building. Using wooden pegs and a rope, the territory is marked. This is an important stage of work, because the final result largely depends on the quality of the preparatory work. |
| | After marking, it is necessary to remove the fertile layer of soil on one bayonet of a shovel up to 250 mm. At the corners of the dug pit are installed pillars for the future of the house. It is important to pay special attention to their installation. They must be installed vertically. Moreover, the upper sole of all 4 pillars must be strictly at the same level with each other. The soil under the pillar base must be compacted. If in your area unstable soil, then a sandy pillow is made. At the bottom of a layer of sand and crushed rock. The cushion is rammed, after which the support pillars are mounted. Even if there is a small horizontal drop, it can be leveled by attaching the bottom trim. |
| | The installed support columns are necessarily treated with an anti-corrosion compound, and also painted over with a water-repellent paint. This will serve as additional protection. After installation of the top trim from the board. For this purpose, you can use the board 150 * 50 mm. At first, a timber from two short sides is fixed to the metal sole. For this purpose, a hole is drilled in the metal, as well as in a bar. It is fastened with steel bolts. After the top two boards are stacked on the long sides and fastened in the same way. The mount must be strong and reliable, because the quality of the future construction will depend on it. |
| | When the base is ready, proceed to the manufacture of a wooden frame. However, before this excavated pit is filled with soil (it is possible and rubble), which is rammed. At the corners are installed support columns, which can be fixed with metal corners and screws to the previously laid wooden piping. Immediately formed an opening to enter the coop. For greater strength, stiffeners are created in the middle of the height of the building. The bar can be 600 * 500 mm. |
| | Now it's time to arrange the roof, in this case the roof has 2 slopes. The rafters are installed and attached to the upper frame of the frame. |
| | The rafters are additionally fixed with struts to give the roof the necessary rigidity. Formed attic can be used to store hay, sawdust and other things. |
| | When the frame is fully ready, you should proceed with its trim. Outside such a chicken coop can be sheathed with plywood. The walls of the frame must be insulated with mineral wool. Inside the wall, you can also sew up plywood, as well as other sheet material. As for the roof, then it uses metal. The roof must be insulated. Inside the ceiling is hemmed with plywood or similar material. Some use drywall. |
| | Here you can see that a place for walking birds is additionally organized. The skeleton used was timber and metal mesh. In addition, the perimeter of the foundation is sheathed with a grid. This will eliminate the penetration of predatory animals to the bird. Doors must be installed in the aviary so that it can be cleaned inside. A ladder is also being made to exit chickens from the house to the street. The gangway is constructed from planks; transverse planks simultaneously stiffen the structure and serve as steps. |
| | A simple latch is attached to the door of the chicken coop. Additionally, it is recommended to install a loop for a padlock so that no one will steal chickens in your absence. |
| | As for the internal space, here we see that two poles for overnight are fixed. Just above there is an extra shelf. A small ladder is surely attached to the poles to make it easier for chickens to climb up.To control the temperature, a thermometer is necessarily mounted. |
| | A nest must be present in the hen house. It should be located away from the fixed perches. Hay is used as litter. |
| | Be sure to make a door for the bird to go outside. In this case, a lifting door is used. As a drinker is an ordinary plastic bucket. Feeders are located in the hen house. |
| | This construction is quite simple. Even in harsh winters, it will be a great place to keep chickens. It is worth adding that ventilation for air exchange is necessarily removed. |


As you can see, it is quite possible to make such a chicken coop even for summer residents who have no special experience in construction. In such a house can live up to 10 chickens. In order to approximately orientate in size, we additionally provide instructions and diagrams with clearly marked dimensions of each individual element.
Construction instructions for the frame hen house: detailing
By following these drawings, you will be able to design and build a small but warm house for chickens in your dacha. In the final result, it will look like this:
 The scheme of a small chicken coop, lined with boards
The hen house height is 2450 mm, width is 1300 mm, and length is 2500 mm. It is worth noting that during the construction of such a house you can use bars 40 * 100 mm for the frame and 25 * 100 for covering the frame.
Construction begins with the formation of the base. For reinforcement in 600 mm pitch, crossmembers are fixed inside the frame. To begin with, a frame is made of bars, and a USB plate is fixed on top with self-tapping screws.
 Base of wooden flooring
You can put blocks and other similar material under the base. After the frame is made with whole finished blocks, as can be seen from the diagrams below:
 The frame of the side wall with doors
 The skeleton of the rear wall of the chicken coop
A door is immediately formed in the frame. It should be of sufficient height so that you can freely enter the coop for maintenance. The door can reach a height of 1770 mm and a width of 750 mm. The windows have dimensions of 550 * 600 mm.
All finished sides of the frame are attached to the wooden base. A single-shed roof is formed:
 Installation of a single-shed roof
After that you can proceed to the wall paneling sheet material. The roof is overlapped with slate, metal tiles and the like; there are no special rules:
 Wall cladding and roofing
Almost the entire chicken coop is ready; in conclusion, the side boxes for nests are made. These hanging nests should have a door so that you can take eggs from the nest from the street and also replace the litter. It looks like this:
 Making a nest for a chicken
An aviary for walking chickens must be made. The size can be absolutely any. In our case, the height of the enclosure - 1500 mm, width - 2500 mm and length - 3700 mm. The choice of the size of the place for walking the birds is determined based on their number.
 Place for walking birds
So, we have examined with you the question of how to build correctly chicken house If you have your own ideas, you can write about them at the end of this article. We hope that this material has given you food for thought. Remember that before starting work, the volume may seem impracticable, but when the process is already running, in practice it is not so difficult to do everything. Creative inspiration to you!
Video: features of building a poultry house
Video: the development of a new hen house by hens
Search
Related Articles
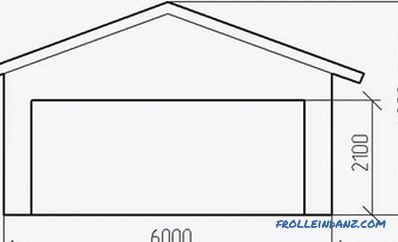
How much does it cost to build a garage - calculating the cost of building a garage

A garage is an important and irreplaceable structure, especially in private properties. To give preference to a particular structure, you need to know its value. But to calculate the approximate amo...
How to fix drywall to the wall
Today, construction works use a variety of methods for leveling wall surfaces, as well as improving sound and heat insulation. One of the most simple and effective - plasterboard plasterboard (gypsu...
How to fix drains to the roof
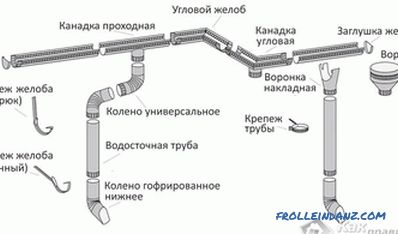
To organize water drainage from the roofs of houses, various drainage systems are used, which are a constructively articulated set of elements that protect the basement and exterior walls from exces...
How to make lining: self-production
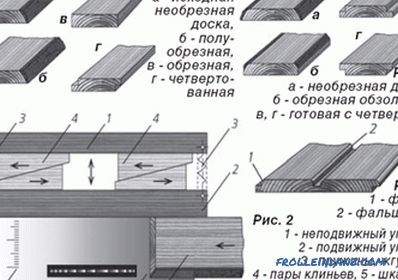
Lining is widely used in construction, and everyone knows about its advantages and quality. Many people spend extra money on the purchase of this material, since they do not know how to make a wall...
How to build a garage from a bar with your own hands: technology
The huge variety of building materials on the market today makes it possible to make almost any garage construction in a short time. However, it is still the tree that is considered the most effect...