A siphon is installed under the sink to ensure quick removal of dirty water into the sewer system under the sink. Replacing and installing this device for some may be challenging. This review will discuss how to collect the siphon in the kitchen. In order to complete the installation, the right approach is needed, and then even a non-professional will do the job. To do this, do not need a specific tool, you need only a screwdriver.
Device and purpose
 Water lock pattern
Siphon not only removes dirty water, but it has another purpose. Due to the special design, large debris is retained in it, therefore its ingress into the sewer pipe is prevented and therefore the likelihood of clogging is reduced. But the main function of this device is the formation of a water seal, which serves to protect the room from harmful and unpleasant odors.
Special attention should be paid to the fact that for the bathroom it is advisable to use a siphon that looks like a pipe with a special S-or U-shaped bend to form a water plug. For kitchen sink, it has a more complex structure, since it is mainly intended for the accumulation of garbage, followed by cleaning.
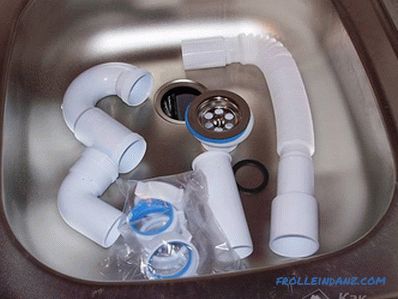 Siphon for the sink
The sink siphons in the kitchen have the following device:
- Socket for connecting to the sink. The design with the help of a nut is fixed to the lattice filter of the sink.
- Pipe connection for overflow. It is used in cases when it is possible to connect the drain of a washing machine or dishwasher.
- The tank or glass is the main part of the design. A water lock is formed inside the tank, and due to the volumetric cover it is possible to quickly remove the accumulated debris.
- A branch pipe is designed to be connected to a sewer pipe for the purpose of discharging dirty water.
Equipment
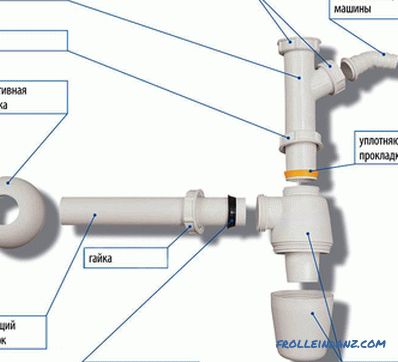 Construction of siphon
The above diagram shows which shows the location of parts. But whatever the design of the siphon, in each of them there is a small knee or a small reservoir, due to which some of the water is retained in the pipe. This forms a water trap, which prevents noise and unpleasant odors from entering the room.
For the manufacture of this device, plastic (propylene, polyethylene, PVC) or chrome-plated metal is most often used. The product from metal, besides that differs in reliability, also looks more attractively and solidly. But over time, the oxidation of the metal occurs even despite the electroplating. For this reason, in everyday life, it will be preferable to use plastic devices that are non-corrosive and easily cleaned from dirt, and more affordable.
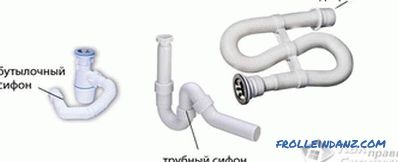 Siphons
Plastic siphon equipment:
- Pipe connection to the sink. With the help of a nut, the device is fixed to the washing filter grill.
- Branch pipe outlet. It is connected to the sewer pipe in order to drain dirty water.
- The glass or tank is the main part of the design. A water seal is formed in the glass. Below is a cover that is designed to quickly remove accumulated debris.
- Exhaust pipe. In some models, a drain is added, through which the connection of a washing machine or dishwasher is performed.
- The protective grating, which is installed in the drain hole of the sink, does not allow large waste into the sewer system.
- Rubber stopper for plugging the drain hole. In cheap devices such a cork is not provided.
- Rubber gasket for placement between the outlet and the sink. The thickness of the gasket can be 3-5 mm.
- Rubber gasket under the outlet.
- Plastic nut from the outlet.
- Connecting screw of copper or stainless steel Ø 6-8 mm. It is noteworthy that cheap models come with metal screws with a thin coating of nickel or chrome. Screws from such material are unreliable, quickly rust and collapse. Choose a device with a quality magnet, you can use a small magnet, which is checked metal. Stainless steel screws will not magnet.
- Nut made of brass, copper or stainless steel. In this case, the iron nut will not work, since due to corrosion it will not last even more than a year.
- The body of the product in the form of a knee or a bottle.
- Plastic coupling nut.
- Two tapered rubber or plastic gaskets.
- Sewer drain.
- Nut for fastening the plastic adapter.
- Glass or siphon cover - for durability of the device.
- Rubber large gasket for a snug fit of the instrument cover to the body.
- Sewer drainage - standard plastic or corrugated pipe, plastic pipe, flexible hose.
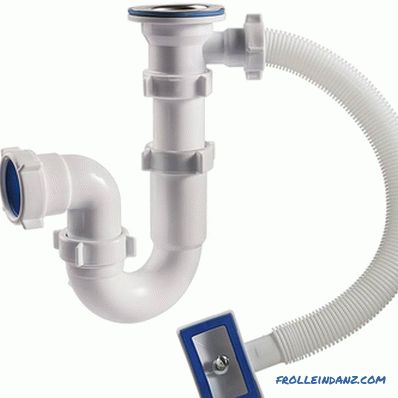 Siphon with overflow
There may also be a siphon with overflow that is installed on the sinks , which design provides overflow.
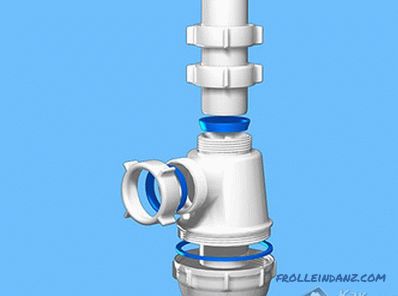 Bottle-type siphon
The device of the bottle type, despite the more complex design, is more It is popular in everyday life than a pipe siphon, because it is compact and easy to maintain. And if valuable items accidentally fall into the sink, they can be easily removed by unscrewing the bottom cover.
Assembly
 Siphon in the package
Installation of the siphon can be done every master of the house. But although the assembly and installation of the device are relatively simple, however, this process requires a responsible approach. Otherwise, a negligent attitude will lead to leakage and the appearance of unpleasant odors from the drain hole in the room.
When purchasing, you need to make sure that the rubber pads are of good quality. In the presence of the seller, the assembled device is disassembled to make sure that the fastenings are reliable and all the components are in stock. Do not ignore possible defects (chips, cracks, burrs), since they can contribute to leaks.
When choosing a kitchen siphon, you should pay attention to some points:
- The diameter of the sink hole must match the diameter of the filter grid that comes with the appliance.
- Connecting other plumbing fixtures. If you need to connect a washing machine or dishwasher that requires water drainage to the sewer pipe, you should purchase a device with an additional outlet for connecting the drain hose.
- Dimensions of the product for installation under the sink need free space. Otherwise, you must purchase a small device.
- Diameter of sewer. The pipe that serves as the connection of the outlet pipe and the sewage system must be of the appropriate diameter. In the case of a smaller diameter, a rubber adapter may be required, but the diameter should not be larger than the sewer.
- Aesthetic solution. If the device is externally closed or hidden in a kitchen cabinet, it does not matter what material it is made of. And for an open location, it would be appropriate to purchase a chrome-plated product, although its cost is more expensive.
- Cost of the product. Not always the quality of the device depends on its cost. It is quite natural that it is possible to operate a metal siphon in the kitchen much longer than plastic. But, in principle, a plastic product can serve a very long time. Therefore, the difference in price is due to the external component, rather than functionality.
Basic recommendations for assembly
As a rule, complete with the device, instructions for product assembly are attached. But even if it is absent, it is possible to mount it without special difficulties. The following tips will help:
- It is best to assemble the kitchen sink by hand without using a screwdriver (instead of a screwdriver). This allows you to control the clamping force, so as not to violate the integrity of the connections on the thread.
- Before you tighten the parts, install rubber gaskets in place. For reliable sealing can be used sanitary sealant.
- The height of the nozzle connecting the sink and the glass can be adjusted. When changing the position of the gasket seal set the optimum height of the device.
- Nuts must be tightened, but do not overdo it, otherwise you can break the thread.
- When all parts are connected, remove excess sealant (if used). A visual check of the build quality is required.
Installation process
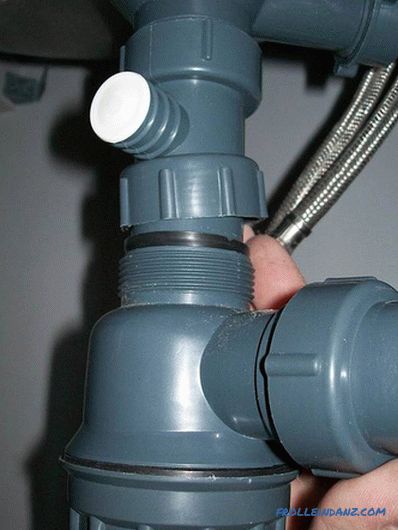 Installing a siphon in the kitchen
- Before installing the sink drain, you must perform the preparatory work. In case of connection with an old cast-iron pipe, the latter is cleaned of dirt and a rubber gasket is installed. With a plastic pipe, the tip is brought to the desired level (maximum 40 cm from the floor level). After that, an adapter is installed on the tip.
- Next, dismantle the old equipment. The screw is unscrewed with a screwdriver.
- The next step is to thoroughly clean the seat of rust, dirt and grease.
- Now the siphon is installed and fixed with a screw by a mixer with a trap.
- It is necessary to connect the main part of the appliance with the pipe under the sink.
- In some cases, you can connect appliances (dishwasher or washing machine). But it is better to connect to the sewage system and perform a primary check. During the test, bends must be closed with plugs.
- If there was no leakage during the inspection, then additional equipment may be connected.For reliability, the drain hoses for the dishwasher and washing machine are secured with hose clamps. Make sure that the water drain hose is not bent or twisted, and that water flows freely through it.
Features of fastening to a sink
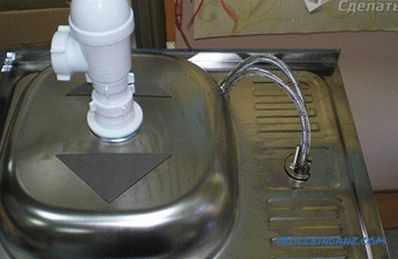 Attaching a siphon to a sink
In the event that the sink has been used and a siphon needs to be replaced with a new one, the old appliance is disassembled, followed by cleaning the surface of the sink from dirt and debris in attachment points.
It is important to remember that when installing the device, it will be necessary to disconnect it from the sewer pipe. To avoid the spread of unpleasant odors, the sewer opening should be closed with a damp cloth, which will serve as a temporary stopper for a kitchen sink. You can also put a plastic bag over the pipe and wind it with a rope.
Siphons are sold complete with a filter grill, which is first attached to the sink using a mounting bolt (in older models, this part is pressed against the bottom of the nut), and then the fixture of the drainage device is made.
Connection with sewage
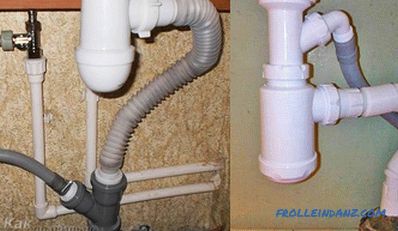 Connection of the siphon to the sewage
Proper connection of the siphon the sink consists in connecting the branch pipe and the main sewage system using a corrugated pipe. Flexible drainage ensures the connection of the device, regardless of the location of the sewer. If the hole has a large diameter, then use an additional rubber gasket or plastic adapter. The main thing is to drain tightly connected to the sewer pipe.
At the end of the installation, you should pour water into the sink to check how tight all connections are. If there are no water leaks under the sink, the work is considered completed.
So, in order to install or replace a siphon, it is not necessary to be an expert. It is enough to choose the right device and follow the technical recommendations. And then this is not a complicated device for a long time.
Video
This video shows how to build in the kitchen:
