The bath has become a desirable attribute for residents of cottages and dachas. Simple wood construction gives people health and unique sensations. For those who can not afford the construction of a bath of logs, there is an alternative option - frame-shield bath.
Such a construction is a frame made of wooden bars, wired with insulated shields. This type of construction differs:
- low cost of materials;
- short construction time;
- fast heating and low thermal conductivity of the material;
- minimum shrinkage ;
- ease of doing work.
The lack of construction - the joints between the shields, which must be carefully sealed with mineral insulation and vapor barrier.
Project
") Bath planning
Bath planning
A small panel sauna with its own hands includes three rooms : washing, steam room and rest room. This is an optional layout, the number of rooms increase or decrease as desired. You can make the project of the room yourself or use it ready. On the drawing it is necessary to note the location of windows, doors, stoves, communications.
Foundation
") Pillar foundations from inside
Pillar foundations from inside
On the site selected for the construction of the bath , with the help of pegs and twine markings are made under the foundation. For light frame construction most often used pile foundation of asbestos-cement pipes. These supports will last a long time, they are durable and do not collapse under the influence of moisture. The work does not require special skills and the use of special equipment.
The underground part of the pillars are buried below the depth to which the ground in your region freezes through the winter. Their diameter is chosen taking into account the weight of the planned building, the bath will require 20 cm posts. Asbestos cement piles are located at each corner of the building and at the intersections of the walls. All places under the posts are marked with pegs.
") Pillar
Pillar
Pits for pipes are dug out from 1 to 1.5 m, sand is arranged at the bottom a cushion of 20 cm. The pillars are level by level, in the presence of groundwater, they are coated with mastic for waterproofing. The base of the pipe is filled with concrete. The outer side is wrapped with ruberoid and covered with sand. Inside the pillars lay 2‒3 iron bars and pour concrete. After its setting, they start building the frame. The columnar foundation will provide an opportunity to put the drain and provide floor ventilation. Instead of asbestos cement pipes, you can install reinforced concrete blocks.
Plinth binding
")
On the installed poles it is necessary to lay a layer of roofing material as a waterproofing. Next is the device grounding trim. To do this, take a bar 120 * 120 mm and soaked with antiseptic. It is better to use softwood, such as pine or cedar. The beam is laid along the entire perimeter and fastened by the “half-timber” method - half of the upper part is sawed off from one timber, and the second half from the second. When joining a flat plane is formed. The strapping checked by means of level, fastens to pipes anchors.
Manufacturing of frame
")
Carrier racks are made of timber with a thickness of 12 cm. They are installed in the corners of the bath and in the places where partitions are built. To the bottom trim rack are fastened with steel corners. It is necessary to install the bars strictly vertically, using plumb and level for control. Prior to the top trim, the racks are fixed with temporary braces.
If there are long walls, additional racks are required. For them, a bar with a smaller diameter is used. The fixing pitch is 50 cm, for the door opening 1 meter is left. You can install the bars, cutting the basement of the beam, but in order not to weaken it, it is better to use steel corners.
The top trim is made the same way as the basement. Its horizontal position is set by level, and the timber is attached to the posts with metal corners. Ceiling beams are laid on the trim.
Roof
") Roof construction
Roof construction
The frame of the bath is ready, it remains to cover it with a roof . The design of the roof is chosen taking into account the amount of precipitation, with a large snow cover, it is better to install a gable roof. Roofing material should not burden the construction of the bath, because it has a light foundation. It is better not to use natural tile, and choose a rolled coating. Suspended rafters are installed for the roof structure, to which the horizontal batten is fixed. Her step depends on the choice of roofing material. Under the roof must be installed waterproofing membrane.
The inside of the bath is lined with clapboard. For insulation between beams, mineral wool is laid, a vapor barrier layer is lined below, and waterproofing is placed on top. When sewing the ceiling, the chimney outlet is equipped.
Cladding of the frame
")
In order for the bath to retain heat well at any time of the year, it is necessary to properly insulate the walls. In the role of insulation, you can put mineral wool, but expanded polystyrene, which does not absorb moisture, is more reliable and durable. The material fits tightly between the pillars of the frame, the expanded polystyrene plates are glued to each other with building tape. On the outside of the insulation waterproofing is tightened, for this you can use plastic wrap. From the inside, it fixes the vapor barrier. An izolon will become a suitable material, its foiled layer is guided inside the bath, the joints are glued with a special tape.
") Size of the shield
Size of the shield
For exterior cladding of walls, a board or OSB board is used. It is possible to decorate a bath with a siding or a block house. Hardwood planks are used as inner cladding: alder, linden, aspen. Lining of coniferous trees, pine or spruce is cheaper, it is perfect for a rest room and washing.
Final finishing of the bath requires the installation of partitions between rooms, windows and doors, floor and stove arrangements.
The construction of a frame-shield bath does not take much time and does not imply significant cash costs. Before you get started, you can watch a video that tells about the stages of work.
We recommend reading:
- a metal stove for a sauna with your own hands;
- how to make shelves in a bath; by hands.
Video
This video shows how you can build a frame-shield bath in one day from ready-made panels:
Photos
") Ready-made frame bath
Ready-made frame bath
") Example of a frame-shield bath
Example of a frame-shield bath
") Small frame bath
Small frame bath
") Panel-shield bath
Panel-shield bath
") The bath is covered with metal
The bath is covered with metal
") Bath 6 * 4.5
Bath 6 * 4.5
Search
Related Articles
How to sheathe the window siding - mounting siding on the window opening + photo

Finishing the building with siding gives it a neat and attractive look. This process is quite simple and can be performed without the involvement of builders. Facing such elements of the house as wi...
main categories and design features

The main purpose of a circular saw is to cut such materials as: boards, soft metal, laminate, cant, drywall, etc. Due to its power, this tool is almost indispensable where precise longitudinal and...
How to connect a pipe PND - methods of connecting plastic pipes
Little construction will do without laying pipelines. For their installation, you can use various pipes, for example, polyethylene, created under low pressure (HDPE). Such products are used both in...
how to ramp up timber or boards
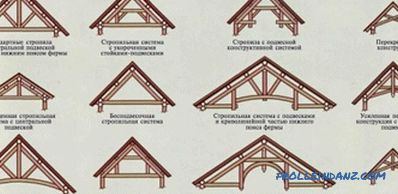
There are two main goals at the roof of the house: protecting the house from adverse weather conditions and maintaining heat inside the house. The basis of the carrying capacity of the roof, which...
Making your own cabinet: recommendations
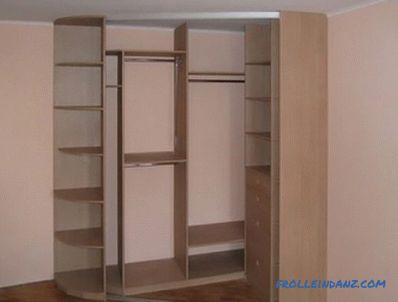
Many people were faced with the issue of lack of furniture in the apartment. However, not everyone has the opportunity to visit the furniture store and purchase or place an order for the manufactur...