Finishing a loggia and balconies with clapboard with your own hands is a responsible occupation. Not only the result, but also its durability depends on the correctness of the work. Therefore, it is important to focus on both the preparatory phase of the process and the finishing stage.

Finishing the balcony with clapboard creates additional comfort.
Materials and tools
Before proceeding to the finish, you need to purchase the necessary materials. But in order to determine the exact amount, loggia measurements should be performed. For this purpose, it is necessary to measure the length and height of the walls, this also applies to the parameters of the windows and the door . The latter value is subtracted from the resulting area of the room, and the result is obtained as a result. Knowing the size of the wall panel, you can calculate its quantity.

Laying of the lining device.
To work, you will need the wooden bars needed for the batten. It requires two sizes of timber: 60x40 and 60x15 mm. For the main lathing, the first option is required, and the second type of timber is needed to hold an additional layer of vapor barrier.
To create insulation, you need to buy insulation that is 4 cm thick. Impregnation is purchased to protect against mold and mildew. In addition, a single-layer vapor-permeable and super-diffusion membrane is required. To make a window sill, you need to purchase a cut board having a thickness of 2 cm. You will also need a planed board 15 mm thick.
If the lining will be made of plastic lining, you should purchase moldings. Their number depends on the number of corner joints. To fasten the panels should buy short screws with a wide cap.
Thus, the work will require the following tools and materials:

Tools for working with clapboard.
- Drill.
- The hammer.
- Screwdriver.
- Brush.
- Hacksaw.
- Pencil.
- Level.
- Tape measure.
- Self-tapping screws.
- Nails.
- Mounting Clamps.
- Liquid nails.
- Moldings.
- Timber 60x40 and 60x15 mm.
- Impregnation from mold and fungi.
- Single-layer vapor-permeable and super diffusion membranes.
- Insulation (stone wool or foam).
- Bladed and planed boards of 20 and 15 mm, respectively.
Preparations for the execution of work
Before performing the lining, preparatory activities should be carried out. It is necessary to check the surface for the presence or absence of damage, cracks, with the first option defects are eliminated. This applies to irregularities, which can be found by attaching a building level to the wall.
In order to protect the surfaces, it is necessary to impregnate the walls and bars. Since the loggia is exposed to atmospheric manifestations, this measure is required without fail. Otherwise, fungi and mold will become frequent guests, and wood will simply become worthless. This measure is also repeated, since every 10 years it is necessary to carry out repairs and new processing.
For protection, you can use a special PVA putty, which creates a barrier to moisture. But there is also the reverse side of this method: the walls stop breathing, and moisture begins to accumulate in the structure itself, which immediately leads to the appearance of fungi there.
Making the frame and performing insulation

The cladding plank of the loggia.
For the framework slats, you need to make a markup. The battens of the batten will be located depending on the placement of the batten. So, in case of horizontal or diagonal placement of the lining, the slats must be installed vertically. The distance between the frame elements will be 0.5-0.7 m. The place for the first and last plank should be 5 cm from the edge of the wall.
After marking, it is necessary to cut the bars of suitable length. The element is applied to the wall along the marked line, then two holes are drilled in the wall and the bar itself. The distance between each hole is 50 cm. The first and last should be at a distance of 5 cm from the edge. Dowels are inserted into the holes made.
Then, the super-diffusion membrane should be fixed, for which you need to use liquid nails. After completing its fixing at several points, you can proceed to the installation of the batten. In this process, screws are used.
Next comes the turn of laying insulation. It is cut to the desired size, and then placed in the openings between the gratings. When using mineral wool, it is necessary to observe precautions, therefore it is recommended to work in protective mittens and respirator. A vapor-permeable membrane is laid on top of the insulation, first fixing it with liquid nails. After this fixation is carried out with a bar 60x15 mm.
Surface cladding with clapboard
After the frame is manufactured, the stage of finishing with a clapboard of the loggia begins.In this case, there are several ways to install: vertically, horizontally or diagonally. It should be cut strips of the desired size.
The first plank is applied to the wall, having previously cut a spike. Fixation is made by klyammerami or nails. The simplest and most accurate method is to use clamp fastening.
To perform this type of fastening, it is necessary to hold the bar and drive it into the nail, but not completely, from the bottom and top. Next, the clamps are taken and wind up to their full shrinkage and full pressing of the bar. Then with the help of nails the fixing of the klyammer itself takes place, and the temporary nails holding the bar are removed.
The next element of the panel is inserted into the thorn-groove connection, if necessary, the bar is achieved, which will allow it to join tightly. Then the clamp is fastened in the manner described earlier. As for the nail heads, they need to be completely drowned, for which you need a bump stop.
For the remaining trims, the finishing procedure will be similar to the process described. The last part is cut so that it fits tightly into space.
In the event that the length of the bar is shorter, you should use dobora.
And the long and short part must be alternated.
Didn't find the answer in the article? More information on the topic:
-

What to glue the flooring with your own hands
What to glue parquet? You can use different glue, its features depend on what kind of parquet is planned to glue. The first step is plywood, which should be well polished.
-

Nuances of flooring laying technology
Will consider the technology of laying the floorboard, the most necessary tools and materials. Thanks to this technology, the floors will always be smooth and durable.
Search
Related Articles
Arbor do-it-yourself - how to build, drawings, photos and video instruction
This article is about how to build a gazebo with your own hands. It is quite easy to do this, especially if you have all the necessary materials and tools at hand, and a ready plan in your head....
How to choose an oil cooler - choice of oil heater

The beginning of cold weather makes you think about the issue of heating a home. In the case when central heating does not warm the rooms enough or the heating season has not come yet, it becomes ne...
The best hoods for the kitchen - rating top 9 (2019)
To determine which hood is better for the kitchen, you can only do some preliminary calculations in which at least the dimensions of the room and the presence of a ventilation system in it will be...
How to make a cinder block with your own hands
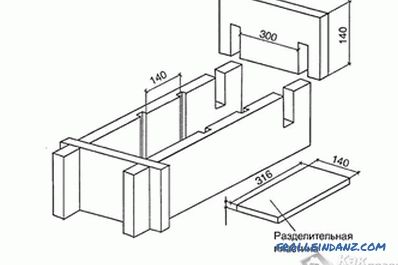
Concrete blocks are a building material that is quite widely used in the construction of the walls of both residential houses and country houses and other outbuildings. In this hollow material, the...
Small bathroom interior - bathroom design
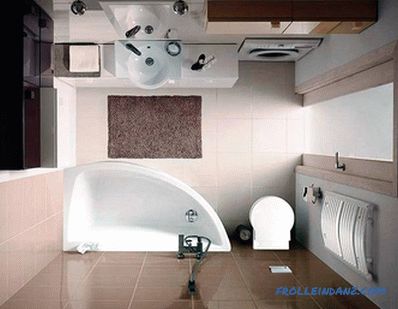
A small room for a bathroom is a feature of the buildings of the last century. Many apartment owners resort to redevelopment in order to increase the area. What can be done? For example, to combine...