Door frames are sold in hardware stores usually already assembled, ready-made, but their individual components (chopped lumber) are also on sale, there is one advantage in purchasing the latter - when assembling, the box can be adjusted to the required dimensions doorway. Installing the door frame with your own hands is not a simple matter and it is not recommended to undertake it without having certain knowledge. Therefore, we propose to study the installation technology, as well as schemes for assembly.
Tools
 Everything you need to install a door
To perform a self-assembly door boxes, you need approximately the following set of tools:
- a set of bars (must be complete with a door frame);
- level or plumb (to avoid distortions);
- hammer;
- nails;
- a screwdriver or a drill with a special attachment for tightening the screws;
- an electrical cutter;
- screws;
- a hacksaw ;
- wooden slats;
- chisel set;
- trim for wedges;
- assembly foam.
 Tools for assembling the door frame
Having a set of professional tools is expensive, but on the other hand, it provides high-quality work results. After all, if you install with simple tools at hand, and without proper experience, you can simply not be able to withstand the necessary accuracy. Therefore, before proceeding to work, contact one of the many firms in which you can rent any necessary tool or device for a small fee.
Assembly technology
The door frame is assembled in several stages.
Stage 1
 Layout of the door frame
- Lay on the floor bars of door construction.
- Carefully inspect the material and make sure that the shortest bar of the structure has grooves (their presence is important for convenient connection of all parts).
- Carefully dock the grooves on the upper bar along with the side bars, and then knock down all these elements. To avoid damage to the material, use a wooden mallet.
- Fasten the parts together with screws and check the reliability of the resulting structure.
- In the absence of grooves in a short bar, all parts of the structure are fastened with nails or screws.
Stage 2
-
 Connection Saw the protruding ends of the wooden bars (so that they do not interfere with the assembly).
 - Pay attention to the surface of the resulting door structure - it should be flat and smooth.
- Check all corners of the structure - it is important that they are straight.
- Make accurate measurements of the width of the upper part of the door frame.
- Cut the rail so that its length is slightly longer than the measurement obtained, and attach it to the side rails with nails.
- Cut the unnecessary ends of the staff.
In the next step, you will need to start mounting door hinges.
Stage 3
 Setting hinges on the box
- On the inside measure 20 cm from the top edge of the structure.
- Attach the door hinge and trace its outline with a pencil.
- It is known that a folded hinge leaves a small gap from the door to the box (0.4 cm). Given the thickness of the loop, calculate the depth of its installation.
- With a router, make a platform for fixing the loop. If you did not have an electric router, you can use a set of chisels for this purpose.
- Similarly, make a footprint for the lower door hinge. But note that the distance from the lower edge of the structure should be 21 cm (1 cm is retracted to the lower gap).
- The door frame, with hinges mounted on it, attach it to the door and mark the door where the hinges will be attached. Arrange the door hinges for the hinges in the same way as you did on the box before.
Stage 4
 Using the plumb bob when setting
- Measure the height of the side of the door opening and then transfer the dimensions to the side rails of the door structure.
- Keeping in mind the safety precautions, carefully lift the U-shaped box from the floor and proceed directly to mounting it in the opening. Using a plumb or level, carefully check the verticality of the box, the perpendicularity of all its constituent elements and the horizontal position of the upper bar. From the first time the frame may not "fit" into the opening (even if all the measurements you made are correct). But it does not matter. The gaps between the opening and the box can be quickly and easily eliminated using wooden wedges or foam.
- After you install the frame in the space allocated to it, be sure to fasten it.Screw the door frame with dowels to the slope of the opening.
- Make sure the door frame you assembled is securely in the doorway.
- Remove the temporary struts and slats, also remember to cut off the protruding parts of the wooden wedges.
 Installation scheme
We can assume that the installation of the door frame is over.
Proceed on hanging the door to the hinges and attaching the door trim.
Attach the trim plates with nails, screws, or with glue. After installation, the nail caps are usually rubbed off, and if self-tapping screws were used, decorative plastic caps are put on them.
As you can see, the installation of the door frame requires not only knowledge, but also installation experience and patience.
Video
Installation details for the door frame:
Schemes
In this section, you will learn how to install the door frame:
 Calculation of the size of the door leaf
 Door frame device

 The thickness of the box depends on the wall thickness
 Components of the box
 Blade installation
 Installing the interior door
 Box installation diagram
 Box with a seal

Photo
The photo shows how to install the box. ku:
 Zapenivanie gap between the box and the wall
 Installing MDF
 Connections

 The floor and threshold of the door frame
 Mounting frames
 Fixing the box with suspensions

 Innovative fastening system
Search
Related Articles
construction technology of logs, timber, on the basis of the frame

A warm and cozy natural wood house for your family is a dream of many. Such housing has long been sought-after and popular, thanks to the many advantages, the main of which are environmental friend...
features, nuances, instructions (photos and videos)
Sooner or later, many owners of country houses are faced with the need to expand the usable area of their homes. The most budget and easiest option in this case would be a frame extension to the...
Do-it-yourself decorative fencing - making decorative fencing

The owners of homestead territories always try to refine their plots. Landscape design depends only on the capabilities of the owner, his aesthetic ideas and imagination. Decorative garden fences ar...
Rating of robot vacuum cleaners of the best models by user reviews
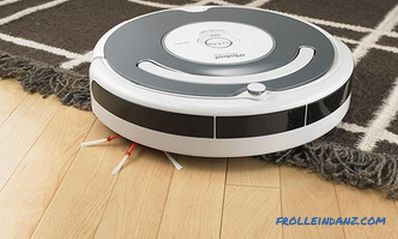
Every year, vacuum cleaner robots are becoming increasingly popular. Manufacturers produce dozens of different models, and each subsequent perfect and better than the previous one. Therefore, more a...
How to level the wooden floor: features

Many people want to put linoleum, laminate, parquet, tile or carpet on the floor made of wood. Before you get down to business, they are often faced with the question of how to level the wooden flo...