A lot of interesting building materials came from the 20th century, but among others there is a profiled bar. It is special not only because of its appearance, but also due to the specificity of a consistent vertical connection. However, the angular connection of the profiled bar is much more difficult to implement, since it is necessary to achieve ideal strength properties.

The corner joint of the timber can be done in various ways, all of which are strong joints.
Elaboration of the process
There are many options to carry out the joint, and the situation depends not only on the required angle, but also on the personal preferences of the master. When choosing a joint method, 2 masters in 9 cases out of 10 will disagree, but both will be 100% right, since most methods are interchangeable.
The most popular option is the Quaternary groove. For its implementation, you will need to do:

Types of corner joints of the timber.
- At any selected section of the beam, except for the end, 2 marks are placed, the distance between which is equal to the width of the beam. At the end of such marks can not be put, because the joint will be unreliable.
- A rectangle is formed on the marked place with a pencil to a height of 1/4 of the beam, and a similar one is mirrored.
- A cut is made of the marked sectors.
As a result, 1/2 of the base thickness remains on this section, due to which it is possible to fold the bars without fear. This option was borrowed from round timber, but there it is known as a joint into a Russian bowl.
For corners, it is convenient to use a trapezoid lock mate. This method of connection was originally called “paw”, but the design was refined to ensure greater reliability of the joint. Here the work is much more difficult, because you will need to use 2 types of cutting:
- There is an indent from the edge equal to the width of the beam, after which only 1/3 of the total height is left in the center, and at the end expansion to 2 \ 3. Thus, an improvised trapezoid with an extension at the end is obtained.
- The trapezoid does not expand towards the end, but from one side to the other. The ratio should be kept perfect.
With successive perpendicular addition, you can get a perfectly flat vertical output. Sometimes the indentation is slightly exceeded, which will not play a significant role, and after the installation is complete, you will simply have to remove the excess with an electric or circular saw.
In mass work, the simplest thorn-groove technology is used. For a corner joint of a profiled bar, this option is poorly adapted, if desired, it adapts quite easily:

Types of corner joints of a log house.
- A rectangular groove is cut to a depth of 5 cm. When cutting this groove, you will have to use a chainsaw of small diameter, since a small expansion will still remain at the base. The narrower the gap, the better.
- From a perpendicular bar, all the excess is cut to leave the corresponding spike. Reducing the length of 5 cm slightly, so think about it is not worth it.
- Connection of 2 elements.
- If the situation requires it, then the guide grooves are corrected by a rasp (manual profiling process).
Thanks to the latter, many more methods have emerged, using the technology of dovetail (aka the connection of a frying pan) and a system of grooves. Each of these technologies has its own characteristics, allowing to organize the angular connection of the profile bar.
The combination of a pan and half a pancake differs only in the degree of reliability and complexity of manufacturing. A full version is usually used, but with connections with a sharp or obtuse angle, the half version will be ideal due to its simple adaptability. A solid connection makes it possible to carry out work activities very quickly, but preparing for it is not easy.

Schemes of connection of a bar by a thorn.
But working with grooves allows you to form corner joints with no less speed, but reliability will limp. The option "on the root spike" is very similar to the Quaternary groove, and here it is not necessary to make such deep grooves, but it is impossible to use the joints on each row, because of which every 2 beams depends on those around it.
The plug-in spike is much more interesting when viewed in detail, since the drawn variant is rather primitive. This method of joint will keep the walls even at an average lateral pressure, but one should not especially hope for a very high reliability.
Sometimes a spike is used in combination with other variations of vertical joints, for which after installation a vertical hole is made into which the round rail is driven in. This rake will serve as an additional fixer.
Tools used and debriefing
The work does not require a large set of tools and materials:

Beam connection diagrams half-tree and paw.
- tape measure;
- pencil simple;
- circular;
- chainsaw;
- rasp;
- profiled timber;
- drill;
- milling machine.
It is not necessary to use all tools at the same time, and it will not work. The choice is made depending on the complexity of the work, i.e., a chainsaw is used for the thinnest, and a circular saw is more suitable for a rougher one, whereas a manual milling machine is only suitable for forming the simplest grooves.
In order to connect 2 beams with your own hands, it is not always necessary to carefully select the option, since most of them are interchangeable. It is very important to be attentive to the connections at the ends, since their design is rather complicated, which may take a little more time than planned.
And in cases where you need to cut a lot of wood, it would be best to make a template made of sheet steel that will perfectly fit the work done.
Didn't find the answer in the article? More information on the topic:
-

Nuances of leveling the floor
Leveling the floor is quite possible to do it yourself. What tools are needed for this? Ways: cement and dry screed, self-leveling floor. Which option is better?
Search
Related Articles
How to measure mosquito net - measurements and installation of mosquito net
Why do you need to measure the mosquito tag? Cut off a piece, and fastened with buttons on the frame. And if the window is plastic? As a rule, this protective device is ordered with the window, but...
How to make a rack with your own hands
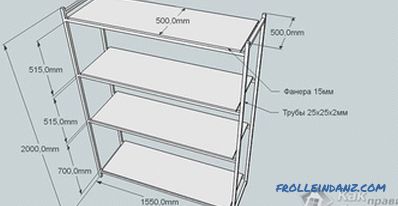
Do you need to arrange personal items? You do not have a specific place to store them? Then you need a rack. This is the easiest and practical way to solve this problem. The rack will be useful not...
How to sheathe house siding with their own hands
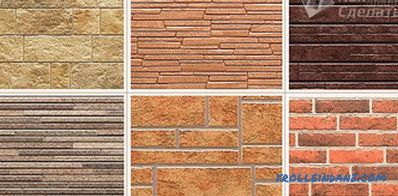
Among the known types of exterior decoration of buildings, a special place is occupied by such a common material in construction, which is familiar to many siding. And indeed, with the help of this...
Sewage in the apartment with their own hands
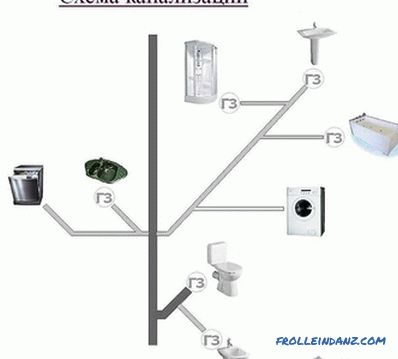
All household drains of numerous apartment sanitary devices are discharged through sewer pipes. The developers undertake their installation, but homeowners have to deal with the repair and replaceme...
How to build a house on the water
To build a house on the water is quite a bold, but at the same time a very original decision that does not occur to everyone. If you decide to become the owner of this type of housing, then you must...