The circular saw is a productive, convenient and maneuverable tool, with which various construction and finishing works are carried out. If you need to perform large volumes of tasks, it is quite difficult to work with a manual circular. In such situations, a circular saw table is a great helper. It can be assembled independently from boards and plywood. The saw itself will be placed at the bottom of the tabletop, and the toothed disk will pass into the slot. The saw turns on, the disk starts to rotate, the sawn timber is fed and sawing occurs. If you wish, you can assemble an excellent table for a circular saw with your own hands. There is nothing difficult in this work.

It is difficult to work with large volumes of wood with a conventional circular saw, so it is better to set it on the table.
The design of the table for the circular saw
Before you assemble the circular table with your own hands, you need to carefully consider its design. At this stage, your task is reduced, first of all, to calculating the load that will be placed on the table in the future. Assembling a table for the saw with your own hands, consider the power of the unit. So, for high-power industrial tools it is recommended to use reinforced steel welded construction. In the case of a home saw in the device so powerful design is not necessary. It will be enough to assemble a table for a saw with your own hands from boards and plywood.

Table device for circulars.
When planning to make a table for a saw with your own hands, you need, as already noted, to take into account the power of the tool. In home workshops most often used saws up to 800 watts. At the same time it is necessary to take into account the frequency and volume of work performed. For example, when building a house, you will have to cut much more material than under any other conditions. Experts do not advise buying a saw for a home more powerful than 1200 watts. In the case of a home workshop in this simply does not make sense.
The higher the power of the circular saw and the higher the volume of work performed, the more reliable, stronger and more stable the table you create. Professional class circular saws are mounted on metal profile bases. In some cases, such tables are even embedded in the floor, because the operator may lose control of the saw for a short while due to vibration, which is enough to cause injury. Creating such a table requires certain skills to work with special tools, welding, etc. The assembly of an ordinary wooden table for a home saw is available to almost every person, even if he does not have similar experience.
Preparation for table assembly

Table assembly scheme.
The simplest version of the circular table is the construction of sufficiently thick plywood and boards. Plywood in this case will be used for the manufacture of countertops. Directly tabletop will be stationary. The tool needs to be installed under it. Previously, a slot is created in the cover, along which the saw blade will move.
Choose the size of the table, first of all, with a guide to yourself. You should be comfortable and work comfortably. The manual covers average and most common sizes. You can change them at your discretion. The height of the table is 1-1.15 m. The length should be selected taking into account the nature of future work. If you often cut long boards, you also need to make the table cover quite long. If the length of the tabletop is more than 2 m, it is recommended to equip the structure with an additional pair of supporting legs. Without them, the table will vibrate violently.
The thickness of the plywood used to make the table top should be from 5 cm. For the same purpose, plexiglass and glass fiber laminate are suitable. Wizards recommend refraining from using chipboard due to insufficient material strength.
The cover is polished and varnished in several layers. This will ensure the required slip of the materials being processed. The best option is to strengthen the sheet metal on the tabletop. This will increase the reliability of the surface and extend the life of the product as a whole.
Materials and tools for work

Tabletop device.
The table for the circular saw requires the presence of guides, which will ensure higher accuracy of cutting materials. Guides are cooked from a metal corner. Clamps are usually used for fastening to the table top. Guides are not recommended to do stationary. It will be more convenient if in the future you can change their position.
Prepare materials for self-assembling the table:
- Plywood. If desired, you can use other material for the countertop.
- Metal sheet.
- Bar 50x50 mm.
- Board 50x100 mm.
- Clamps in the amount of 2 pcs.
- Metal corner for making guides.
Pre-assemble all the necessary tools:

The bed of the circular machine.
- Hacksaw. If possible, instead use a jigsaw.
- Screwdriver.
- Power Drill.
- Manual cutter or machine. In the absence of you can do without them.
- Tape measure and ruler for measurements.
- Square.
After preparing all the tools and materials, you can start assembling a homemade table. Some craftsmen use old dining and kitchen tables for this. But you should not count on greater durability of such products. It is better to do everything yourself, from scratch. So you can assemble a convenient table that fully meets your needs and demands.
Step-by-step instructions for assembling the table

Table of a circular machine made of steel plate.
First, you need to form a tabletop. Take a plywood sheet and make a markup. The edges of the sheet should coincide with the two edges of the cover. Saw the workpiece with a hacksaw or jigsaw. If desired, cut the cut saws. This is optional, so you can skip this step. In the case of a circular saw, reliability is more important than a beautiful appearance. Rough up the worktop with emery cloth.
At the bottom, prepare a slot for the disc. Measure the circular saw tip. To make it as convenient as possible, remove the saw blade from the tool and simply circle the required part of the saw.
Next, you need to take a hand mill and select a material of about 8-10 mm. If there is no cutter, use a chisel. The result will be the same, but it will take more time and effort.
After completing the arrangement of the footprint, try on a plate and make the required adjustments. Mark out the slot for the saw blade and fasteners. If the disk should rise and fall, the table should be equipped with a pendulum mechanism. In this case, the slot shape should look like a truncated pyramid. The top of this kind of pyramid should be sent down. For the manufacture of the frame of the lifting mechanism is better to use metal corners, welded to each other.
Assembly of the frame and installation of the legs

The guide carriage of the table for the circular.
Next, you need to make markup for the transverse and longitudinal slats. In the case of such a table, they perform the function of stiffeners. Do it from the wrong side. The slats are made of bar. Need to prepare 2 longitudinal ribs. Pick the length on the basis of the length of the table top. It is enough just to take away from her 8-10 cm on each side. There should also be 2 transverse slats. To determine their length, subtract 8-10 cm from the width of the tabletop on each side.
Prepare nests for screws. The slats are fixed in such a way that the cover of about 8-10 cm protrudes beyond the edges of the frame. It is important to make the most reliable and durable mount. The first screw set at a distance of 4-5 cm from the edge of the rail. Sami screws are mounted in steps of 20-22 cm. Details need to be drilled through. The caps of the self-tapping screws must be completely recessed into the worktop material.
The first are attached transverse ribs. To ensure maximum reliability of the table, it is necessary to pre-lubricate the edges of the rails with wood glue. Pull the construction with clamps and secure with screws. Leave the table cover until completely dry, then install the longitudinal slats in the same pattern. Pull off the frame parts and install several fastenings on each side. After that you can remove clamps.
For the manufacture of legs, use the bars. The height of these elements is selected individually in accordance with the growth of the operator. It is more convenient when the tabletop is located at the level of the hips. Before installing the legs, scrub them from 1 side so that the treated side goes to the corner. As a result, the base of the leg will have a slightly larger area than the top.
To fix the legs, it is best to use metal corners. You need to slightly tighten them so that the base of the home-made table is located on the side. Thanks to this, the frame will become more stable. Fastening is done with bolts and washers. They need to set the caps out. If set differently, in the process, you can get hurt by protruding fasteners.
Additionally, legs are recommended to pull off the diagonal slats.
This will make the design even more reliable. Reiki should be installed in pairs from the sides of a homemade table.
Carefully polish the surface of the tabletop and cover it with several layers of varnish. Instead, you can fasten a smooth metal sheet with small screws.
At the end, the circular saw is installed in its intended place. Additionally, you can apply markings on the surface of the tabletop, which will contribute to a more even and correct processing of the material being cut.
The controls of such a machine should be brought to the outside of the table top. Usually they are fixed on a table leg. Performing this phase of the job requires some wiring skills. In case of their absence, it is recommended to contact the appropriate specialist
Thus, in the self-assembly table for a circular saw there is nothing complicated. It does not require much time and money. You will spend much less on materials than on a ready-made factory table, and the quality of the product, if you follow the instructions, will be just as good. Good luck!
Didn't find the answer in the article? More information on the topic:
Search
Related Articles
Cutting houses with their own hands (photos and video)
Today, along with modern materials and technologies, many individual developers, paying tribute to the tradition, build log houses with their own hands. With this approach to the construction of yo...
Arrangement of garden paths - varieties, features and installation

After the home improvement is completed, you can proceed to the design of the site. Modern landscape design includes the development of a variety of decorative elements. But an important part throug...
Garden table do it yourself from natural wood

Garden furniture can be diverse, it is not difficult to do it yourself. The big plus is that you can independently decide what kind of appearance it will take to fully match the style of the garden...
The foundation for the fence do it yourself
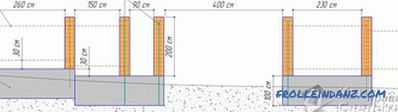
Improvement of any country house, as well as the adjacent land plot, implies their obligatory fencing with a reliable and attractive looking fence, which is a kind of visiting card of the owner. The...
Flooring with plywood do-it-yourself: features, some moments (video)
Few people enjoy listening to creaking parquet. Meanwhile, this is a fairly common phenomenon, and the reason for it in most cases is the uneven foundation of the floor. Any, even the most modern a...