After the harvest is over, the gardener faces the problem of where to store his stocks. Vegetables won't last long in an apartment or garage.
It is good if the country house was purchased already with a cellar. But if it is not there, then you will have to either hire a brigade or do it yourself. There is nothing difficult in work, you can handle it yourself. The main thing is to do it in advance, before the harvest comes. Otherwise, then in a hurry, you can make a lot of mistakes.
Types
") Types of cellars
Types of cellars
There are three types of cellars:
- ground;
- buried;
- semi-buried.
Study of the area
")
") Types of soil First you need to determine the depth of the groundwater waters This is especially true when building a recessed and semi-submerged cellar.
Types of soil First you need to determine the depth of the groundwater waters This is especially true when building a recessed and semi-submerged cellar.
One of the methods requires a fresh egg, a shred of wool and a glass cap. This is a very old technique, which, nevertheless, is fairly accurate. It is necessary in the place where you plan to build a cellar, put a piece of wool on the ground, and an egg on the wool. Above all, it covers the cap. Cap leave the night. In the morning you should see the results.
It is believed that if both the egg and wool contain dew, the groundwater is very close. Building in such a place is not recommended. If the egg is dry and the dew is only on wool, then the water is deep enough. And if the wool and the egg are dry, then the place is just great for construction, because there may not be any water at all.
There are several types of soil:
- sandy loam,
- sandy;
- loam;
- clay;
- peat;
- quicksand.
Peat is one of the best types of embankment soil. It prevents food spoilage, especially when it comes to potatoes and other vegetables.
Quicksand is a very heaving soil that can cause a lot of trouble. It consists of sandy loam, loam or fine sand. Usually for construction in places with such soil, soil is replaced by adding sand.
Sandy soil is excellent for foundation construction. Often this soil is used to reduce moisture and heaving.
Construction of labaza
") Labaz for storing vegetables
Labaz for storing vegetables
Labaz is a ground structure, it can be built anywhere, including in the lowlands. Although, of course, it would be great to make it in a dry area.
The depth of the storage shed does not require, although some structures of this type make them slightly recessed. Logs for such a cellar should be treated, for example, with liquid bitumen. The main thing is that the coating protects the wood from moisture and mold. Bottom can be waterproofed, if there is a need.
- First the base of the labaze is made.
- After the base is ready, it is necessary to build the structure itself, which should not be too high. In appearance, it is more like a tent or hut.
- Logs for labaza are processed.
- To make the protection of the cellar, you need to install the crate.
- It's time to figure out how to make a waterproofing cellar on top. For this it is necessary to lay roofing material on the roof crate. This material will perfectly protect products.
- An embankment is made above the roof. Peat is used as a material. This is the best type of soil for this purpose.
It is interesting that the storage shed can generally merge with the terrain. After all, it is enough to plant a burial ground with seeds of grass or other plants so that it will overgrow.
How to make ventilation in this type of cellar? To do this, there are special boxes in which ventilation can be regulated using a special mechanism - the valve. Sizes labaza each owner sets his own. Usually they do not exceed 3.5 m on the sides.
Semi-deep
") Semi-deep cellar
Semi-deep cellar
The advantage of a semi-buried cellar is that it is less demanding on the ground than the buried one. For its arrangement it is enough to dig a ditch about 1 meter deep. In some cases, 70-80 cm is enough.
- The base is made of concrete or brick. Less commonly used for such purposes slag concrete. Slag concrete can be harmful, so it is used only after processing.
- Much attention should be paid to waterproofing the bottom and walls of the cellar. For this, roofing material can be used, as well as clay and other coating materials.
- The semi-submerged cellar requires overlapping. It is usually made from slab.
Other types
") Cellar embankment
Cellar embankment
There are many other varieties , despite the fact that the main types of three. For example, an ordinary ground cellar may become slightly different if it is covered with peat on top of it. The same can be said about recessed structures.
Under the garage house, it is imperative to conduct a study of the soil, so that later there will be no problems. However, given the fact that during the construction of the garage, they most likely have already been carried out, it will not take much time. Even if there was no research, the owner of the building is still more or less aware of the depth of the groundwater.
") Waterproofing
Waterproofing
Special attention should be paid to the ventilation of the building. It is usually made with the help of special pipes. Such tubes serve as channels. Fresh air flows through one of them, and the waste air flows through the other.
Since the cellar under the garage is an underground structure, more serious walls and waterproofing will be required here. In some cases, such constructions are made in wet soils. In this case, the walls are made of cement and covered with a thick layer of insulating material. Do not forget that the soil should be “dried” with the help of sand. This will allow the site to be separated from the groundwater at least partially.
By the way, during construction it is necessary to do drainage systems. Moisture, one way or another, is still present on the sites. It can penetrate the structure as precipitation, therefore the moat and drainage system are necessary.
Video: features of the design of the cellar
Photos
") Land works
Land works
") The laying of the cellar
The laying of the cellar
") From the cinder block
From the cinder block
") Waterproofing of the cellar
Waterproofing of the cellar
") Waterproofing of the hatch
Waterproofing of the hatch
") Vent
Vent
") Entrance to the cellar
Entrance to the cellar
") A beautifully decorated cellar
A beautifully decorated cellar
") Reliable doors
Reliable doors
") Facing with natural stone
Facing with natural stone
") Original design of the cellar
Original design of the cellar
") Earthen cellar
Earthen cellar
") Shelves for the cellar
Shelves for the cellar
") Wine cellar
Wine cellar
Schemes
")
") Installation in the ground
Installation in the ground
") The scheme of the alta cellar
The scheme of the alta cellar
") The scheme of the brick cellar
The scheme of the brick cellar
") Manhole for the cellar
Manhole for the cellar
") Installing the cellar outdoors
Installing the cellar outdoors
") Cellar diagram
Cellar diagram
") From tractor tires
From tractor tires
") Under the house
Under the house
") Scheme of shelves made of boards
Scheme of shelves made of boards
") Scheme of shelving in a cellar of perforated profiles
Scheme of shelving in a cellar of perforated profiles
") Entry to the cellar
Entry to the cellar
") Ventilation of the cellar
Ventilation of the cellar
Search
Related Articles
DIY installation of metal pipes

Metal-plastic pipes, hitting the construction market, gradually crowd out all others. A number of advantages of these products allows using them equally for both cold and hot water supply. The insta...
DIY polymer flooring - how to make (+ photos)
Strength and durability, aesthetics - these are just a few of the requirements for a floor device. Thanks to modern building technologies and materials, an extensive selection of floor finishes is a...
How to make a highchair: assembly procedure

Everyone knows that besides parental attention and care, children also need special furniture. This category includes chairs for children. There is a huge number of different children's stools, cha...
How to warm a log house: ways and features
Many people think that wooden houses do not require insulation. As is known, their thermal conductivity is such that the walls are able to retain heat even in severe frosts. However, this is not al...
Adjustable floors on logs with their own hands
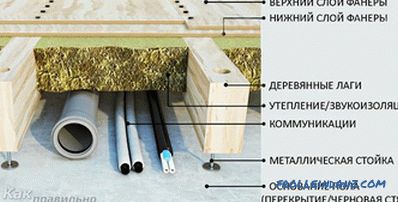
As one of the possible options for arranging rough flooring today, quite often, specific designs, called adjustable floors, are chosen. Arrangement of such structures involves the use of a lag syste...