Wall paneling is a wood finishing material used for cladding buildings inside and out. Can be mounted on walls, ceilings and floors. It is a wooden board, smooth on one side and figured on the other. On the sides they have grooves and ridges that are needed to dock the material. These boards are used for decoration of houses, garages, baths, balconies and loggias in apartments, etc.
")
Winging installation scheme.
Installation of wooden lining can be divided into steps:
- calculate how many boards and fasteners are required for covering the surface;
- preparing the walls, floor or ceiling for cladding;
- installation of lathing;
- fastening lumber;
- varnishing, varnish or paint.
Lining of wood has a number of positive properties. It is universal, that is, it has a wide range of applications; environmentally friendly, safe for health; inexpensive; Easy to attach to the surface. But it must be painted and / or treated with protective impregnations. The tree is very fond of various parasites, mold and fungi, and lumber suffers from the sun and precipitation, so it needs protection and care.
For clapboard trim, the following are used:
- tape measure;
- level or plumb;
- pencil or marker for marks;
- drill or screwdriver, screws for fastening the lath;
- mounting materials for planks;
- brushes for paint, varnish, impregnation.
")
Tools for mounting the wall paneling.
Before you buy lumber, you need to calculate how much it will take to cover the surface. To do this, find out the area of the wall, floor or ceiling. If the covering will be on the walls, then you need to take away the area of windows and doors. Next, compare the resulting value with the size of the lining. The standard width of the board is 8-9 cm, length 2-3 m. A more accurate calculation is done in millimeters.
In the next step, dismantle the old skin, if it is on the surface, clean it of dirt, glue or paint residues. We fill up all the cracks and chips. Then we cover the walls, floor or ceiling with waterproof materials. This may be a film, foil, polyurethane foam (sprayed from a can), moisture-resistant primer.
Lathing and laying of insulation
The next step in installing the wall panel is to fix the bars of wood, and between them almost always thermal insulation is laid.
Lathing is required when facing surfaces with lumber. It performs several functions. First, the installation of the wall paneling is much faster than on any other surface. Secondly, with the help of it you can level the walls, floor or ceiling, then the boards will be on the same level. Thirdly, a heater is inserted between the surface and the finishing materials.
To create the skeleton, wooden blocks or metal profiles are used. The width of the materials should be at least 2.5 cm, and the length can be selected by the parameters of the surface under the finish. They are mounted at a distance of 50-70 cm from each other vertically and at the same horizontal distance, so is the grid.
")
Scheme of the profile of the planks and methods of fixing lining.
Then a heater is laid in the squares of the sheathing. This may be mineral wool, foam, polyurethane foam, expanded clay (floor only). Top need a layer of waterproofing. If wooden bars were used, they should be treated with protective impregnations. Some heaters do not need additional protection from moisture; they already possess such properties. For example, foam and polyurethane foam. But through the gaps between the foam and the crate water or steam can penetrate into the room, so waterproofing is still needed. Polyurethane foam - the sprayed material, with its application there will be no gaps.
Installation of wood paneling
The next stage of finishing works is boarding the surface. There is nothing difficult in this, you just need to nail or drill, and check the evenness level.
The finishing work uses several methods of fixing the wall paneling to the wall, floor or ceiling.
Each of them requires different fasteners and tools.
The first option is to nail down. Especially since there are nails and a hammer in every home. The difficulty is that on each board you need at least 5 nails. You need to drive them very carefully, so as not to damage the paneling.
The next method is to use clamps. This is a special fastener, which is installed on top of the ridge, and the next board is attached to it. Next, they need to be fixed with screws (screws).
One of the easiest options for fixing lining - use a construction stapler. The principle of his work is the same as that of a clerical one, the connection with the help of metal brackets. At an angle of 45 ° staples are inserted into the groove, while the crest of the previous lining easily installed in it.
The last way is to attach with screws.First, the boards are joined along the tongue and groove system, then the screws are screwed into the joints with a drill or a screwdriver.
You can choose any of the listed fastening methods, but remember that wooden lining is always mounted from bottom to top, there should be a groove at the bottom of the board, and a comb at the top. After installation, the lining must be coated with special antifungal impregnations, painted or coated with varnish or drying oil.
Didn't find the answer in the article? More information on the topic:
-
")
Connection of the roof rafters with the power plate
The connection of rafters with mauerlat when mounting the roof of a building is carried out with the help of steel corners, steel plates, self-tapping screws, brackets, bolts. The connection is hard or sliding.
Search
Related Articles
How to choose a grout color - tips on choosing a grout color + color chart
Overhaul each does not more than 1 - 2 times during the entire stay in the apartment. That is why it is so important while making any changes, to think through every detail, to choose the appropriat...
Classic bathroom
If you decorate your bathroom in a classic style, this will indicate only a good and sophisticated taste. After all, this particular trend has always been considered fashionable, elegant, modern. To...
How to connect plastic and metal pipes without welding
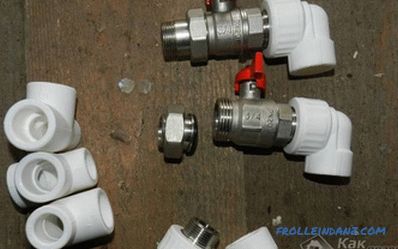
It will still not be possible to assemble the entire system of domestic plumbing and heating only from plastic pipes, no matter how much you want it to. Both heating radiators and heated towel rails...
How to choose an acrylic bath
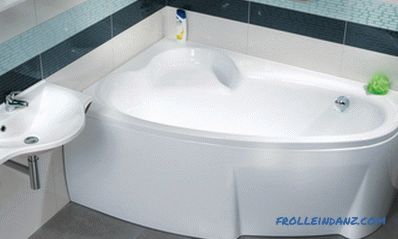
Acrylic baths in the domestic market of sanitary ware appeared relatively recently. In total, it took some 10–15 years for an acrylic bath to take its place in the neighborhood of the baths made of...
How to hang the bracket on the wall
If another flat-panel TV appears in your house or apartment, try not to put it on any furniture (as was customary earlier), but hang it on the wall. To perform this "operation" you need to learn how...