If you wish to fill the non-functional corners of a small room, you will not find a better solution than installing a corner cabinet in one of them. Before choosing the design of this piece of furniture, you should decide what configuration the doors will have. They can be hinged or made by the type of coupe. And this choice will depend not only on personal preferences, but also on the size of the cabinet. Thus, compartment doors cannot have a width of less than 450 mm at a standard height. As an optimal construction height, 2200 mm or more can be distinguished. This indicates that the opening for facades should be above 900 mm; but with a total height that exceeds 2700 mm - from 1200 mm.

The corner cabinet helps to preserve useful space in small rooms.
If there are many books in the house, then they will need a bookcase. In the traditional sense of such interior items are open and closed. The first version of the cabinet will look more light and airy. If there is no goal to save, you can buy natural wood or veneer. However, it is permissible to use in the work and cheaper material options - particle board or MDF. A light-textured textured board is characterized by high durability, although it is a cheaper material option compared to wood. In the manufacture of doors can be used high-strength glass. Shelves can be made using a furniture shield. Plywood sheets will form the basis of the pillars, support covers and the wall adjacent to the wall of the room. The legs can be made of timber.
The minimum depth of the shelf must be equal to 20 cm. The thickness of this element will be limited to a minimum of 2.5 cm, which is true for a length of 1 m.
Tools and materials

The optimal dimensions of the corner cabinet.
- furniture board;
- plywood;
- cant;
- milling machine;
- nails;
- grinding machine;
- sandpaper;
- hacksaw;
- drill;
- screwdriver;
- screws with washers;
- hammer;
- varnish and stain;
- tape measure and pencil;
- wood glue.
Preparation of cabinet elements
It was better to entrust the chipboard with a chip. Alternatively, you can use a jigsaw, but the process with its use will take a long time and does not guarantee quality results.

The device is a typical corner cabinet for the hallway.
The example bookcase will be based on chipboard, veneered oak and oak. If desired, the rectangular ends of the panels are permissible to be trimmed with veneer, you can prepare in advance of oak rails that need to be strengthened with glue to the ends. At the final stage, they will round out.
The used oak boards should have a width of 30 cm and a length of 3 m. They will have to be cut into elements, the length of each of which should be equal to 1.6 m. Then the slats must be adjusted to the size. In this case, you need to use a template to align the board, you will need a sawing machine, as well as a guide. Template dimensions, d / t / sh: 1500 mm, 20 mm, 250 mm. In the process of cutting the pattern is required to have under the board.
Next you have to prepare the required number of rails. They need to be machined on a planer, in the end you need to get elements with parallel and completely even sides. These blanks have yet to be polished, which will achieve perfect smoothness.
Fastening the rails, milling the ends and working on the back wall
Once the rails are ready, they can be fixed to the chipboard with an adhesive composition. At the same time to be used clamp. In order to prevent damage to the workpiece during clamping clamp, under it you need to put a piece of plywood, which must have the desired thickness. Compression will provoke the release of glue from the joints between the elements, it must be removed immediately with a cloth, but you can not touch it until it dries, and then get rid of using a chisel. Assembling the construction, the slats must be joined at an angle of 45 °.

Device layout for a three-piece cabinet.
Milling of the ends should be carried out with special care, it is important to select correctly before starting work cutters for arranging the relief and clearly set the required reach. Feeding the element into the router, it should be advanced smoothly, avoiding deviations to the side. The efficiency of the cutter must be checked before the start of work, it must be done on an extra trim. As soon as the required size is set, you can proceed to the processing of the rails. After completion of milling it is worth checking the contact of the element with the working surface. If there are gaps, it is necessary to get rid of them using the method of the skin, the grain of which is equal to 150.Do not neglect the conduct of these works, since even minor errors will be visible after the cabinet is covered with varnish. That is why getting rid of bumps is required at this stage.
The back wall of the cabinet will not be visible, for this reason it is not worth working too hard on its processing and finishing. However, its installation must be carried out qualitatively, since the reliability of the entire cabinet depends on it. The back wall will hold on to all the other elements. Plywood pieces in the manufacture of this part of the design are most suitable, since they simply can be processed, and the installation process will not take so much time. A sawing machine or an electric jigsaw will help to cut off a part of the element of the required size, and the chamfer can be removed from the cut positions with a sandpaper.
If necessary, you can make a back wall, the characteristics of which will differ in higher reliability and durability, can be used as a basis for chipboard, however, its weight will be much larger.
It will be quite difficult to perform the treatment of the plate, and during the installation a special fastener is to be used, based on a certain technique of fastening.
The process of assembling the cabinet
Correctly assemble the bookcase can only be on a flat surface, this will prevent distortions. The side walls should be fixed to the upper wall, while you need to use a corner, it will help to observe the correct angles in the joints. To insert fasteners, you first need to drill holes, for which you need to use a drill with a diameter that is smaller than the diameter of the connecting element. In the next step, you can tighten the elements together using fasteners. Confirmats, which are not only convenient to use, but also can be obtained with high-quality mounting, will be a reliable option. By purchasing confirmatics, the buyer receives an Allen key, which is able to alleviate the moment of clamping.
Once the master has coped with the installation of the upper part of the structure, he can start the installation of the lower part, and the corner should be used when adjusting the joints. After fixing all these parts, you can install the shelves. You should not hurry with the installation of the rear wall, since without it it will be easier and more comfortable to install shelves. For the reason that the shelves of the bookcase are subject to constant loads, it is not recommended to make them removable. It is preferable to strengthen them with the confirmatics, which must be distributed in 3-4 pieces. on each side wall. This will not only protect the shelves, but also provide the entire structure with additional reliability and stability.
Only now you can proceed to the installation of the rear wall, which will be the final stage. If the master chose the chipboard, then in the role of fasteners will use a construction stapler, nails or screws.
After you managed to assemble the cabinet, you can install it against the wall. By the way, on the side walls of the structure it is preferable to make a selection under the baseboard, so that it was possible to install the cabinet close. Otherwise, it will take up more space, and behind it will form unused free space.
Now you can refine the surface of the cabinet by polishing it and painting it with varnish.
Didn't find the answer in the article? More information on the topic:
-

Properly making your own shelves
Making your own shelves: planning, work features. How the appearance of the front edge made affects the shelf rating. Wood shelf processing, assembly work.
-

Frame house: we build with our own hands
How to build a frame house with your own hands: the device foundation, frame, floor, walls, roof. Carrying out wall insulation, installation of windows and doors in the house.
Search
Related Articles
The better to cover the roof
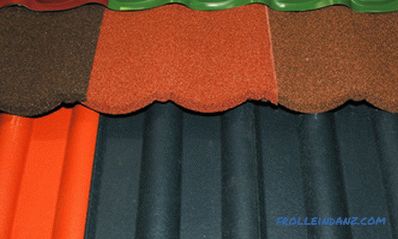
The better to cover the roof of the house so that it is practical, durable and has a beautiful aesthetic appearance, it is about the choice of roofing material that will be discussed in this article...
How to warm a log house: ways and features
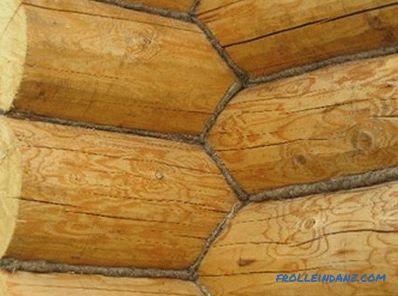
Many people think that wooden houses do not require insulation. As is known, their thermal conductivity is such that the walls are able to retain heat even in severe frosts. However, this is not al...
How to prepare the gates for the winter: choose reliable automation

With the onset of cold weather, the risk of breakdowns or malfunctioning of complex equipment: automobiles, electric drives, etc. increases. Such a situation can take precious time, frustrating pla...
How to choose a plinth to laminate
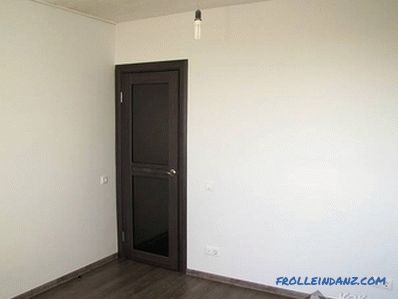
The plinth plays not only a functional, but also an aesthetic role. With its help, the gap between the wall and the floor is closed, and the room itself acquires a finished look. If you choose the p...
Planning of the suburban area - how to zone (+ schemes)

Planning and breaking down a summer cottage is a big creative process that will require not only certain knowledge from you, but also your own imagination. At the same time, knowledgeable people rec...