The presence of chairs in the room is an important issue. Even in the most refined premises, ordinary stools are needed as a functional piece of furniture.

If you need a stool, then you should think about buying it or making it yourself. In stores, they are expensive, and a stool made with your own hands will delight your eye day by day.
But many people these days do not want to spend money on their acquisition. After all, most of them by virtue of their decorative appearance cost a lot of money.
Tools and materials
But it is quite possible to make a wooden stool with your own hands. This is not such a difficult job, so if you take the matter seriously, you can manage in a couple of days. But in order for work to go quickly and easily, it is necessary to immediately stock up on the necessary tools and materials. So, you will need:

Tools for building a wooden stool.
- varnish and wood varnish;
- self-tapping screws (about 7 cm long);
- well-dried whole wooden boards;
- joiner's moisture-resistant glue;
- drill;
- sandpaper;
- screw clamps (4 cm);
- handsaw;
- jigsaw ;
- ruler and pencil;
- chisel;
- several rasps.
Before you begin, you must prepare the wood. It is advisable to cover it with an antiseptic, and after it is fully absorbed, proliferate. This is necessary to ensure the long life of the future stool.
Manufacturing of legs and their fastening

The scheme of fastening the legs of the stool "king-piece".
Now you can start making your own stool. Work begins with the manufacture of legs. As a rule, a standard stool has a height of legs of about 45 cm. But, if desired, the height can also vary up or down. To fasten the legs, you will need two so-called “tsargs”. They will make the connection as reliable and durable as possible due to its cruciform arrangement.
Now the most important thing is to cut the legs correctly. To begin, make a template on a dense cardboard, cut it, and already on this template, start cutting wood legs using a jigsaw. It must be remembered that if you are engaged in the manufacture of the stool for the first time, the legs are best done smooth and smooth. Since experiments with the design for the first time can be unsuccessful, as a result of which the material will be damaged.
After cutting, the legs should be sanded well to achieve optimum smoothness. Then take up the device grooves, which will be drilled into the jumper. The grooves are made with a drill, and then finally aligned with a chisel or a file. As the jumpers, you need to take the appropriate size boards, taking into account that a square with sides of about 35 cm will be used as a seat. Next, spikes are cut at the edges of each membrane, which will fit into the grooves made. In this case, you need to be very attentive to all measurements in order not to miscalculate.

Figure 1. Two stools are needed for the stool, which later will be interconnected.
Now take a cut in the middle of the rectangle on the membranes. In this case, note that the depth of the cut should be equal to half the height of the second membrane, and the width should be equal to the width of the membrane. This is how you will make ready tsars from ordinary membranes.
In total, there will be two such velours, for the pairwise connection of the legs of the stool. When you connect the leg rails to the legs, it will look something like Figure 1.
But first you need to make the roughing compound to dry. So you can be convinced of fastening durability and in time to remove defects in case of their detection. And then the spikes, grooves and grooves in the barrels are coated with wood glue and firmly connected to each other and fixed with clamps. Usually, everything dries for about a day.
Making a seat and assembling a stool with your own hands
Now is the time to start making a seat with your own hands. There are two options for how to do it. The first option is to build a seat from a finished thick board (thickness not less than 2.5 cm, side length about 35 cm). The seat is simply cut with a hacksaw and polished with a jigsaw. It is also desirable to slightly round the edges.

Design scheme of a wooden stool.
The second version of the seat for the stool is the assembly of the shield. Here, focusing on the same dimensions, simply select the desired number of identical boards, which are then connected with glue. Be sure to fix everything with clamps. Additionally, it is possible to fix it from the bottom with wooden membranes that are nailed across the boards.
Now that both of the main parts of the stool have dried, you can proceed to the assembly.Assembly is carried out, as a rule, or with the help of ordinary wood glue, which then must also be secured with dowels (for this, holes are drilled in the cross-shaped connection of the legs and in the seat) or with screws.
But there is another version of the assembly - with the help of special metal corners that connect the legs and seat. It will be more reliable and beautiful, as the connection will remain visible only from the bottom, and the top of the seat will be untouched and smooth.
After the assembly of the stool with your hands will be finished, you will only have to sand the stool and varnish it for the wood.
And the varnish is applied in two layers to make the chair look more impressive. When the varnish is dry, you can safely use the stool.
Didn't find the answer in the article? More information on the topic:
-

Do-it-yourself wooden partition installation
To mount wooden partitions with your own hands, you need to prepare a timber. Its size will depend on the size and weight of the future septum. If necessary, the base must be strengthened.
Search
Related Articles
How to make a barbecue from a brick do it yourself
How to make a barbecue from a brick with your own hands? With some skills and with the right tools at hand, you can easily cope with this task! We present you another brick barbecue construction pro...
Installation of the profile under the drywall do it yourself
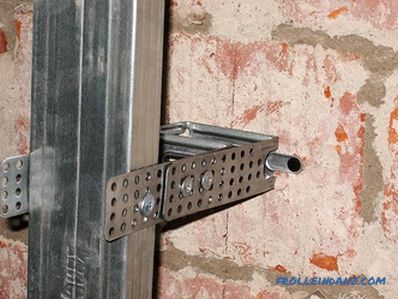
The organization of work on the installation of a drywall profile with your own hands involves carrying out a whole series of operations related to the preparation of a reliable foundation for a pla...
Landscaping the site in front of the house - arrangement of the front garden

The business card of each house is the front garden or the area in front of the house. In the modern sense of landscape designers, the front garden is a beautifully designed area, which separates th...
What are the best poles for the fence

All elements of the fence must be distinguished by durability, resistance to significant climatic loads and to possible mechanical damage. In the article we will understand from what material to cho...
- technical specifications and scope of application + Video
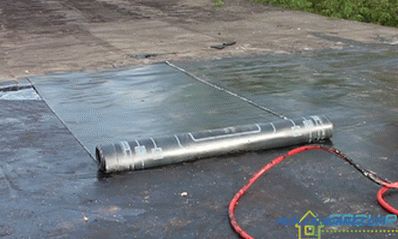
One of the important points in any construction is waterproofing. If proper protection of materials and structures against moisture is not provided for, the service life of the structure will not be...