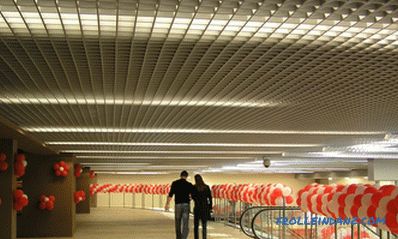
It can be said with all responsibility that drywall has changed the face of our home. And this is true, because drywall, due to its simplicity in processing, environmental friendliness and the ability to create an infinite number of designs, has found application in a huge number of solutions. This material is used not only for cladding, creating niches and additional walls, but with its help they make the most beautiful and unusual multi-level ceilings.
There are many schemes for creating mind-blowing plasterboard ceiling structures. At first glance, it seems that making them yourself is unrealistic. .. But it just seems. Every person who has experience in repairing and working with plasterboard can make a two-level plasterboard ceiling with his own hands.
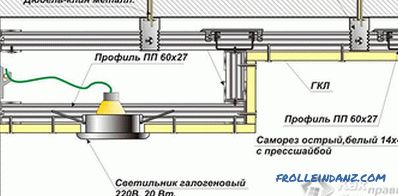 Scheme
Before starting work, planning is the most important. There is a huge amount of two-level ceilings. Which option is right for us? It is the one that can be implemented with your own hands. Let's first understand what kind of suspended ceilings are in general. There are a few options on how to make a suspended two-level ceiling by yourself:
- The first option is to install the box around the perimeter of the room. It is the easiest to implement and at the same time one of the most beautiful. That is what makes it so popular. It is suitable for rooms where the concrete ceiling is initially fairly flat and does not need to be hidden. The box here can be not only rectangular, but also of any shape - it all depends on your imagination. The box is usually used for laying in it various electrical communications with lamps and LED lighting. The box can be located in the center of the room in the form of a circle or an oval.
- The second option is usually used in the case when the old concrete ceiling is in very poor condition and it is not possible to level it in other ways. A feature of this method is the mandatory construction of the first tier of plasterboard, which is attached to the second tier. Regardless of the method that you apply, the design will represent the usual frame of profiles located on the ceiling.
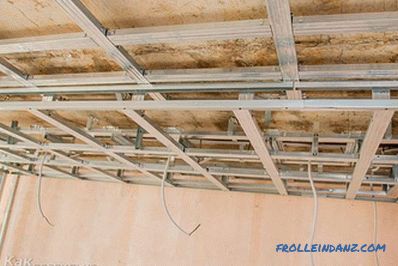 The frame on the concrete ceiling
The final decision on choosing the type of ceiling takes the owner of the premises, based on the design features of the apartment and their strength.
In this article we will look at the standard version of a two-level suspended ceiling, which can be made independently. And of course for the work will require a certain amount of tools. Take care of them in advance. So, we need:
- punch;
- rule, its size should be quite large, preferably at least two meters;
- water level;
- construction thread;
- pencil;
- tape measure;
- stepladder;
- construction goats;
- knife;
- drywall saw;
- angle;
- knife.
And of course we need the drywall itself and the fixings. The list is as follows:
- Drywall.
- Aluminum profiles.
- Hangers and knitting needles for mounting.
- Screws for metal and drywall.
Before you start, you should be especially careful with the calculations. Remember that installation of two-level ceilings does not tolerate errors, so when working, try to be extremely careful.
Preliminary marking
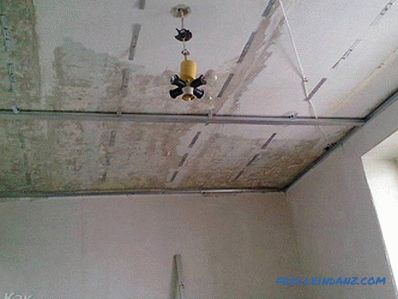 Fixing the profile by marking
- Take a pencil and measure the lowest point where the plasterboard ceiling will end. From this point the level of the bottom part of the box will be measured.
- Using the water level, you need to postpone the horizontal from our starting point and, also note all the other corners of the room.
- Now, using the rule, draw on the walls along the perimeter horizontal lines indicating the contours of the box.
- The first tier of the ceiling should be mounted on a formwork of metal profile attached to the ceiling. But first you need to put the guide lines in the form of a grid.
- Using a pencil or building cord, mark the ceiling to form a grid with a 50 cm cell.
Proceed to assembling the frame
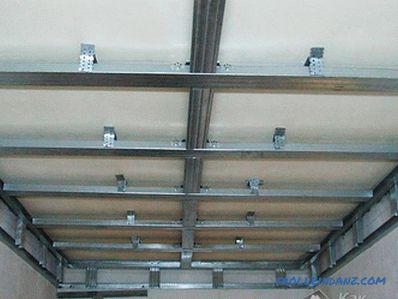 Mounting frame
Well, now we can proceed to the installation of the formwork of metal profiles according to the marked lines.
- Fasten the guide profiles so that they overlap the lines applied to the ceiling.
- Fix the same guides on the walls, where we marked the border of the ceiling.
- Now you need to cut the parts of the guide profile equal to the distance from the ceiling to the horizontal line, minus one and a half centimeters.
- Insert the parts of the cut profile into the ceiling formwork vertically every 50 cm and fix them with self-tapping screws.
- Now connect the lower ends of the vertical sections of the profile to the wall formwork. To achieve horizontal, use the level.
Boxes are prepared. Now go to the plating of the horizontal part of the frame with drywall. First you need to sheathe the bottom of the box. A sheet of drywall cut to size is attached to the aluminum frame with self-tapping screws. They should be located at intervals of not more than 20 cm.
Installation of the lower tier
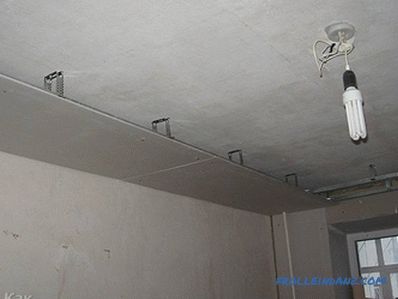 Installation of the second level to the concrete ceiling
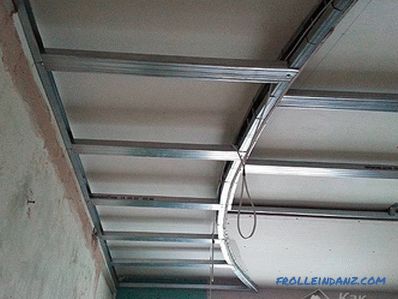 Mounting the lower tier of the frame
Now we need to draw the marking lines of the first tier of our new ceiling.
- We make the marking of the lower boundary of the lower level on the side of the boxes.
- To the obtained horizontal lines we fix the guide profile with the help of screws.
- Now you need to insert and fix the horizontal support profile perpendicular to the obtained guides with a step of 50 cm.
- The required position is given to the profile using a level.
- We fasten the profile to the suspension on the ceiling.
- Then we need to make perpendicular sections of the profile, insert them between the longitudinal ones and fasten with screws with a distance of 50 cm.
Well, it's time to inspect the resulting frame carefully, check the evenness profiles, fasteners reliability and horizontal guides. Now you can sew the resulting frame with drywall.
In most cases, a suspended ceiling implies embedded lighting. So, think over this important element in advance. Pick up the required number of fixtures, wires, terminals.
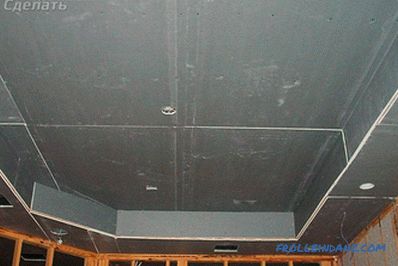 From drywall
Think about all this beforehand and then the new two-level ceiling will delight you long years. For a more visual representation of the installation of a two-level ceiling, watch the video.
We advise you to read:
- how to hang the chandelier on the plasterboard ceiling;
- how to choose the punch correctly.
Video
In this video you will see how the installation of profiles is made and the framework for the gypsum cardboard of the two-level ceiling is made:
