The kitchen or dining table is almost the main attribute of the room where they cook and eat food. How to make a kitchen table with your own hands, it is easy to find out, and then you can not be afraid of whether it fits the room in its dimensions.
")
For the manufacture of the kitchen table using wood cuts or laminated chipboard, as well as edged board or furniture panels.
For the simplest table to be made according to all the rules, the following tools and materials will be needed:
- pine board;
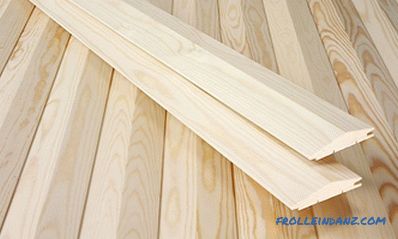
- pad on edges;
- screws;
- furniture angles;
- wood glue;
- emery paper;
- finishing nails;
- square;
- tape measure;
- screwdriver;
- pencil;
- saw on wood;
- electric drill;
- drill;
- mill;
- set of planers;
- chisel;
- grinder;
- clamp.
")
Tools for making the kitchen table.
For the manufacture of the main part of the table, you can use different materials to suit your tastes. Use wood cuts or chipboard, as well as edged board or furniture boards. Each of the materials has its own advantages and disadvantages. The shortest turnaround time can be shown using chipboard, wooden elements are not required. But this material is limited in design.
A cut of a tree trunk is the most expensive option. Making with its use is simple, but finding a cut of the required diameter is not so easy, and not every beginner can make a worktop perfectly smooth. Furniture panels are easy to process, but they, like the edged board, need to be varnished and wait for it to dry. The quality of the cut board is higher, and the wood species can be chosen to your taste. A table properly assembled from boards will live for several generations, although it will take a long time to wait for several layers of lacquer to dry during assembly.
Preparing the legs
")
Drawing the kitchen table.
First of all, it is recommended to make legs. The board of the desired height and cross-section of the sawn to get 4 of the same segment-bar. Near the ends of the conduct of the transverse lines. You can leave the legs as they are, or you can give them their shape by drawing a blank on tracing paper and then transferring it to each side of the legs of the kitchen table, in order to remove the extra wood. Each workpiece is strengthened on the workbench and sawn off all the excess, including the ends, with the help of a saw. Trims are useful, they can be used as corner blocks when attaching the legs of the kitchen table to its frame.
Then the workpiece is machined with a plow or a rasp, after reaching the desired result, the first part can be used as a template for everyone else. Details are polished to a shine with sandpaper of different fractions, you can also use a belt sander for this. The upper part of the legs at this stage is not polished. The legs of the table after sawing process with plow or rasp. The finished parts of the table are treated with stain, which can be made independently from coffee mixed with water. You can use ready-made options, and after the surface dries out, the table is rubbed with mastic based on beeswax. On the edges of the table top, instead of special decorative linings, you can use wood without knots, fir or pine.
Production of the frame sidewall
")
Arrangement of wooden legs and rigidity with dimensions for the kitchen table.
Even one of the simplest do-it-yourself desk projects will require correct and accurate beveling at a 45º angle for attaching to the sidewalls of the legs. Such bevels are most conveniently done with electric saws, circular or tortsovochnoy, but in their absence, you can use a frame or bow saw. First you need to mark the oblique cut on all sides of the workpiece, then clamps press it to the frame of the saw and slowly continue to work.
When marking the board, for cutting the sidewalls out of it, you need to make them as large as possible, as it is not difficult to cut off the excess if necessary. A wooden table often has the shape of a rectangle, so one pair of sidewalls in size should be longer than the other. To prevent the sidewalls from being clamped with clamps from being damaged, you can put a soft cloth under the clamping points.
The beveled ends of each sidewall are divided by halving, the label is transferred both to the front and to the back face. At this stage, it is necessary to find the optimal position for the lamella and carve a groove for it, which should be located at an adequate distance from the outer edge. A line parallel to the beveled edge is drawn on the face. Then the sidewall is clamped in a vice and a groove for the lamella is selected with a router on it.
It is advisable to practice before that on unnecessary pieces of wood, since the process requires great precision.
The marks from the sidewalls are carried to the edge of the legs, you need to make sure that they are not at their height. For every detail, everything must be symmetrical. Sidewalls should be tight to the rear of the legs.
Making the worktop
")
Designing a kitchen round table
Wide boards are cut into the required number of pieces of the intended length. To reduce the likelihood of warping during operation, the end structures of wood are better positioned in the opposite direction from each other. To avoid confusion, all obverse are marked. The extreme slats should be located at least 5 cm from the ends of the boards, the distance between the closest slats should not be less than 15 cm.
The milling cutter is installed in the middle of the edge, all the marks made are aligned with the marked lines. The slits under the slats are selected on all boards, slats are inserted into them, glued together and clamped until completely dry. When the glue dries completely, the tabletop is turned over and its surface is treated with a plane. Before you make a wooden kitchen table, you need to make sure that the ends of all the boards of its surface are flush with each other. If necessary, pruning is applied with a saw with a blade on wood.
All parts are connected, during assembly you need to make sure that the lamellae are also in place. If everything is in the planned places, you need to make holes for screws. The screws are screwed almost to the end, then the level checks the entire structure and the screws, after the necessary adjustments, are tightened. The design is checked, then unwound to apply glue, then re-clamped and fastened with screws. Excess glue, speaking at the joints, you need to promptly clean with clean damp rags.
The decorative face plates are pressed to the marked points, then attached with glue and finishing nails. Subsequently, using the same tips, it will be easy to make a chair with your own hands, since the difference is only in the size of the parts.
Didn't find the answer in the article? More information on the topic:
-
")
How to repair stools with your own hands
Do-it-yourself stool repair: basic repair options for individual parts. Repair legs: installation with glue; thread restoration and improvement of the old thread. How to repair a seat.
Search
Related Articles
how to do it yourself (photo and video)
One of the most popular ways to finish the ceiling of any room is clapboard cladding. Wall paneling is one of the most popular materials, as it makes it possible to emphasize the naturalnes...
Greenhouse made of polycarbonate do-it-yourself + drawings, diagrams, photos
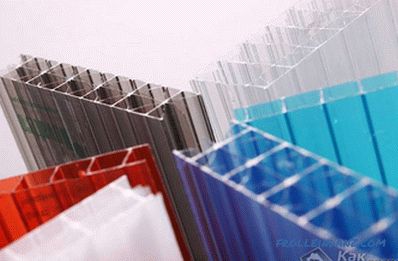
To get a high yield and protect your vegetables from the negative effects of fog and high humidity, you need to take care of the installation of the greenhouse. Often in the manufacture of greenhous...
How to choose a hacksaw
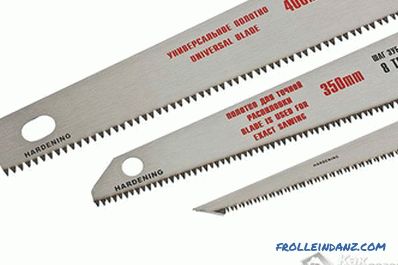
If your toolkit still lacks a tool such as a hacksaw, or you have a lot of inconvenience when working with it, it's time to correct the situation and get a good saw, having thoroughly understood all...
materials and technologies, instructions, drawings (photo and video)
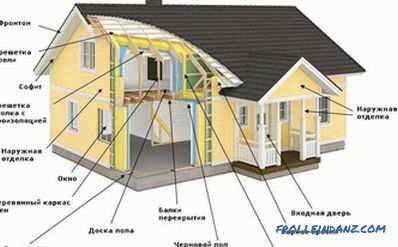
The construction of a frame house is considered simple and can be built in a short time. Therefore, the question of how to build a frame house with your own hands, is becoming increasingly popular....
Pond in the country with their own hands + photo
A pond at the dacha will delight the owner and serve as an excellent place to relax. A professional team can do it in the shortest possible time, but it will be expensive. If you properly understand...