A place for a meal is the most important thing in the family, because often it is only he who gathers together and spends time, even if it is very short. In order to make a dinner table with your own hands, you do not need to have special skills, but it will take some patience.
Figure 1. To make such a dinner table, you will need bars and planks.
The complete manufacturing process
It all starts with the choice of the option that is closer to the design and mental state of the family. In this case, you should always treat all family members with understanding, since the result should suit everyone. In this case, it will be an option in Fig. 1, because it is made quite easily, but it will have to use all possible techniques to organize the highest quality.
You will need the following tools and materials to work:
Before assembling the table, you need to measure, saw off and polish the parts you need to fit.
- tape measure;
- pencil;
- jigsaw;
- screwdrivers;
- grinder or sandpaper zero ;
- screws;
- nozzles for a screwdriver in the form of a crown and a drill;
- edged board 20x150;
- bar 50x50 mm;
- timber 100x100 mm;
- pins;
- glue on wood (slowly setting);
- aluminum corners;
- sponge.
First you need to make a cut for the future construction:
- Bar - 4 pcs. 75 cm each.
- Bar - 2 pcs. 110 cm and 2 pcs. 80 cm each.
- Edged board - 6 pcs. 120 cm each.
After the cut is ready, you need to polish each element carefully so that you do not injure yourself during work and during further operation. After sanding, all remaining dust is collected with a damp (not wet) sponge so that the wood is perfectly clean.
With the help of a screwdriver with a drill bit in the upper part of the bars, 2.5 cm deep grooves are made, and a bit is used to grind down the ends of the bars at the ends of the bars. As a result, all the elements can be connected to the system by means of the usual docking, but a few drops of glue are poured over the wood to the bottom of each slot so that the joint is more reliable. Bars between each other must be tightened with aluminum corners and with a self-tapping screw, due to which it will be possible to achieve absolute reliability.
A fairly simple preparation of the supporting structure is completed by a no less simple formation of the table top of the future dinner table. Under each board, except the extreme ones, 2 grooves are made 1 cm deep, and under the extreme grooves are made in 5 cm increments. After the inner side of the extreme boards, grooves are also made 1 cm in 10 cm increments. from two sides.
")
The legs and the table top of the dining table are fastened with mounting hardware using a screwdriver.
To connect to each groove on the supporting structure, you need to drop a little glue and close with the dowel, and the surplus glue that has come out is removed with a sponge. Now, under each board, glue is dripped personally onto the pins in the supporting structure, after which the board is placed on top (the excess will be carefully distributed between the board and the bar, which is not harmful).
A new batch of dowels should be pasted into the installed board, and then the procedure should be repeated. Thus, 6 boards will be laid in total, which will take a lot of time, but the result will be so reliable that even after decades the quality will not deteriorate.
Completion of work
Tools and materials:
- varnish and stain;
- flat brush.
After the dinner table has been made with your own hands, you can cover it with stain and varnish. At this stage, the tree can be given the color of any desired wood or leave the original color.
After varnishing, the table is left for 36 hours in a ventilated place, and the master should not be in this room once again. Even the best varnishes, drying in 5-7 hours, will still emit harmful fumes into the air at the indicated time.
Making a dinner table is quite an interesting process, but it requires a considerable amount of concentration and patience. For it, only coniferous wood is used, since deciduous wood becomes useless much faster.
The entire workflow usually takes up to 2 days, and taking into account the drying of the varnish - up to 4, but in the house there appears a unique piece of furniture made from high-quality wood.
Didn't find the answer in the article? More information on the topic:
-
")
Bed transformer cabinet with your own hands from chipboard
Bed closet transformer do it yourself. The choice of material and preparatory work. A detailed description of the workflow with all the nuances: sawing, the main work on the assembly, the final work.
-
")
Folding table with your own hands for a picnic
How can I make a table with my own hands for a picnic, various options for legs. Materials suitable for this or that case, tools, assembly, final finishing.
-
")
How to make a ceiling in a wooden house?
Recommendations on how to make a ceiling in a wooden house with your own hands. Options for finishing the ceiling in a wooden house. Design features of high and low ceilings in the house of wood.
Search
Related Articles
How to choose a jigsaw - a description of the parameters of the tool

Jigsaw is a saw with a forward movement of the saw blade, which returns to its original position. The device has a license to guide this blade in the process of moving along the sawn base and produ...
construction start and installation process
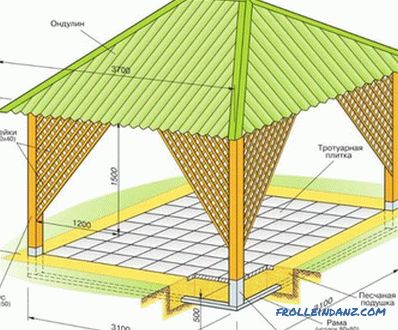
A gazebo with your own hands is a good way not only to decorate your plot, but also to equip a recreation area. For the manufacture of the structure you need to stock up on the necessary materials...
Visor over the porch with their own hands
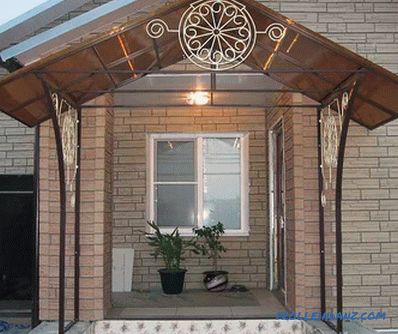
Among the attributes of the design of facades of residential buildings, special attention is paid to the porch, which is located at the entrance to the house and primarily characterizes the taste of...
How to dilute cement without sand
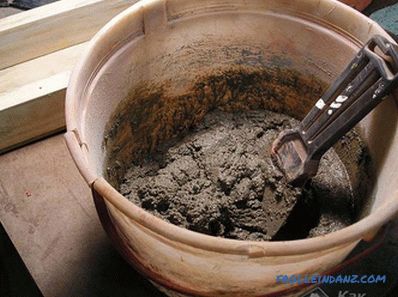
It is well known that for the preparation of a classic cement mixture, the initial three fractions of sand are kneaded with one fraction of cement. But there are a number of other types of cement mo...
How to arrange the rails in the kitchen
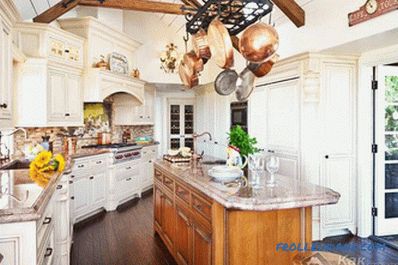
Convenient railing systems have become popular in everyday life relatively recently. They came from a cafe, where they were originally used in the kitchen, and replaced the bulky storage cabinets fo...