A gazebo with your own hands is a good way not only to decorate your plot, but also to equip a recreation area. For the manufacture of the structure you need to stock up on the necessary materials and tools, find some free time. In addition, you will need a scheme that should be prepared in advance .

Device layout for the construction of an open arbor.
The choice of material for work
Before you begin work, you should decide on the choice of material for construction. It is recommended to do this step, based on their own skills, which will greatly simplify the work. If there is electric welding and relevant skills, then why not build an arbor on your own from a metal profile? There are skills in handling a stone - why not think about a brick structure?
Skillful handling of an ax and other tools of a carpenter in itself pushes the choice of wood. It is better to choose what really presents no difficulty than trying to build an unprecedented structure, not knowing how it is being built. Yes, and the result when using familiar material will be much better.
The simplest material is wood, but in this case one should competently approach the choice of a suitable wood species. Pine has good characteristics, which has a high resistance to decay and the formation of fungi. In addition, the material is soft, but at the same time has great strength. Pine is well impregnated with antiseptic agents.

Image 1. Drawing of the arbor basement.
For interior work, you can use a spruce that has the same solid structure as pine, but is inferior to it in persistence. Larch possesses resistance to decay, and even pine is noticeably superior in strength. But such material is heavy for processing, easily splits, which significantly complicates the work.
A suitable option would be oak wood with high strength. The presence of tannins in oak composition makes the wood resistant to rotting, but the material itself is elastic, which is not always convenient.
It should be said about the materials, the use of which is not recommended for the construction of an arbor with your own hands. Beech is exposed to fungi, which lead to the destruction of the material. After some time, the beech begins to dry, which is quite natural for wood. But in the case of this material, the beech loses its attractiveness, as its surface warps. Birch also has a large shrinkage and instability to fungi.
Preparing for work
Before you start building a gazebo with your own hands, you should take care of the availability of the necessary materials and tools. The following components are required to perform the work:

Basements of the arbor.
- electric planer;
- carpentry workbench;
- hammer;
- shovel or garden drill;
- saw ;
- electric jigsaw;
- tape measure;
- wooden bars 6 pieces;
- cement;
- 26 planks of lining, necessary for walls ;
- boards for slats and railings;
- nails.
If the summerhouse with your own hands will be used in the summer, it should be placed near the trees, in the shade. This will create a comfortable environment, as the foliage of the trees will protect against summer heat. If there is a reservoir on the site, it is recommended to move the gazebo with your own hands closer to it. This will not only look beautiful, but also the coolness of the reservoir will increase comfort.

Scheme of preparing the base for a gazebo.
Special attention should be paid to the ground, since the future structure will be located on it. Favorable are sandy and rocky soils. It is not recommended to begin construction on water-saturated soils. If the building will be located on clay soil, then some requirements should be met - the number of supports should be increased to 6, and they should be located along the perimeter of the building.
The boards used for construction should be treated with protective compounds that protect both the elements of the building and the structure as a whole from the effects of the environment and harmful microorganisms.
Start of construction: foundation and foundation
To build an arbor with your own hands, it is recommended to use the column type of the foundation. It is best suited for the construction of structures, as it will be not only the base of the gazebo, but also part of the frame. You can use this option as a strip foundation, then the frame will be installed on the prepared foundation.
For the manufacture of the column foundation should be made at the corners of the future well construction. To do this, you can use both a shovel and a garden drill, which will speed up the work. It is necessary to make a sand pillow. Its thickness is equal to 10-15 cm pillow must be compacted, after which the pipes are installed in the wells.

Image 2. Scheme of an arbor with a basement.
They should be fixed in a strictly vertical position, for which it is better to use help. Concrete is poured into the holes and bricks are piled. In addition, a reinforcing cage can be positioned inside the pipes, and then also be filled.
If wood is used as pillars. First, you need to remove the soil layer on the spot, 10 cm deep. Only after that the holes for the posts are dug out, the depth must be at least 50 cm. The diameter of the holes is 30 cm and more.
With regard to the choice of material for the column, in this case, oak is well suited, about the strength and other characteristics of which were mentioned earlier. Before installing in the pit that part that will be located in the ground, you need to dip into the bitumen or tar.
The dug hole is filled with rubble, after which it is tamped. It is recommended to cover each of the four holes with a film, and fix the bar with strips. After this, the pit is covered with gravel, is also tamped and filled with concrete. The picture shows a diagram of the foundation (image 1).
Manufacturing of frame and floor

Bottom binding and supporting posts of the arbor: 1 - foundation, 2 - ground level, 3 - waterproofing, 4 - lower piping, 5 - lags, 6 - support racks.
To make a frame for a gazebo, you should take the same bar that was used for the installation of support struts. But there is a certain difference, as it is necessary to perform some preparatory work.
In particular, in the upper part of the element, it is necessary to make a recess, which will later be required for the installation of the roof. The notch is represented by a groove, which has a size of 50x70 mm. The construction of the gazebo is sealed with the help of screws, which enter the material on one side diagonally. Below is a semi-open type gazebo (image 2).
To give strength to the structure, the corners of the gazebo should be lined with bars of small length. With the same purpose, you can use metal corners. The size of the bars is 40x40 mm. Racks are recommended to be placed at a distance of 2 m.
In order for garden arbors to be more durable, diagonal piping should be carried out. For your convenience, it is recommended to do this work on the ground. It is necessary to perform the following actions: take two boards with a cross section of 50x100 mm, make half of each sample, which will allow them to be fastened into one design. Along the edges should be installed grooves located from the edge at a distance of 10 cm. The elements should be inserted into the frame racks.
The next stage of work involves the manufacture and arrangement of the floor. A common and simple option for work is wood, and it should be given as an example. For the floor boards are needed with a cross section of 6x10 or 5x5 cm, which will be used as a log. The distance between the elements - 50 cm, the details are stacked on the top trim.

Arbor upper binding: 1 - upper crossbar, 2 - intermediate link crossbar, 3 - lower lower crossbar, 4 - rigidity brace.
You can use brackets for fasteners or ordinary bolts to make fixings. After that, the boards are laid on top of the log. It should be noted that the thickness of these boards should not be less than 2 cm. In addition, to ensure good ventilation, it is necessary to dock the boards not too tightly.
An important action is the application of antiseptic agents to the coating. This will save the design, protecting the board from fungi and rotting. It is recommended to apply the product in several layers. In addition, the floor and its surface should be properly cared for - it is recommended to apply antiseptic agents to the surface every six months or to take any other actions aimed at preventing the appearance of fungi.
Roof Installation Process
This process begins with the installation of hexagonal screeds. This will balance the spacer forces that occur during loading on the roof surface. In addition, this action will help to connect the upper parts of the racks.
The hexagon is assembled on the ground, after which the roof is installed on top of the support legs. To fix the hexagons, you can use nails, screws or metal plates. In addition to hexagons, octagons can be used.
Garden arbors can have various roof shapes. In this case, it depends on the method of mounting rafters. The simplest option for a gazebo is a straight hip roof. For its construction required rafters in the amount of six or eight pieces, depending on the number of racks support.

Arbor gable roof scheme.
As rafters, you should take a bar with a cross section of 6x4 cm.The most difficult stage of work is the connection of the rafters in the center of the arbor. In this case, the connection resembles a fan, is done on the same principle.
Work to create a roof is divided into several stages. First you need to cut off the ends of the rafters at an angle of 60 °. It is necessary to make holes at the ends. The diameter of the holes is 12 mm. After that, you need to select the notches, which should be located at a distance of 0.3-0.5 m from the bottom edge. This is necessary for further strapping.
For the installation of the roof, you will need steel screeds, the size of which is equal to 20x6x0.4 cm. In the middle, they must be in the bent state and have holes 12 mm in diameter. The rafters of the gazebo need to be connected in pairs, which would require metal ties. The design should be folded in the form of a tripod, that is, it is necessary to reduce the ends of the boards.
It is recommended not to tighten the screws all the way during the assembly.
This trick will help your structure to gain flexibility during the installation process. To simplify installation, place the temporary support necessary to support the roof dome in the center of the building. With it, you need to raise the dome itself. After this stand gazebos need to connect with rafters bolts or nuts. After these actions, the central support can be removed, and the bolts are well tightened.
Additional actions

The rafter roof system of the gazebo.
This is where the gazebo is finished, but before putting it into operation, you can create some devices that allow you to significantly improve comfort during your stay in the gazebo. So during the dark time of day, fibrous backlight will look good. This will create a comfort, decorate the gazebo, and is a functionally necessary device, especially in the dark.
To illuminate a small area, which is the gazebo, does not require much power. In this case, enough 75 V, which is enough for lighting. It is recommended to use warm shades of lighting, which can not be said about the cold spectrum of lanterns that have a white tint.
If there is no opportunity to get a lamp, then it can be made independently. It is necessary to have a wire having a length of 2 m and a cross section of 2.5 mm. In addition, you will need a piece of cloth, which should be soaked with fire retardant.
A twisted wire circle is suitable as a frame. Six small segments should be secured to the circle, for which you need to take a well-bending wire. The length of each segment - 25 cm. Their ends are curled at the bottom. Made the ceiling should be given a rounded shape, for which it must be compressed above and below. The fabricated structure is coated with a cloth, after which the lamp is ready.
Search
Related Articles
How to weld a ceiling joint by electric welding

The use of welding joints in the assembly of metal structures is considered to be the simplest and most reliable method of their installation not only in industry, but also in everyday life. It is c...
Dog box with their own hands: assembly, drawings, sizes
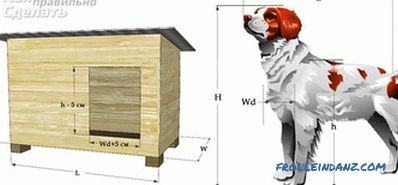
If your four-legged friend lives not in your cozy apartment or house, but in the yard (all year round or only in the summer months), then he needs to have his own house to hide in it from rain, snow...
Installation of the floor in a wooden house: the preparatory work, laying the lag
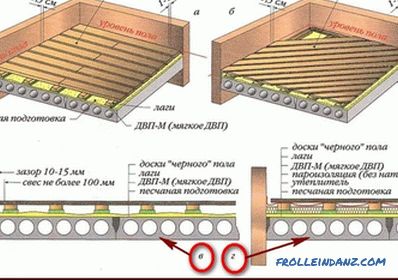
If the question arose of how the floor should be laid in a wooden house, you can prefer the best option - arranging the floor over the surface of the lag. Such a solution will make the wooden const...
How to cut the thread on the pipe with your own hands
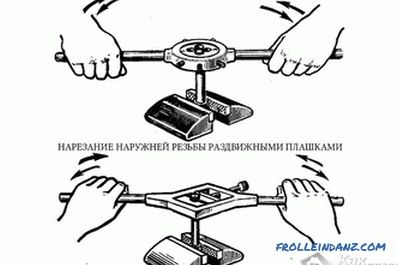
Independent threading on pipes of a different class requires from the performer certain skills and knowledge of all the subtleties of this procedure. In this article we want to acquaint you with how...
How to care for a lawn - the rules of lawn care all year round

According to the second law of thermodynamics, all processes in nature occur with an increase in entropy. This means that the object left will be affected by external forces over time and will move...