The main element of the steam room is, of course, the heating furnace for the bath. Modern industrial production offers a variety of models to replace traditional wood-burning stoves: on liquid fuel, on gas with a metal body, working on pellets. Factory products are equipped with a variety of functions and economical use of fuel. Yes, and care for them is minimal.
There are many options for homemade devices for a steam room, depending on the type of room. For example, there are so-called cold furnaces, that is, those whose outer walls do not warm up above 50 ° C. This is an important advantage, because this design does not get burned. Such units require a long continuous kindling. Heating takes place through special air ducts. They absorb air from the floor and heat it up by passing through the combustion chamber. Warm and soft steam comes out from above, without burning anyone. In such a bath, it is easy to regulate the level of humidity and the temperature of heating.

Unlike the "cold", the "hot" furnaces quickly and efficiently heat up the steam room due to the heated walls, the temperature of which can reach 100 ° C. Careless touches of them threaten with burns, and the degree of air heating in this case is difficult to control. And it threatens to heat stroke.
Of brick
 Of brick with water tank
Good and simple The "cold" furnace for the bath constructively looks like this: the combustion chamber is made of refractory bricks, an ashpit is located under it. From above, to preserve the heat, cobblestones are laid out on a steel or cast-iron grating. Their mass is calculated from the ratio: for 1 m 3 steam rooms it takes 20-30 kg of stones. This proportion is true for continuously operating devices. If heating occurs periodically, that is, after warming up the room to the desired level, it is quenched, then the amount must be increased another 2 times. Sometimes, iron pigs are added in a ratio of 20% to 80% of stone to better retain heat.
The walls themselves, in addition to bricks, can be made of ordinary or rubble stone. Sometimes for construction they take granite or naked. The weight of each element is from 1 to 5 kg. Do not try to build from silicon - it will simply burst from heating.
Only clay with sand can be used as a binder solution when laying the stove. Conventional cement mortar will not withstand high temperatures and will not last a year.
 Clay mortar
Clay is soaked in water for several days and mixed with sifted sand to the consistency of thick cream. Sand is preferable to take not river, and mountain. Its edges are uneven, unpolished and provide better grip.
A kiln of baked bricks with stones weighs a lot, so you have to make a foundation for it. To do this, a pit of 70 cm is enough.
15 cm of sand and crushed stone fall asleep at the bottom. Then everything is filled with a layer of concrete, preferably with reinforcement. From above, the frozen foundation is closed with rolls of roofing material for waterproofing.
 Brick kiln on a solid foundation
Note some points:
- The corner of the bath where the stove is installed must be insulated and strengthened. In addition to the danger of fire, there will be a large temperature difference, which can lead to cracks in the walls.
- The first row is placed on a ruberoid substrate without solution, dry.
- The remaining blocks are moistened with water during operation, each new row is laid with dressing (offset from the previous one).
- It is necessary to ensure that the sides of the bricks facing the inside of the combustion chamber are intact, without chips or cracks. The wall here should be as smooth as possible, since any pothole provokes the destruction of the structure. At the same time, it is impossible to coat the internal surfaces with clay - after drying, it will begin to peel off and clog up the chimney,
- After the completion of the masonry work, the stove must be dried. To do this, either it is left for 15 days with a good inflow of air, or it is heated several times gently.
Video: laying of a stove 3 * 3.5 bricks
Drawings
 Types of brick stoves
 Scheme of the brick stove-heater
 Example of order

 With a separate water tank
 Order
Order
Metal stove
 Metal bath stove
Unlike brick structures, metal units are compact and quickly warm themselves and heat the room.
A foundation is also needed for a metal stove. Although its mass is much less than its stone counterpart, however, and under it you need to make a reliable foundation.
 The foundation for a metal furnace
The starting material is heavy-gauge steel or large-diameter pipes. By design, this furnace will be similar to stone. The only difference is the firebox. It is customary to make it a two-chamber, so that in the second compartment fuel afterburning can occur. This scheme allows you to increase productivity by 20%.
The body must be fully welded - tack welding is not suitable here.
The main disadvantage of a steel furnace can be considered as an extensive hot surface that is dangerous for people. However, it is easy to fix. After installation, the body is simply lined with refractory bricks, leaving a gap for convection.
 Brick lining
Video: making a metal stove for a bath in stages
Drawings and diagrams of metal furnaces
 The device of the boiler for the bath
 The device of the metal stove-heater
 The device of the stove for a bath with a closed heater
 Furnace for mining
 Scheme of the metal stove-heater
 Drawing of a safe simple bath boiler
 With built-in tank for water heating
 Drawing is metallic Which furnace
 The principle of operation of the boiler in working out
 The self-made metal furnace from a pipe
 A metal Kamenka with a water tank
 Drawing of the stove
 Durable oven
Search
Related Articles
How to insulate a log house - insulation of a log house
The most warm and ecological houses are wooden buildings, namely, log houses. As you know, wood saves well and accumulates heat, so the walls of the house are also endowed with these important prope...
installation of the structure (photo and video)
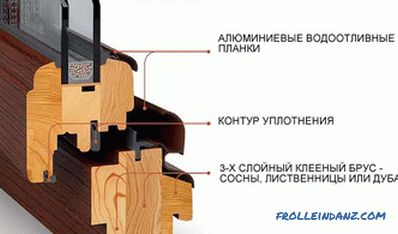
The modern generation puts windows not only from PVC, but also wooden. These designs are able to decorate the interior of any room, creating coziness, beauty and absolute security. The windows of w...
How to make a dog house with your own hands
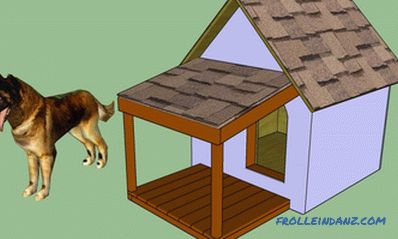
From this article, which is, in fact, a detailed step-by-step instruction, you will learn how to make a dog house with your own hands. And not just a booth, and insulated. Insulating material placed...
Boiler for a bath with his own hands
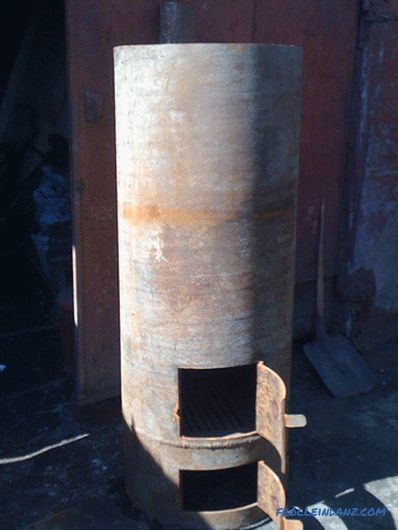
One of the important attributes of the bath is the boiler. Modern boilers work on different sources of fuel, which determines not only the quality of work, but also the cost of both the apparatus it...
Screed on a wooden floor with their own hands
It used to be very prestigious to have a wooden floor at home. Of course, after a certain time they lose their attractiveness, and, accordingly, the owners come to the conclusion to replace them. I...