Relief plaster for wall finishing has been used for many years, and changes are constantly being made to the technology. It is worth noting that the main feature of this decoration is that it is impossible to reproduce two identical patterns. Therefore, it gives individuality to the interior. The application of decorative coatings is considered a real art, especially when it comes to a kind of panel. This process is handled by experienced professionals. But at the same time, it is possible to perform such work independently. Enough to get acquainted with the technology, pick up the necessary materials and allocate some time.
Features of the process
 Decorative stucco panel
To achieve the desired result All work must be done in a strictly defined order, which is prescribed by technology.
- Selection of a suitable pattern for the style of the room. It is best to print the sample in multiple copies so that the sheets are always at hand. This will allow to reproduce exactly what was intended.
- Surface preparation. The process is quite time-consuming, since you want to completely remove the previous finish.
- Remove dust and dirt with a broom, rags and water.
- Priming. Modern solutions of primers are also used as an antiseptic that protects against fungus and insects.
- Applying a starting layer of plaster. It is the basis.
- Re-priming of the surface after the complete drying of the starting layer.
- Formation of a relief by the finishing layer.
- At the last stage, a completely dried wall is covered with paint. In the presence of excess and drips, it is best to remove them immediately with a damp foam sponge.
The algorithm of operation is quite simple, so you should not risk and move away from the described process. Otherwise, it will negatively affect the final result. In the process of creating the desired relief does not need to hurry, because it may take more than one day.
 Creating relief using the roller
Each drawing involves the use of certain objects and technologies.
Tools and accessories
 Tools for creating texture, relief
To know how to make a three-dimensional drawing, you need to pick up certain tools and fixtures, processing the wall you can get an original texture. So, in addition to traditional objects for the decoration, in the process of creating relief, you may need the following elements:
- the sponge will give a "blistering" or serve as a basic tool when painting;
- a roller with a special nozzle
- rollers to create a grass pattern or to form horizontal chaotic and smooth stripes;
- a plastic bag, rubber glove or a simple brush are also useful in forming a volume effect.
Practically any object that has textural shapes is useful. It is they who during the processing will leave a characteristic imprint on the raw plaster. For example, if you want to imitate skin on a wall, then for this it is necessary to apply a roller with a special nozzle. Many interesting drawings can be obtained by working with a simple spatula. In this case, it is worth picking up several options for a tool with different widths.
Experts and psychologists say that embossed plaster provides endless possibilities for the manifestation of fantasy. Therefore, creative people love to carry out this process on their own to develop their talents and abilities. And parents attract children to work so that they can also contribute to the renovation of the house, especially when it comes to the children's room.
Apply a small amount of finishing compound to the wall and experiment with a variety of objects.
Required materials
 Decorative plaster
Also, Before work, appropriate tools are selected, it is also important to take care of the purchase of all necessary materials. To not miss anything, it is enough to follow the compiled list.
Leveling blends. With their help, you can eliminate the defects on the wall. The store has such offers:
- gypsum base (used only if the finish will be made of the same material);
- cement base (to save money, you can make the mixture yourself in simple proportion: 3 parts of sand and 1 part of cement;
- clay (despite its ecological and plastic properties, this technology is rarely used in modern construction).
Finishing blends. Manufacturers produce a large range of products intended for the formation of decorative relief.To make the right choice, you should carefully examine the packaging, as manufacturers indicate for which type of textures a particular composition is intended. It is worth noting that the mixture is often heterogeneous, since in their manufacture include different sets and proportions of the components.
Primers. Here is where to roam. To date, you can find compositions that come in two forms: liquid and paste. Experts recommend before applying the starting layer to process the walls with antiseptic compounds with deep penetration.
 Textured paint
Paints. Pay attention to the water-based, water-dispersion and emulsion coloring compositions. The color is selected individually. For original solutions, it is best to buy special dyes and a white base in order to independently set the desired shade.
Varnish. If you cover the painted wall with lacquer, you can extend the life of the decorative finish.
In some cases, masking tape will be appropriate in the work, which will not allow the dye to get to a certain area.
Water-dispersion paints are best suited for painting relief plasters.
Progress

To make a high-quality finish, you should familiarize yourself with all the details of each stage that are provided for in this process.
Surface preparation
A very important condition for any finish is not only cleanliness and dryness of the walls, but also the absence of any defects. That is why the surface before plastering must be treated as follows:
- removal of old coatings;
- old coating must be completely removed, and if the layer is strong, then on it with an ax, chisel or perforator with pike make shallow notches for better adhesion;
- dust removal;
- applying a deep penetration primer (for reliability, it is better to repeat).
 Surface treatment of walls with soil
Only after complete drying can you proceed to the next step.
In most cases, a complete cleansing of the treated area from the old finish to the base is required.
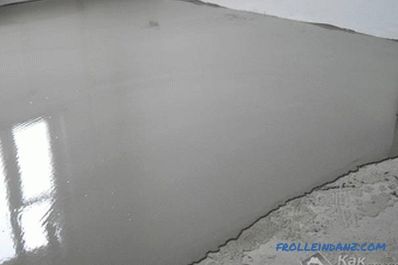
Base
To get a flat and smooth surface, plastering of walls is performed. The mortar is kneaded using a construction mixer, if there is none, you can use an electric drill with a special nozzle. You should not make a large batch, as many solutions quickly enough to seize.
 Mixing the solution
The finished solution is poured with a trowel or applied with a spatula on the wall depending on the desired thickness. For convenience, you can use construction beacons that allow you to perform the process more accurately and smoothly. Rubbed solution float circular motions counterclockwise. After drying, the surface is again primed.
The thickness of the starting plaster layer depends on the flatness of the walls and the presence of defects.
Relief creation
 Example of texture plaster
The most interesting part - This is the creation of a conceived relief on the wall. As mentioned above, here you need to show your imagination and use a variety of items that you have at home. It is very important to pay attention to the solution - it must be homogeneous. Except for those cases where it is required to use a heterogeneous composition.
- Spatula. To create a relief with a spatula, several techniques are used, for example, short strokes, long ribbons and various turns. After surface treatment, the pattern thus obtained can be left or smoothed. Add a volume of properly selected paint color.
- Staple-comb. Uncomplicated and correct figures can be obtained by processing a wet plaster comb. In addition, by creating stripes in a certain direction, you can visually expand the space in the desired direction or increase the ceiling.
-
 Brush Brush. A simple iron brush like a staple comb can be used to create a variety of lines, only thinner and larger.
 - Polyethylene film. There are also several options: the film is crumpled or neatly applied to the wet layer, and then removed. So that the wall does not have too expressive and sharp elements, they are compared with a large spatula.
- Roller. No less diverse possibilities for the formation of drawings. In the building stores are sold ready nozzles, which remains to be put on the roller and begin to work. If you want more individuality, you can make the nozzle yourself. For this fit the most simple materials: thread, rope, fur, sponge, polyethylene, rubber and much more. It is only necessary to show imagination.
- Carved nozzle.Special attention should be paid to the nozzles for the roller with an internal pattern. After the plaster has been applied and smoothed it is sufficient to hold it with a roller with a slight pressure. As a result, the pattern will be convex. If desired, it can be painted with tassels.
- By dragging with a float on a wet layer, horizontal and vertical stripes can be obtained. Circles or semicircles are also created.
It will be interesting to look at the pattern performed by an ordinary metal mesh for dishwashing.
 Drawing with a sponge and polyethylene
 Brush and relief roller
 Rollers for making relief
Paint application
At the completion of plastering and finishing work, painting is performed. There are only two options:
- Single color staining. Paint of a certain shade is purchased and dyeing is carried out.
- Self-obtaining shade. White paint is taken as a base to which pigments can be added. Professionals recommend spilling paint in several containers and adding a different amount of color. As a result, a larger picture will appear on the wall.
 The plaster is painted in the desired color
Staining can be done by various means, in depending on the created relief (its depth):
- roller;
- brush;
- spray gun.
Artists often paint relief plasters with brushes to get the desired picture or a whole wall panel.
 Wall Panel
Note that when drying, the color of the painted surface will be on a couple of tones lighter applied.
The final touch in the creation of relief plaster will be the application of a protective coating. These tools can also be found in the hardware store. In addition to protection, they will help give a certain shade to the wall:
- pearl;
- golden;
- silver, etc.
With the above described method of finishing can transform the interior of the room and decorate the walls in an original way.
Video
The bas-relief of plaster putty looks interesting on the wall:
See the following instructions for applying structural plaster. It’s really simple:
See also:
How to finish the ceiling with decorative plaster
Plastering Bark
How to prepare a decorative wall plaster
Search
Related Articles
Arbolite do-it-yourself bathhouse

The construction of the bath is one of the cherished desires of many men. It is noteworthy that it can be made not only from wood, foam block or stone. For this purpose, you can use arbolit - a mate...
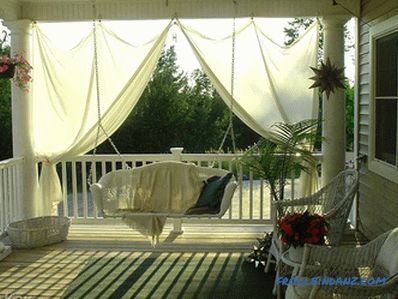
Veranda in the country with their own hands + photo
A summer house is a rest from a busy, bustling city. Someone this place is associated with the summer harvest, while others as a place of family recreation. It is the association of summer cottages...
Electric underfloor heating with your hands under the tile, laminate
A heated electric floor allows you to create warmth and comfort in your home. Often the floors freeze in winter so much that neither carpets nor slippers help. Therefore, there is a need to mount th...
Glazing of a balcony with your own hands + photo
Living in a city apartment has certain features, one of which is the lack of useful space inside the room. Its expansion is possible due to the accession of the balcony. However, this is not always...