It is not necessary to purchase ready-made shelves or a closet for storing objects of small weight, photographs, books, decorative items, etc. Having made the shelves with your own hands, you will reliably know what kind of load they will be able to withstand, how long they will last and how to remake them to meet your changing needs.
")
Drawing of the wall shelf.
Hinged shelves are distinguished by a variety of designs, materials used and methods of attachment to the walls of rooms. They can be installed in one vertical row, offset relative to each other, with side, rear walls and without enclosing elements.
Shelves with concealed fasteners: materials and tools
")
Schematic example of the dimensions of the hinged shelf.
Self-made products can be fixed to the wall in the standard way using corners, hanging brackets, hinges, etc. For a better combination of home-made shelves with a common interior, the mount is visually imperceptible. The color chosen for the hinged shelf will express the desired emphasis on the background of the wall, create the impression of a floating structure, without visually loading the overall look.
The simplest construction of a shelf made of wood with a hidden fastener element consists of a box sheathed with polished plywood and a frame-holder of bars prepared to the required dimensions. The latter are selected depending on the load on the shelves and the required dimensions of the product.
")
Fastening a hinged shelf using an auxiliary beam.
For the described example, materials of the following sizes will be required:
- 2 rectangular pieces of plywood 800 * 250 mm and 5-8 mm thick for the upper and lower surface of the shelf;
- 2 longitudinal bars 40 * 40 mm for the back and front slats with a length of 700 mm;
- 2 side bars of 250 mm in length and 3 intermediate as transverse elements of the mounting frame of 170 mm;
- 3 bars (40 * 40 mm) for a hollow box frame in plywood dimensions;
- 3 strips of plywood for the sides of the shelf or decorative trim.
Taking into account the dimensions of the bars of the framework of the shelf and plywood elements, it should be noted that the box will be mounted on the mounting frame. From additional materials you will need screws, sandpaper, putty, glossy paint of the selected color, dowels for attaching the frame to the wall. To make a shelf with your own hands, you should prepare the tool:
- puncher, drill;
- screwdriver or screwdriver;
- wood saw;
- level, pencil;
- paint brush, trowel.
Assembly and installation of a hinged structure
")
Schematic of a suspended shelf of rails.
From the prepared bars we assemble the holder frame. The side bars (250 mm) are fastened to the long bar from the ends with self-tapping screws, between them there are shortened bars (170 mm). All frame elements must lie in the same plane. Attach the front bar in place to make it easier to mount the holder to the wall.
In the rear bar of the frame, drill holes for screws with a drill. Through them on the level we make marks on the wall where you plan to hang the shelf.
Then, using the marks, drill holes in the wall and insert dowels in them. The assembled part of the frame with a screwdriver is attached to the wall. The front bar is attached to it with self-tapping screws, completing the holder fixture for the shelf.
")
The procedure for installing an anchor in a plasterboard wall for mounting a wall shelf.
The frame of the shelf itself is knocked out of 3 bars (without a back) with the same section as that of the mounting frame. Prepared plywood strips are attached to the frame with a stapler or screws depending on the thickness of the skin. The surface of the frame can be used with glue. We sheathe the end parts of the shelf (except the back) with strips of plywood or decorative platband.
The width of the U-shaped frame should ensure that the hollow structure is placed on the holder.
The joints of the box elements and above the caps of the self-tapping screws are puttied, the surface is cleaned with fine-grained emery paper, primed and painted. After drying the shelf box is put on the holder frame. At the wall, plywood is screwed to the rear bar with screws. Using the same principle of assembly, you can make shelves with side walls and top.
Processing and fastening of glass hinged shelves
")
Scheme of the corner shelf of glass.
Glass is used with a minimum thickness of 10 mm, hardened and polished. Blanks can be ordered in the furniture workshop or cut and polished with your own hands. For self-processing glass will need a glass cutter and belt grinder. When sanding used sandpaper grit 120 units.
The glass cutter is better to use an oil one with a ruler of the desired length. The main condition for cutting is to make 1 pass with a tool with the necessary effort.Pressing force can be determined by training on small pieces of glass.
When grinding with a machine, the edge must be constantly wetted with water. This will protect the glass dust from entering the respiratory tract and make the edge transparent. Glass blanks should be stably laid on a flat surface with a protrusion of the treated side for a short distance. Processing of the ends can be done manually, but the process will take longer.
Two main types of fasteners are used for fastening prepared elements to the wall:
- single special holders (for example, of the "pelican" type);
- aluminum profile along the shelf length .
Fasteners are purchased from the furniture hardware store and are equally reliable with proper installation.
")
Shelf mounting elements.
With the help of holders, shelves of glass of various thickness are fixed. Profiles must be matched to the size of the blanks.
The holder consists of 2 detachable parts: the base, screwed using dowels from the kit and a decorative element for glass insertion. The number of fasteners used (at least 2) depends on the load on the shelf and its size.
When using an aluminum profile, it is cut to the desired size, the edges are closed with end caps. The profile is fastened with dowels through existing holes with leveling. Adhesive pads are installed on the wall end of the glass shelf, and it fits tightly into the groove of the profile holder. When pressing the shelf into the profile, you can use a rubber mallet.
The seeming unreliability of glass construction is deceptive. The product can withstand heavy loads up to certain limits. The material is not exposed to the microclimate of the room and is easy to clean. The special visual effect of the glass shelves gives the addition of design LED backlight.
Didn't find the answer in the article? More information on the topic:
-
")
Wall mounted cabinets: do-it-yourself installation
The technology of making wall cabinets with their own hands. Recommendations on the choice of materials. Detailed description of the assembly of the product. Nuances of manufacturing wall cabinet.
Search
Related Articles
Installation of the log house: basic recommendations, installation
The frame is a traditional option for the construction of summer houses and small country houses. Today, the scope of the log has expanded considerably. From it build houses, baths, saunas, hotel c...
arrangement of mine and log (photo)
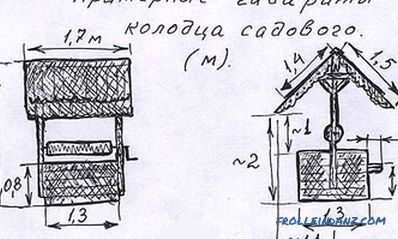
In a properly equipped wooden well, natural water purification makes it better and more palatable than after treatment at a water treatment plant. Such a source is always available and can serve as...
How to drill ceramic tiles + Photo and Video
When the walls in the bathroom and in the toilet shine with new tiles, it is nice to look at them. But the repair is not finished yet - it is necessary to hang the shelves and fix the mirror. But no...
What door is better to put in the private house entrance from the street so as not to freeze
Reliability and good thermal insulation are the two basic requirements for entrance street doors. The huge variety of such products only makes it difficult to choose. Someone falls for the “bait” of...
More about the wallpaper in the interior

Nowadays, wallpaper in the interior of residential premises has become particularly popular, and their use for interior decoration may be of interest to both designers and home-lovers. For this reas...