For dividing the space of a room into separate zones interroom partitions are used. Thanks to their installation, the room becomes more functional and comfortable.
")
In order to be able to divide the room into different zones, it is possible to make interior partitions. The safest and most environmentally friendly material is wood.
Interroom partitions made of wood or on a wooden frame are most often installed. This design is durable, environmentally safe and easy to install. All the work of the home master can perform independently.
Types of partitions
Wooden interior partitions can be solid, shield and frame, you can install them in houses built of different materials. For this, it is not necessary to reinforce the floor decks. Wooden partitions - the ideal solution for installation on the second floor or in the attic. Their use will be particularly appropriate in cases where redevelopment is expected in the future. The wooden structure is easily disassembled and, if necessary, mounted elsewhere.
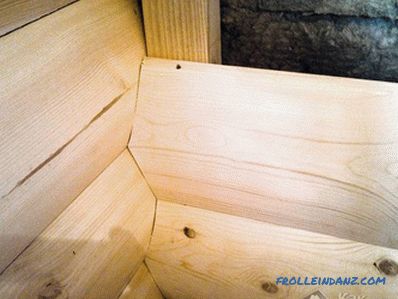
When planning to do partitions with your own hands, you must first decide what kind of constructions it will be. To make solid interior partitions, you will need boards with a minimum thickness of 40-50 mm. They are installed vertically and attached to pre-attached guide bars or directly to logs and beams. Then sheathed clapboard, plywood, sheets of drywall or simply plastered. The result is a sturdy construction with good sound insulation characteristics. It is worth noting that for the construction of such a wall will require a lot of consumables.
")
A solid wooden partition allows you to create a complete room with minimal visibility.
More economical in terms of materials consumption will be frame-sheath interior partitions. To make the frame, you will need bars with a section of 50x90 mm. They are mounted vertically and horizontally. Horizontal bars are mounted in places where sheets of cladding material will dock. The step of installation of bars depends on the size of cladding sheets. This design is inferior to a solid partition for strength and sound insulation. To improve these indicators are used heaters: mineral wool, foam, or other materials.
Shield partitions are prefabricated. The finished shields are mounted on the spot. The choice of material and method of installation will depend on the size and shape of the shields.
Wooden partitions may be deaf or with doorways. The door frame can be made separately or assembled during assembly of the partition from individual parts.
Frame partition
")
The frame-sheath partition is the simplest and most economical option.
To mount the frame interior partitions with your own hands, it is necessary to prepare the harness from a wooden bar. The dimensions of the timber will depend on the size and weight of the future partition. For supporting beams and frame edges, a bar of the same section can be used. Using a smaller cross-section for the inner ribs for trimming the timber will make the construction cheaper. The following tools and materials will help to make partitions with your own hands:
- Level.
- Plumb.
- Pencil.
- Drill.
- Saw.
- Screwdriver.
- Self-tapping screws or screws, mounting dowels.
- Metal corners.
- Screwdriver.
- Bars: for vertical and horizontal racks.
Before starting work, it is necessary to make a drawing of a future structure and make sure that the base can support its weight.
This will make it possible to avoid further sagging of the floor at the place of installation of the partition.
")
It is better to install partitions on the subfloor.
The best option is if the wooden partition is installed on the subfloor, and not on the topcoat. In this case, all the lags are clearly visible, and if the need arises, an additional beam can be installed with the crossbars.
Guides can be attached to the floor in different directions: along the beams or perpendicular. If the room has high ceilings, then the weight of the partition will be rather big. Consequently, the base must be strengthened, for which purpose to install an additional beam. If interior partitions are mounted on the second floor, then in this case it is better to build a lighter structure. This will allow you not to worry about the fact that under the weight of the bulkhead the beams will bend and the geometry of the house will break.
The next stage of work is marking. The tensioned cord will allow you to mark a straight line along which the guides will be attached. Fastening begins from the ceiling, then guides are installed on the floor and walls.The ribs of the frame are installed in such a step that corresponds to the width of the cladding sheets, but not more than 600 mm.
In the course of work, it is necessary to constantly use a level and plumb and check the accuracy of the installation. When the frame is mounted, all its parts must be thoroughly treated with antiseptic impregnation to protect the tree from drying out, the occurrence of fungus, mold.
The space between the internal edges is filled with insulation. To mount it, you can use a special mesh, pull steel wire between the slats or use any other convenient method. Then sheathe the partition with the selected material.
A room partition may have a sliding structure. To do this, you must purchase moving parts. You can install them on the outside with either side of the partition or fasten it inside.
Didn't find the answer in the article? More information on the topic:
Search
Related Articles
How to sheathe a blockhouse house - imitation of timber on the facade
The blockhouse is a special type of cladding that imitates: rounded log; construction timber; decorative paneling. Due to its aesthetics and ease of attachment, a blockhouse can be used no...
How to make a wicker fence - making wattle (+ photos)

If you are tired of the usual netting-chain-link that serves as a fence for your land plot, attach some imagination, zeal, and ... make an original wicker fence. To master the basic principles of it...
Artificial pond do it yourself - how to make a pond
What can you think about when someone says that he has an artificial reservoir? It is clear that in the imagination everyone will have their own image, so this structure can be designed for a variet...
Characteristics of Penofol and its properties as a heater
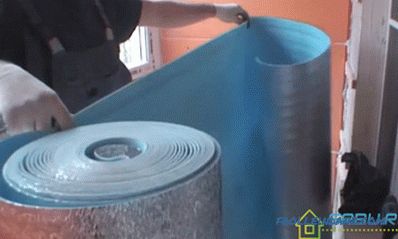
Thermal insulation materials lay the walls and floor of all the houses under construction today. The number of heaters offered by manufacturers is so great that some of them have not heard everythin...
Paths from rubble with their own hands

If precipitations regularly fall in your area and you are tired of fighting dirt in the yard, then you should seriously consider making a safe path. Today, there are many ideas for their arrangement...