After the bustling city, its own suburban area seems like a piece of heaven on earth. Flowers are planted here, paths are paved and lawn is arranged. And, of course, on your own site you want to see the reservoir. In this article we will explain how to make a reservoir with your own hands at the dacha.
Types of reservoirs
The reservoirs in the area can be of different purposes, of different shapes, and of different sizes. In addition, they are the following types of reservoirs:
- Pond, organized with the help of a plastic form.
") Film pond
Film pond
- A pond with a bottom made of PVC film.
") Concrete
Concrete
- Reservoir with a reinforced concrete bowl.
The rigid plastic form is ideal for the construction of small reservoirs, located in close proximity to flower beds or paths on the site. Such reservoirs are easy to assemble, and they can be transferred from place to place at will, decorating them with plants or stones in various styles.
Large ponds can be equipped with PVC film or reinforced concrete. Such artificial reservoirs are usually mounted once and are no longer transported. Therefore, when planning on the site of a large reservoir, you need to carefully consider its location, as well as the surrounding plants.
Where it is possible to locate a reservoir in the area
") Where to locate
Where to locate
Small reservoirs organically look anywhere - near the house, near the flower garden, near the tracks. They can be decorated with various plants, stones, small garden figurines, and fountains. The great advantage of small reservoirs is the possibility of their rapid transfer from place to place. Thus, you can easily change the look of your own plot.
") The pit of a stationary reservoir
The pit of a stationary reservoir
Large reservoirs need to be positioned thoughtfully: first, they cannot be moved from place to place as easily as small reservoirs, which are based on a plastic form. Secondly, they need to be properly entered into the surrounding landscape. The organization of a large reservoir requires a long preliminary planning and planning, takes a lot of time and effort, but the result can exceed all expectations and allow you to create a unique rest corner on the site.
Suitable materials for construction
") Artificial pond
Artificial pond
What choice to make - film PVC or concrete? Concrete or plastic form?
The plastic form is a convenient preparation, it is not difficult to put it. She does not need additional waterproofing.
The PVC film allows you to create ponds with the most unimaginable edges. However, its service life, although long, is not as long as we would like. Under the influence of low temperatures PVC film can lose its properties. Usually the life of such a film is not more than a few years.
") Arranging the film reservoir
Arranging the film reservoir
Concrete is the most difficult material to work with. It requires significant preparatory and construction work: preparation, reinforcement, waterproofing. However, if the construction of a large reservoir with a bridge is required, building material is better than concrete with reinforcement - not to be found.
Pond with a hard plastic bowl
") Plastic form
Plastic form
- At the selected location, a hole in the ground is prepared to the size of the bowl. To dig a suitable pit, turn the bowl over and transfer the bowl contour to the ground. Do not forget to make allowances at the edges of the pit approximately 15 cm and leave a small reserve of depth for the sand bedding of the order of 5 cm.
- You can cover the prepared pit with thick PVC film. The soil is tamped down, after which the rigid plastic mold is placed in place so that the edges of the bowl are at the level of the soil.
- The bowl is leveled, filled with water for about a third, and then emptied between the bowl and the walls of the pit. Previously extracted soil can be used for these purposes, but sand is better.
- As the voids are filled, it is necessary to shed the soil with water to avoid strong shrinkage.
- The edges of the bowl are decorated with stones or planted in the immediate vicinity of host-type water-loving plants.
") Installation of the bowl
Installation of the bowl
Water with a bowl of PVC film
") PVC film
PVC film
- First you need to mark the boundaries of the reservoir with a cord and wooden stakes, giving it the desired shape. The edges of the pit should be located at the same level.
- Then along the contour they dig a hole in the ground of the desired depth.
- Be sure to remove all stones and roots, they can damage the film.
- The bottom is covered with sand 10 cm, poured and compacted.
- Now you need to cover the bottom of the future reservoir with geotextile.
- The turn of the film has come. The film must be laid out in advance in the sun, so that it becomes more elastic. If the foundation pit cannot be laid in a single piece, you need to brew the edges of the parts of the desired size. The film is laid in such a way that it extends beyond the edges of the reservoir, where it will be pressed against stones. The perimeter of the reservoir can be decorated with stones, or you can cover the protruding film with earth and land moisture-loving plants.
Photo
") Marking
Marking
") Digging of the excavation
Digging of the excavation
") Film layout
Film layout
") We decorate the coast
We decorate the coast
") Arrangement
Arrangement
") Construction for protection against garbage
Construction for protection against garbage
Reservoir with reinforced concrete bowl
- Such a body of water requires careful preparation. This means that a drawing is required here, as well as calculations relating to the determination of the approximate consumption.
- According to the measurements made, a foundation pit is being prepared, at the bottom of which a minimum of 5 cm of sand should be poured. Sand must be carefully tamped. An armature is installed in it that will support the vertical walls of the reservoir; metal rods are also laid on the bottom, giving the reinforced concrete bowl rigidity and strength.
- Concrete is poured on the bottom of the reservoir. For vertical reinforced walls you need to prepare the formwork. Then pour it with concrete solution and leave to dry completely.
- Arrangement of a reservoir with a bowl of reinforced concrete is impossible without good waterproofing. Therefore, it is necessary to treat the resulting bottom and walls of the reservoir with a waterproofing compound, and then think about the finish - PVC film or tile.
Photo
") Preparation of the excavation
Preparation of the excavation
") First concrete layer and reinforcement
First concrete layer and reinforcement
") Second concrete layer
Second concrete layer
") Concreting the walls and trimming the reinforcement
Concreting the walls and trimming the reinforcement
") Editing
Editing
") Leveling layer of concrete
Leveling layer of concrete
") Primer
Primer
In addition, for such stationary bodies of pvc film or reinforced concrete, you need to consider a filtration and water purification system. This means supplying electricity to the pond and installing special equipment.
") Fountain
Fountain
Additional accessories in the form of fountains or mini-waterfalls also need electricity. and in the backlight.
Photos
") Pond creation scheme
Pond creation scheme
") Layout of the film reservoir
Layout of the film reservoir
") Fish pond
Fish pond
") Design of an artificial reservoir
Design of an artificial reservoir
") A small body of water in the area
A small body of water in the area
") A pond lined with
A pond lined with
") Pond with a stream
Pond with a stream
Search
Related Articles
How to start repairing the kitchen with your own hands

A cozy kitchen, from which pleasantly pulls the smell of warm cakes or aromatic coffee, like a magnet, attracts all households. To this room was beautiful, stylish and modern, we will arrange it, ma...
Installing MowerLat: Installation Methods (video)
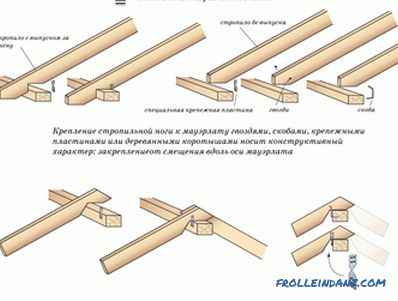
Mauerlat is part of the roof and has an important role in the uniform distribution of the load from the roof. The installation of the power plate is done in several different ways. The choice dep...
How to choose a bimetallic radiator
The heating battery is an important element of the heating system of each house. The comfort and coziness of people living in the house depends on it. In order for the battery to perfectly fulfill i...
How to choose a water filter under the sink: reveal all the secrets

Tap water is not transparent, pleasant taste and purity. Often it can not be drunk raw, tea and coffee from it are not so aromatic and rich. Therefore, many people today are considering how to choos...
Kitchen table do it yourself

Regardless of the size of the kitchen, whether it is a spacious kitchen in a new building, a country house, or a small one in a small family, the most important piece of furniture is the kitchen tab...