A clothes hanger is an indispensable attribute of any hallway. When you come home or to visit, the first thing you do is look for a coat hanger where you could hang your outerwear. Modern hangers are extremely diverse, they can be of various forms, and any materials can be used in their design. They can be intended both for clothes, and for headdresses, to be placed on the floor or on the wall, to have a closed or open structure. If you are used to doing everything yourself, then you can make a hanger effortlessly, because the hanger is made simply and quickly with your own hands.
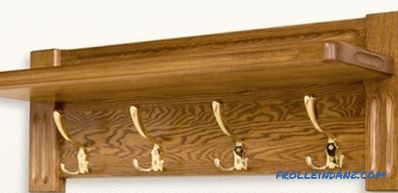
The wall hanger is very compact, fits snugly to the wall, so this model will take a very small portion of space in the hallway.
Types of hangers for the hallway
Wall and floor hangers are particularly popular in both private homes and apartments. Wall designs are very convenient and do not take up much space. This is due to the fact that they are quite tight to the wall. Some models of wall hangers are equipped not only with a crossbar for hangers, but also with an upper shelf on which you can store a hat.
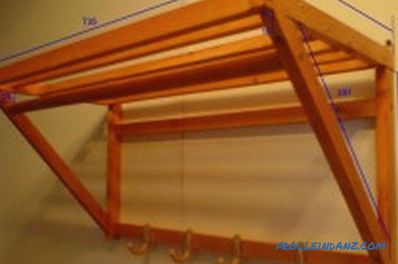
Figure 1. Size chart of the hanger.
In large rooms with enough free space, many install a floor-mounted version of the hangers. This design is a tripod on which there are hooks for outerwear. Therefore, choosing one or another version of furniture products, it is worth considering not only your tastes, but also the size of the hallway.
When designing a hanger with your own hands, you will be completely sure that such a product will fit perfectly into the interior of your home. At the same time, there are no clear requirements for choosing his color. It all depends on your imagination and preferences.
How to make a wall hanger for the hallway?
To create a wall hanger, you need the following tools and materials:
- circulating saw;
- drill with drills for wood;
- hammer;
- level;
- tape measure;
- bar 2x3x300 cm - 2 pcs. ;
- bar 2x2x200 cm - 2 pcs. ;
- wooden dowel;
- brackets;
- coat hooks;
- tassel;
- pencil;
- antiseptic, varnish, stain;
- sandpaper;
- fasteners (screws, euro screws).
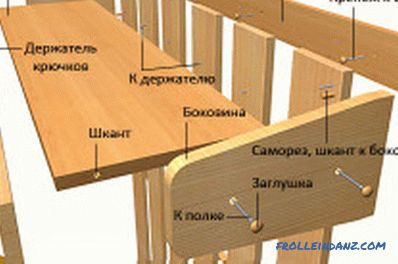
Figure 2. Assembly diagram of the wall hanger.
To make a reliable and beautiful wall product, you need to choose the right building material, that is, a wooden board. It is very important that the wood is dry and without knots. The best option would be pine. The material for the future construction should not be too narrow and thin, since during operation it will be influenced by a sufficiently large weight. To prolong the service life and protect the wood from rotting, it should be treated with an antiseptic before starting work.
The design of the hanger begins with a pattern on which all the dimensions of the future product and the attachment points of the clothes hooks should be noted. In order for the hanger, made with own hands, to have an aesthetic appearance, it is necessary to properly treat the wood. Its surface should be sanded using emery paper, and the edges of all blanks should be rounded off at an angle of 45 °.
After the completion of the preparatory work, a bar of 2x3x300 cm is taken and dissolved on blanks: the hypotenuse (397 mm) and 2 legs of the triangle (372 and 339 mm). After that, the resulting blanks for both triangles are compared in pairs, so that their sizes are the same. All the burrs obtained after cutting are cleaned with sandpaper.
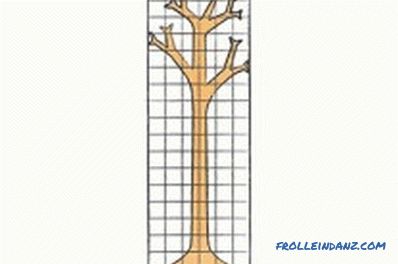
Figure 3. Scheme of the floor hanger in the hallway.
After that, departing from the ends of the short sides of the triangle by the required distance indicated in fig. 1, drill holes for tightening screws. It is necessary to drill very carefully, without putting excessive efforts in order not to accidentally split the timber. Further, with the help of screws lower corners. The upper back of the triangle is fastened with a bracket. After the first triangle is ready, you can proceed to the design of the second triangle on the same principle.
In the next step, crossbars are prepared. Their length will be 675 mm. This value is obtained as follows: the length of the whole structure is 735 mm, and the thickness of the beam of both triangles is 60 mm. 735-60 = 675 mm. Having drilled all the slats of the required length, they drill holes for the euro screws in their ends, after which they drill the reciprocal holes on the sides of the triangles. Between their sides, adjacent to the wall, there are 2 spacers of the same length installed on the euroscrews, hooks will be mounted on one of which.
At the last stage, the wall hanger is assembled and painted (Fig. 2), and it is necessary to paint in 2 layers.
Next, the hooks are fastened according to the sketch, after which the finished product is hung on the wall.
Making a floor hanger with your own hands
For work, you will need:
- jigsaw;
- ruler;
- sandpaper;
- 2 pieces of plywood;
- pencil;
- brush;
- furniture glue;
- adhesive tape;
- primer;
- paint;
- fasteners.
First of all, you need to come up with the appearance of the future product and draw it on a piece of paper. An example of a floor coat hanger is shown in fig. 3. Then, using the resulting pattern, transfer it to sheets of plywood. Next, use the jigsaw to cut out all the elements of the future product, and then grind all the edges with sandpaper.
Cut through the holes with a width of 20 mm and a length of 700 mm to connect the individual elements into a single unit. It should be noted that one slot should be located on top, and the second - from the bottom. Then glue the edges of the cuts and glue the 2 halves of the product together. For their quality fit to each other, use adhesive tape.
At the last stage, treat all elements of the hanger with a primer, and after it dries, paint it. At the same time paint is applied in 2 layers. Floor hanger ready for use. Having shown imagination and creative abilities, you will be able to make an original and beautiful coat hanger that will delight you for years.
Didn't find the answer in the article? More information on the topic:
-
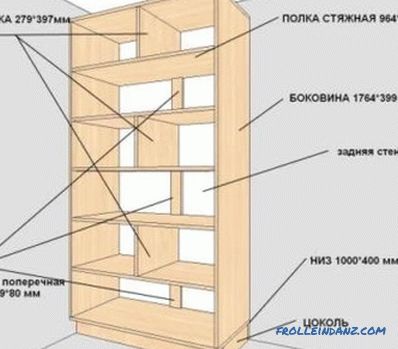
Properly making your own cabinet
Making a cabinet with your own hands is available to almost every person. It is enough to purchase the necessary materials and tools, and your product is ready for use. How to do it? Consider.
